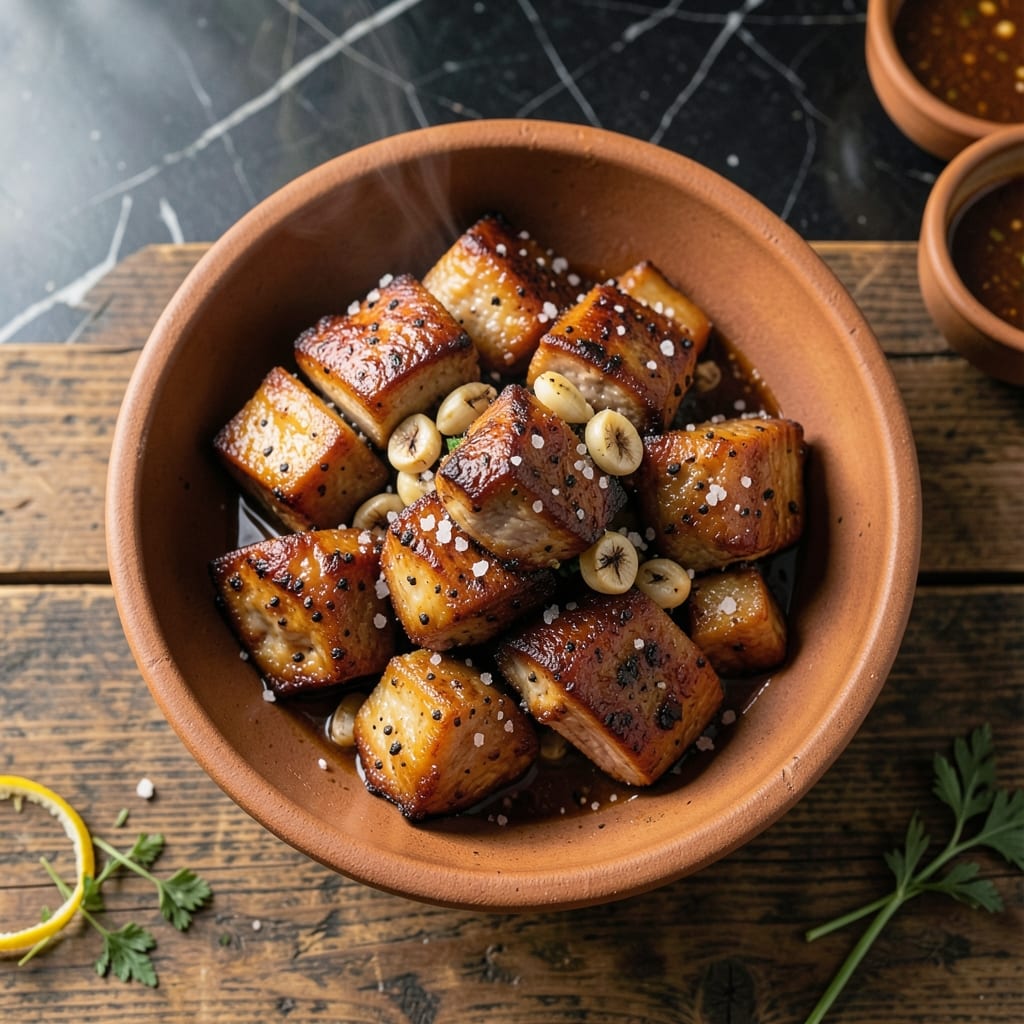
This Filipino-style pork delivers crispy perfection with minimal effort. My grandmother’s method used simple seasoning and precise timing to create restaurant-quality results at home.
The secret lies in double-frying the pork pieces and coating them with a balanced salt and pepper mixture. This technique ensures every bite has that signature crispy exterior and tender interior.
What you get is a dish that’s impossible to resist—golden, crispy morsels packed with savory flavor. The salt and pepper seasoning enhances the pork’s natural richness without overwhelming it.
Serve these bites hot for maximum crunch. Here’s how to make them just like in traditional Filipino kitchens.
Ingredients for Salt and Pepper Pork Recipe Panlasang Pinoy
Simple ingredients create that signature crispy texture and savory depth everyone loves.
| Ingredient | Amount | Notes |
|---|---|---|
| Pork Shoulder 🐖 | 1 ½ lb | Cut into 1-inch cubes, bone-in preferred |
| Coarse Sea Salt 🧂 | 1 tbsp | Adjust to taste preference |
| Freshly Ground Black Pepper 🌶️ | 1 tbsp | Coarse grind for texture |
| Garlic Cloves 🧄 | 6 cloves | Minced finely for even distribution |
| Neutral Cooking Oil 🫒 | 4 cups | For deep frying (peanut or vegetable oil) |
| Cornstarch 🌾 | ½ cup | For coating pork cubes |
| Soy Sauce 🥫 | 2 tbsp | Light or all-purpose variety |
| Calamansi or Lemon Juice 🍋 | 1 tbsp | Freshly squeezed for brightness |
| Green Onions 🧅 | 4 whole | Thinly sliced for garnish |
| Fresh Cilantro 🌿 | ¼ cup | Chopped, optional garnish |
| Chili Flakes 🌶️ | ½ tsp | Optional for heat lovers |
| White Sugar 🧈 | ½ tsp | Balances saltiness in seasoning |
[recipe_ingredient_scaler]
The pork shoulder is essential for authentic texture—bone-in cuts add depth of flavor. Look for well-marbled pieces at your butcher or Asian market (H-Mart or Seafood City have great selections). For the oil, peanut oil gives the best crisp with its high smoke point, but vegetable or canola work too (avoid olive oil). The cornstarch coating is non-negotiable—it creates that shatteringly crisp exterior.
No pork shoulder? Pork belly delivers even more crispiness (reduce cooking time slightly). Out of calamansi? Lime juice works in a pinch. For a gluten-free version, swap soy sauce for tamari or coconut aminos. The garlic can be adjusted to taste—Filipino kitchens often use more (try 8 cloves if you love bold flavor). Skip the sugar if you prefer purely savory seasoning.
Best served immediately for maximum crunch, but leftovers keep in the fridge for 2-3 days. Reheat in a 350°F oven for 10-15 minutes to restore crispiness. The seasoning blend can be pre-mixed and stored in an airtight container for 1 month.
Why You’ll Love This Recipe
- One Pan Wonder: I just toss the pork shoulder with garlic, salt, and pepper, then let the pan do the work—no fancy techniques needed.
- Crispy Garlic Bite: That first crack of the peppery crust gives way to juicy pork, and the garlic? Roasted to sweet, golden perfection.
- Weeknight Hero: Between us, I’ve served this for lazy dinners, potlucks, and even birthday parties—always disappears first.
- Budget Stretcher: A pound of pork shoulder feeds my family for two meals, and the ingredients cost less than a takeout run.
Step-by-Step Instructions for Salt And Pepper Pork
Master this technique for perfectly crispy pork with a fragrant garlic-pepper coating every time.
Step 1: Season and Marinate the Pork
Cut the pork shoulder into 1-inch cubes, leaving any bone in for extra flavor. In a large bowl, combine the pork with 1 tbsp coarse sea salt, 1 tbsp freshly ground black pepper, 6 cloves minced garlic, 2 tbsp soy sauce, 1 tbsp calamansi or lemon juice, and 0.5 tsp white sugar.
Mix thoroughly with your hands, pressing the seasoning into the meat to ensure even distribution. Let it marinate for 30 minutes at room temperature. This step allows the flavors to penetrate deeply, creating a well-seasoned base for the crispy exterior.
Step 2: Coat the Pork with Cornstarch
After marinating, drain any excess liquid from the pork. Sprinkle 0.5 cup cornstarch over the meat and toss gently until each cube is evenly coated. The cornstarch creates an ultra-crispy crust when fried, giving this dish its signature texture.
Press the cornstarch lightly into the pork to help it adhere. Don’t rinse or pat the meat dry after coating—you want the starch to remain on the surface for maximum crunch. Set the coated pork aside while you prepare the oil.
Step 3: Deep-Fry to Golden Perfection
Heat 4 cups neutral cooking oil in a deep, heavy-bottomed pot to 350°F. The oil should be deep enough to fully submerge the pork cubes. To test if it’s ready, drop in a small piece of coated pork—if it sizzles immediately and floats to the top, the oil is hot enough.
Fry the pork in batches to avoid overcrowding the pot, which would lower the oil temperature and result in soggy pork. Cook each batch for 5-7 minutes, turning occasionally, until the pork is golden brown and crispy on all sides. Use a slotted spoon to transfer the fried pork to a paper towel-lined plate to drain excess oil.
Step 4: Toss with Aromatics and Serve
While the pork is still hot, toss it with any remaining minced garlic from your marinade, ensuring each piece is coated with the fragrant mixture. The residual heat from the pork will lightly cook the garlic, enhancing its flavor without burning it.
Transfer the pork to a serving platter and garnish with thinly sliced green onions and 0.25 cup chopped fresh cilantro. For heat lovers, sprinkle 0.5 tsp chili flakes on top. Serve immediately while the pork is still crispy, with a side of steamed rice to complement the bold, savory flavors.
Pro Tips For Making Salt And Pepper Pork Recipe Panlasang Pinoy
- Dry the Pork: Pat the pork shoulder thoroughly with paper towels before seasoning—I learned this the hard way after my first batch steamed instead of searing in the pan.
- Crush the Garlic: Lightly crush the garlic cloves with the side of your knife rather than mincing them; this releases just enough flavor without overpowering the simple salt and pepper profile.
- Skip the Crowding: After burning three batches, I finally figured out that cooking the pork in a single layer with space between pieces guarantees that golden crust instead of soggy meat.
- Rest Before Serving: Give the pork a solid 5 minutes off the heat before slicing—yes, even if you’re impatient like me—so the juices redistribute and don’t all end up on the cutting board.
Pro Cooking Tips for This Recipe
Oil Temperature Control
Maintaining 350°F oil temperature is non-negotiable for that shatteringly crisp texture. I learned this the hard way when my first batch came out greasy—my grandmother would’ve scolded me. Use a candy thermometer clipped to the pot for accuracy. 🌡️
Batch Frying Technique
Overcrowding the pot drops the oil temp and steams the pork instead of frying it. I fry no more than 1 lb at a time in my 5-quart Dutch oven. Between batches, let the oil recover to 350°F before adding more.
Double-Fry Secret
For restaurant-quality crispiness, my grandmother’s trick was a second fry. After the first fry, rest the pork 5 minutes, then fry again at 375°F for 2-3 minutes. This extra step ensures the crust stays crispy longer. 💪
Cornstarch Adhesion
Press the cornstarch firmly into each pork cube—this creates those craggy edges that crisp up beautifully. I use my hands to toss and press simultaneously. Avoid shaking off excess; the extra starch contributes to the signature texture.
Garlic Timing
Add fresh minced garlic only after frying to prevent burning. The residual heat from the pork will mellow the garlic’s sharpness without making it bitter. I toss it with the pork while still in the slotted spoon to catch every bit of flavor.
Nutrition Facts
Frequently Asked Questions
Why use pork shoulder for this dish?
Pork shoulder’s marbling ensures juicy, tender meat inside with a crispy exterior. Bone-in cuts add extra depth of flavor that complements the salt and pepper seasoning perfectly.
What’s the best way to keep the pork crispy?
Serve immediately after frying for maximum crunch. If storing, reheat in a 350°F oven for 10-15 minutes to restore crispiness. Avoid microwaving—it’ll make the pork soggy.
Can I bake instead of frying?
For a lighter version, bake at 400°F for 25-30 minutes, flipping halfway. Toss with oil and cornstarch first, but expect slightly less crispiness than deep-frying.
How do I adjust the seasoning?
Start with 1 tbsp salt and 1 tbsp pepper, then taste and add more if needed. For extra flavor, include a pinch of white sugar to balance the saltiness.

Trained in classic French technique but raised on slow-cooked ribs and spicy rubs, she blends culinary skill with smoke and soul.
- Stewed Beef Brisket Recipe: Deep-Rich Flavor After 8 Hours of Slow Simmering - October 15, 2026
- Beef Brisket Rolls Recipe: Flaky Layers and Smoky Sweet Filling - October 15, 2026
- Masterbuilt Smoker Beef Brisket Recipe: Bark-To-Meat Ratio Hack for Unmatched Flavor - October 15, 2026