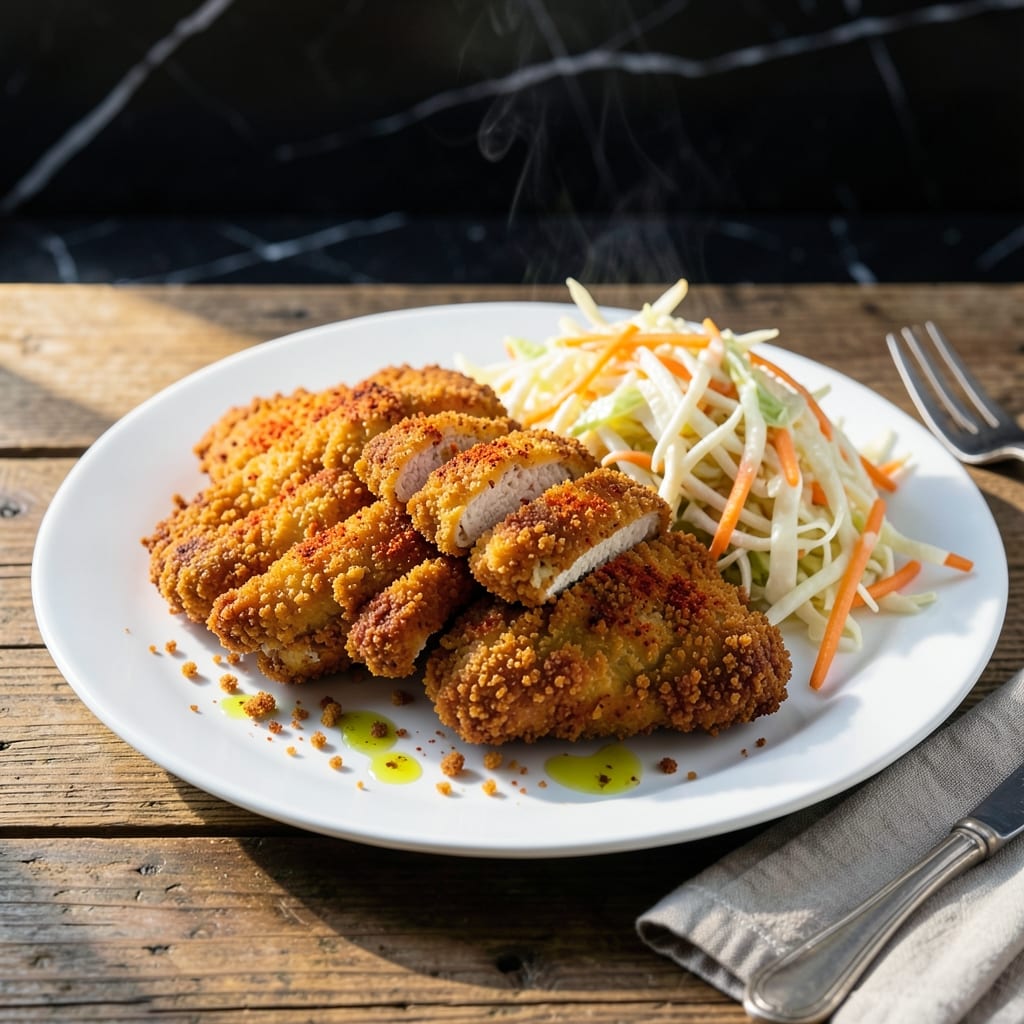
This method delivers crispy chicken without the mess of deep frying. I developed this approach during my years at The Smoky Pig, where we needed consistent results for large batches.
The secret lies in the coating technique—tossing the chicken in seasoned crumbs creates an even, golden crust that bakes up perfectly in the oven. No special equipment is required, just a bowl and a baking sheet.
You’ll achieve evenly browned, tender chicken with a satisfying crunch in every bite. The coating adheres beautifully, eliminating the need for excessive oil while maintaining that classic texture.
This recipe works for any cut of chicken and adapts easily to different seasoning blends. The oven does all the work while you focus on the sides.
Ingredients for Shake N Bake Chicken
Pantry staples and fresh chicken deliver that signature crispy coating with ease.
| Ingredient | Amount | Notes |
|---|---|---|
| Chicken Breast 🍗 | 1 ½ lb | Boneless, skinless, cut into strips |
| All-Purpose Flour 🌾 | ½ cup | For initial dredging |
| Large Eggs 🥚 | 2 whole | Beaten for egg wash |
| Breadcrumbs 🍞 | 2 cups | Plain or panko style |
| Cornstarch 🌾 | 2 tbsp | For extra crispiness |
| Paprika 🌶️ | 1 tbsp | Sweet or smoked variety |
| Garlic Powder 🧄 | 1 tbsp | For savory depth |
| Onion Powder 🧅 | 1 tbsp | Complements the garlic |
| Salt 🧂 | 1 tsp | Kosher or sea salt |
| Black Pepper 🌶️ | 1 tsp | Freshly ground preferred |
| Dried Thyme 🍃 | 1 tsp | Optional herb boost |
| Olive Oil 🫒 | 2 tbsp | For light coating |
| Dried Parsley 🌿 | 1 tbsp | For color and freshness |
[recipe_ingredient_scaler]
The breadcrumbs are key here. Panko from the Asian aisle gives you that extra crunch, but regular works fine (the good stuff, not the pre-seasoned kind). I always grab mine from Kroger or Walmart—their store brands are solid. For the chicken, boneless, skinless breasts are easiest to cut into even strips, but thighs work too if you prefer darker meat.
No panko? Crush saltine crackers for a similar texture. Swap the paprika for Cajun seasoning if you want heat. Fresh herbs can replace the dried ones at three times the amount. The cornstarch helps with crispiness, but all-purpose flour works in a pinch. The olive oil can be any neutral oil you have on hand.
The coating mix keeps in an airtight container for up to 2 months. Bake extra chicken and reheat in the oven to maintain crispiness—microwaving makes it soggy. Leftovers keep 3-4 days in the fridge.
Why You’ll Love This Recipe
- No-Mess Magic: I love that I can coat everything in a bag—no sticky counters, just shake and bake. Honestly, cleanup is almost as satisfying as the meal.
- Crispy Perfection: The cornstarch and breadcrumbs give it that irresistible crunch, while the chicken stays juicy inside. That first bite? Pure satisfaction.
- Weeknight Hero: Between us, this is my go-to when I need dinner on the table fast. It’s unfussy enough for a Tuesday but good enough for company.
- Budget Stretcher: Chicken breasts and pantry staples keep it cheap, and leftovers (if there are any) reheat beautifully. My wallet and my family both approve.
Step-by-Step Instructions for Shake N Bake Chicken
This method guarantees a crispy coating every time without the mess of frying.
Step 1: Prepare and Season the Chicken
Cut the 1.5 lb chicken breast into uniform strips about 1-inch wide. Uniformity ensures even cooking and consistent results. Pat each piece dry with paper towels—moisture is the enemy of crispiness.
Season the chicken lightly with salt and black pepper on both sides. I prefer doing this before dredging to build layers of flavor. This initial seasoning enhances the taste of the meat itself, not just the coating.
Step 2: Create the Flour and Cornstarch Dredge
In a shallow dish, combine the 0.5 cup all-purpose flour with the 2 tbsp cornstarch, 1 tbsp paprika, 1 tbsp garlic powder, 1 tbsp onion powder, 1 tsp salt, 1 tsp black pepper, and 1 tsp dried thyme. The cornstarch is the secret to extra crispiness.
Whisk until fully combined and no lumps remain. This mixture creates the first layer of your coating. The spices should be evenly distributed so every bite delivers maximum flavor.
Step 3: Set Up the Egg Wash and Breadcrumb Station
In a second shallow dish, beat the 2 whole large eggs until fully combined and slightly frothy. In a third dish, combine the 2 cups breadcrumbs with the 1 tbsp dried parsley. The parsley adds a touch of color and freshness to the final dish.
This three-step breading station (flour, egg, breadcrumbs) is classic for a reason. Each layer serves a purpose: the flour helps the egg adhere, the egg acts as glue for the breadcrumbs, and the breadcrumbs provide that coveted crispy texture.
Step 4: Coat the Chicken Thoroughly
Working with one piece at a time, dredge each chicken strip in the flour mixture, pressing gently to ensure full coverage. Shake off any excess—too much flour creates a thick, pasty coating rather than a crisp one.
Dip the floured chicken into the egg wash, letting any excess drip off for a moment. Then transfer to the breadcrumb mixture, pressing firmly to create an even, thick coating. Place each breaded piece on a plate and let rest for 5 minutes before cooking.
Step 5: Bake to Golden Perfection
Preheat your oven to 400°F. Lightly coat a baking sheet with 2 tbsp olive oil—just enough to prevent sticking. Arrange the breaded chicken strips on the sheet, leaving space between each piece for even browning.
Bake for 15-18 minutes, flipping halfway through, until the coating is golden brown and the internal temperature reaches 165°F. The chicken should be crispy on the outside and juicy on the inside. Serve immediately for maximum crunch.
Pro Tips For Making Shake N Bake Chicken
- Preheat the Oven: I learned this the hard way—crank that oven to 425°F before you even touch the chicken. Cold ovens mean soggy coating.
- Dry the Chicken: Pat those breasts bone-dry with paper towels first. Water is the enemy of crispy crusts, and I’ve ruined batches by skipping this.
- Double-Dredge for Crunch: Dip in flour, then egg, then breadcrumbs mixed with cornstarch, and repeat the egg and crumb step. Sounds tedious, but it’s the only way to get that thick, shatteringly crisp shell.
- Use a Rack: Place the chicken on a wire rack over the baking sheet instead of directly on the pan. Air circulates underneath, so you won’t have a sad, steamed bottom—lesson learned after too many gummy first attempts.
Pro Cooking Tips for This Recipe
Double Dredge Trick
For extra crunch, I double-dredge my chicken strips. After the initial flour coating, dip in egg wash, then back in flour, then egg again, and finally into breadcrumbs. This creates a thicker, more substantial crust that stays crispy longer. 💡
Oven Rack Position
Place your baking sheet on the upper-middle rack of the oven. This position allows the coating to brown evenly without burning the bottoms. I learned this trick during my years at The Smoky Pig when we needed consistent results for large batches.
Prevent Soggy Bottoms
Use a wire rack set over your baking sheet instead of placing chicken directly on the pan. This allows air to circulate underneath, preventing the dreaded soggy bottom. A Lodge cast iron baking sheet with a rack works perfectly for this.
Seasoning Boost
Add 1 tsp cayenne pepper to your flour mixture for a subtle kick. Or try 1 tbsp Cajun seasoning for a bolder flavor. I often use Tony Chachere’s from the Charleston markets—it’s my go-to for that Southern heat.
Rest Before Baking
Let your breaded chicken rest for 5-10 minutes before baking. This helps the coating adhere better and prevents it from sliding off during cooking. I use this time to preheat the oven and prep my sides.
Crispiness Check
If your coating isn’t browning enough, broil for the last 2-3 minutes of cooking. Watch closely to avoid burning. The internal temperature should still reach 165°F before serving. 🔥
Nutrition Facts
Frequently Asked Questions
Can I use chicken thighs instead of breasts?
Thighs stay juicier and their higher fat content makes the coating extra crispy. Just extend baking time by 3-5 minutes to reach 165°F.
Why did my coating fall off during baking?
This usually happens if the chicken wasn’t dry before coating or you skipped the resting step. Always pat pieces dry and let breaded chicken rest for 5 minutes before baking.
How do I make this gluten-free?
Swap the flour for cornstarch and use gluten-free breadcrumbs. The texture will be slightly different but still delicious. Add 1/4 tsp xanthan gum to help binding.
Can I air fry instead of bake?
Yes! Cook at 375°F for 12-15 minutes, flipping halfway. The air fryer actually makes it crispier with less oil.

Trained in classic French technique but raised on slow-cooked ribs and spicy rubs, she blends culinary skill with smoke and soul.
- Recipe for Boneless Pork Chops in Cast Iron Skillet: Sear and Baste to Juicy Perfection - October 3, 2026
- Recipe for Boneless Cross Rib Roast: Slow-Roasted Beef with Herb Crust - October 3, 2026
- Hamburgers in Sauce Recipe Crock Pot: Slow-Cooked Savory Delight - October 3, 2026