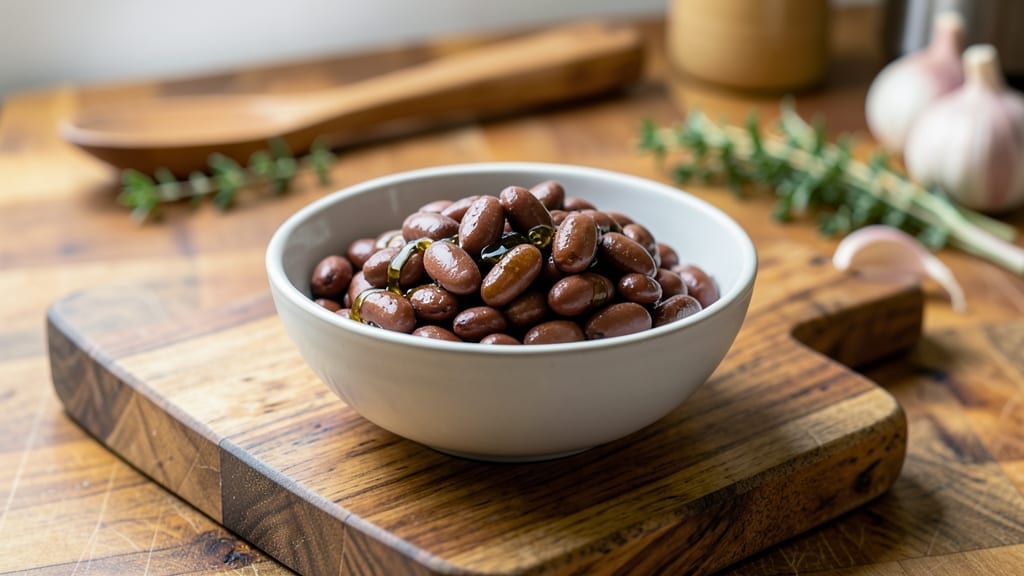
This smoked pinto beans recipe transforms simple dried beans into rich, smoky comfort that rivals any backyard cookout. The key lies in slow-smoking them over wood chips—whether you have a smoker, grill, or even a stovetop alternative—until they’re tender with deep, aromatic flavor.
I first mastered this technique during a family cookout when my grandpa insisted on smoking everything, and it’s become my go-to for hearty, crowd-pleasing sides.
The process is simpler than it sounds: soak the beans overnight, then smoke them low and slow until they’re fork-tender. A smoker box or liquid smoke works just as well if you don’t have a dedicated smoker, ensuring that signature smoky depth without the hassle.
The result is beans so flavorful they’ll disappear from the pot faster than you can say “second helping.”
What you’ll end up with is a vegan-friendly, protein-packed side that’s creamy, smoky, and packed with texture—perfect for serving alongside rice, tortillas, or grilled meats.
The beans develop a rich, almost buttery consistency from the slow cooking, while the smoke infuses them with a warmth that feels like a hug in every bite. This is the kind of dish that turns ordinary meals into something special.
Whether you’re prepping for a weekend feast or just craving a taste of smoky comfort, these beans deliver. The best part? They reheat beautifully, making them ideal for meal prep. Let’s get started on creating your own batch of restaurant-quality smoked pinto beans at home.
Ingredients for smoked pinto beans
Simple dried beans plus a few pantry staples. Smoking them transforms everything into smoky comfort.
| Ingredient | Amount | Notes |
|---|---|---|
| Dried Pinto Beans 🌾 | 2 cups | Rinsed before soaking |
| Water 💧 | 6 cups | For overnight soaking |
| Wood Chips (Hickory or Mesquite) 🌳 | 1 cup | Unsoaked, for smoker |
| Yellow Onion 🧅 | 1 whole | Quartered, skin on |
| Garlic Cloves 🧄 | 4 cloves | Whole, peeled |
| Smoked Paprika 🌶️ | 2 tbsp | For extra smoky depth |
| Ground Cumin 🌿 | 1 tbsp | Toasted for warmth |
| Dried Oregano 🍃 | 1 tsp | Mexican preferred |
| Liquid Smoke 💨 | 1 tbsp | Stovetop substitute |
| Vegetable Broth 🍲 | 4 cups | Low-sodium preferred |
| Lime Juice 🍋 | 2 tbsp | Freshly squeezed |
| Salt 🧂 | 1 ½ tsp | Kosher or sea salt |
| Black Pepper 🌶️ | ½ tsp | Freshly ground |
| Avocado Oil 🫒 | 2 tbsp | High smoke point |
| Fresh Cilantro 🌿 | ¼ cup | Chopped, for garnish |
[recipe_ingredient_scaler]
The beans are the star here. Dried pinto beans give the best texture—canned are fine in a pinch, but they lack that tender, almost creamy bite. Soak them overnight (or quick-soak with boiling water for 2 hours) to cut down on cooking time. For the wood chips, hickory or mesquite work best—they’re easy to find at stores like Costco or Home Depot. If you don’t have a smoker, liquid smoke is your secret weapon. Just add it at the end for that authentic smoky flavor without the grill. The onions and garlic? They’re non-negotiable—they build the flavor base, so don’t skip them.
No wood chips? Liquid smoke or smoked salt gets you close, though nothing beats the real deal. Swapping the smoked paprika for regular paprika? Add an extra pinch of cayenne for a little kick. Short on vegetable broth? Water with a bouillon cube works, but you’ll miss that depth. The lime juice is what brightens everything up—fresh is non-negotiable here. If you’re prepping ahead, skip the cilantro until serving; it wilts fast. For extra richness, stir in a splash of coconut milk at the end, but keep it optional—this is already creamy enough.
These reheat beautifully—honestly better the next day once all the flavors meld. Store in an airtight container for 5-6 days in the fridge or freeze for up to 3 months. I like to portion them into containers with rice or tortillas for easy meal prep. The smoky flavor actually intensifies over time, so leftovers are always a treat. If you’re serving a crowd, double the batch—they disappear fast.
Why You’ll Love This Recipe
- No-Fuss Weeknight Win: Honestly, this is the kind of recipe that doesn’t care if you’re running late or forgot to meal prep. Just soak the beans overnight (trust me, it’s worth it), and the rest happens while you’re doing something else. I’ve made them while watching TV, and they still turn out creamy and smoky—no stress, just delicious.
- Smoky-Sweet Addiction: The combo of hickory or mesquite wood chips (or that liquid smoke hack) with toasted cumin and lime juice? Chef’s kiss. It’s like a campfire in your pot, but with that bright, tangy finish that makes every bite sing. My picky husband actually asked for seconds—yes, even on a Tuesday night.
- Leftovers That Shine: These beans taste even better the next day, and they’re perfect for meal prep. Pack them in lunchboxes with tortillas or rice, and you’ve got a protein-packed meal ready to go. I freeze half the batch, and they’re still solid after three months—no soggy surprises here.
- Budget Meal Magic: Dried pinto beans are dirt cheap, and with just a few pantry staples like onion, garlic, and smoked paprika, you’re making a dish that feels fancy but costs less than a takeout burrito. Plus, the wood chips (or liquid smoke) give it that restaurant-quality depth without breaking the bank.
Step-by-step instructions for smoked pinto beans
Here’s how to transform simple dried beans into rich, smoky comfort with minimal effort.
Prepare and Soak the Beans Overnight
Place the 2 cups dried pinto beans in a large bowl and rinse thoroughly under cold water. This removes any debris and helps prevent gas during cooking. Transfer the rinsed beans to a large pot and cover with the 6 cups water. Let them soak uncovered in the refrigerator for at least 8 hours or overnight – I always do this step the night before to save time the next day.
Soaking softens the beans significantly, reducing cooking time by about half. The water should cover the beans by about 2 inches. If you forget to soak overnight, you can soak them for at least 4 hours, but overnight yields the best texture. Drain and rinse the soaked beans before proceeding to remove any impurities that may have risen to the surface during soaking.
Build the Smoky Flavor Base
In a small bowl, combine the 2 tbsp smoked paprika, 1 tbsp ground cumin, 1 tsp dried oregano, 1½ tsp salt, and ½ tsp black pepper. Mix thoroughly to create your smoky spice blend. Set aside – you’ll use this to enhance the beans’ natural flavor. In a separate skillet, heat the 2 tbsp avocado oil over medium heat. Add the quartered yellow onion and cook for 5 minutes until softened.
Add the 4 garlic cloves and cook for another 30 seconds until fragrant. This aromatic base forms the flavor foundation for your beans. Remove from heat and set aside. The reason we cook these aromatics first is that their flavors will infuse throughout the beans during cooking, creating that deep, complex taste you crave in smoked dishes.
Smoke the Beans with Wood Chips
If you have a smoker, preheat it to 225°F using the 1 cup wood chips (hickory or mesquite). Place the drained soaked beans in a smoke-proof container or directly on the smoker grates. Smoke for 1½ to 2 hours, stirring occasionally, until the beans are tender but not mushy. The beans should be fork-tender but still hold their shape when pressed.
For those without a smoker, create the smoky flavor using the 1 tbsp liquid smoke. Add it to the beans along with 2 cups of the vegetable broth during cooking. The liquid smoke works surprisingly well to replicate that authentic smoky taste. If using the smoker method, check the beans periodically and add water as needed to keep them moist during smoking.
Simmer and Develop the Sauce
In a large pot, combine the smoked beans with the remaining 2 cups vegetable broth. Bring to a boil, then reduce heat to low and simmer uncovered for 45 minutes to 1 hour. Stir occasionally and add more water if needed to maintain a sauce-like consistency. The beans should be completely tender with a creamy texture.
Stir in the cooked onion and garlic mixture along with the spice blend. Add the 2 tbsp lime juice and simmer for another 10 minutes. The lime juice brightens all the smoky flavors and adds a nice tangy contrast. Taste and adjust seasoning if needed – you might want to add a pinch more salt or a splash more lime juice to balance the flavors.
Finish and Garnish
Remove from heat and let the beans sit covered for 10 minutes. This resting period allows the flavors to meld together perfectly. Stir in the chopped ¼ cup fresh cilantro just before serving. The cilantro adds a fresh, bright finish that cuts through the richness of the smoked beans.
Serve the beans warm with cornbread or over rice. They make an excellent side dish for grilled meats or can be enjoyed as a hearty vegetarian main course. The combination of smoky, savory, and slightly tangy flavors creates a truly comforting dish that’s perfect for any gathering or cozy meal at home.
Pro Tips For Making Smoked Pinto Beans
- TOAST YOUR SPICES FIRST: That cumin in your spice blend isn’t just for show—lightly toast it in a dry skillet for 30 seconds until fragrant. I used to skip this, and the flavor was always just there, not popping. Toasting deepens the earthiness and makes the smoky notes sing, especially when paired with the mesquite or hickory.
- SMOKE THE ONION TOO: If you’re using the smoker, toss those quartered onions right on the grate with the beans during the 1½ to 2 hours. The skin will crisp slightly, and the onion absorbs that wood-fired flavor like a sponge. No smoker? Sear the onions in the avocado oil until caramelized before adding them back—it’s the same idea, just stovetop.
- DON’T SKIMP ON LIQUID SMOKE: That 1 tbsp of liquid smoke isn’t optional—it’s the bridge between stovetop beans and smoker magic. Add it with the 2 cups of broth during simmering, not at the end. If you’re feeling bold, add an extra half-tsp and taste. The beans will thank you with a richer, more authentic smoky punch.
- REST THE BEANS LIKE YOU WOULD STEAK: Those 10 minutes covered after simmering aren’t just for show—they let the flavors settle and the sauce thicken slightly. I know, I know, you’re eager to serve, but rushing this step means a mushy texture and diluted flavors. Trust me, your taste buds will notice the difference.
Make-ahead tips for this recipe
Prep Ahead for Smoky Success
I always start by soaking the 2 cups dried pinto beans overnight in 6 cups water—this is non-negotiable for best texture. Drain and rinse them the next morning, then store the soaked beans in a sealed container in the fridge for up to 2 days.
This saves you 3-4 hours of cooking time later! Label your container with the date so you don’t forget. 💡
Smoker-Free Smoking Tricks
No smoker? No problem. Prep your beans ahead by mixing the 2 tbsp smoked paprika, 1 tbsp ground cumin, and 1 tsp oregano into a spice blend. Store it in an airtight jar for up to 1 month—this lets you build flavor ahead of time.
When ready to cook, toss the soaked beans with the spice blend and 1 tbsp liquid smoke, then refrigerate again for 4 hours to let the flavors meld. This shortcut mimics the smoker’s magic!
Broth Boost for Flavor
Make your vegetable broth ahead and freeze it in 1-cup portions—this is my secret weapon for busy weeknights. Thaw the 4 cups broth overnight in the fridge when you’re ready to cook.
The beans will absorb that deep, savory flavor as they simmer, making them even more delicious. I keep a stash of homemade broth in my freezer at all times. ✨
Garnish Prep for Freshness
Chop your ¼ cup fresh cilantro and store it in a damp paper towel inside a sealed container. This keeps it vibrant for up to 3 days in the fridge.
When serving, toss it in just before eating—this prevents the beans from absorbing the cilantro’s moisture and turning soggy. Fresh herbs make all the difference! 🌿
Portion Like a Pro
Divide your cooked beans into 4 airtight containers while still warm—this prevents them from sticking. Label each with the date and store for up to 5-6 days. When reheating, add a splash of water or broth to loosen the texture.
I like to freeze half the batch for later—just thaw overnight in the fridge before reheating. Leftovers taste even better the next day! 🔥
Nutrition facts
Frequently asked questions
Why do I need to soak the beans overnight?
Overnight soaking softens the beans significantly, cutting cooking time by half and preventing hard spots. The 8-hour minimum soak also removes impurities that cause gas. If short on time, a 4-hour soak works but won’t yield the same creamy texture. This step is what makes the difference between mushy and perfectly tender beans!
Can I use a grill instead of a smoker?
Place soaked beans in a foil packet with 1 cup wood chips and 2 tbsp liquid smoke, then grill over indirect heat at 225°F for 1.5 hours. The foil traps smoke flavor while keeping the beans moist. Just stir occasionally and add water if needed. This method works beautifully for grills without a smoker!
How do I prevent the beans from getting too salty?
Taste the spice blend before adding to the beans—it should be flavorful but not overwhelming. When simmering, add salt gradually and taste frequently. If you over-salt, balance it with lime juice or a splash of broth. The beans absorb flavors slowly, so err on the side of less salt initially.
What if I don’t have fresh cilantro?
No problem! Substitute with ½ cup chopped parsley or 1 tbsp dried cilantro (though fresh is always best). For extra brightness, add 1 tsp lemon zest instead. The beans will still be delicious—just the garnish will differ slightly. Fresh herbs are ideal, but don’t let that stop you from enjoying these beans!
Can I make these beans ahead of time?
Yes! Cooked beans keep beautifully for 5-6 days in the fridge or 3 months frozen. Let them cool completely before storing, and reheat with a splash of water or broth. The flavors actually improve over time—they’ll taste even richer when reheated. Portion them into containers for easy grab-and-go meals!

Trained in classic French technique but raised on slow-cooked ribs and spicy rubs, she blends culinary skill with smoke and soul.
- Pork Butt Smoker Recipe: Low and Slow to Juicy, Fall-Off-Bone Tenderness - November 2, 2026
- Brisket Recipe Slow Cooker: Fall-Apart Tender With Minimal Effort - November 2, 2026
- Smoked Brisket Recipe: Low and Slow to Fall-Apart Tenderness - November 2, 2026