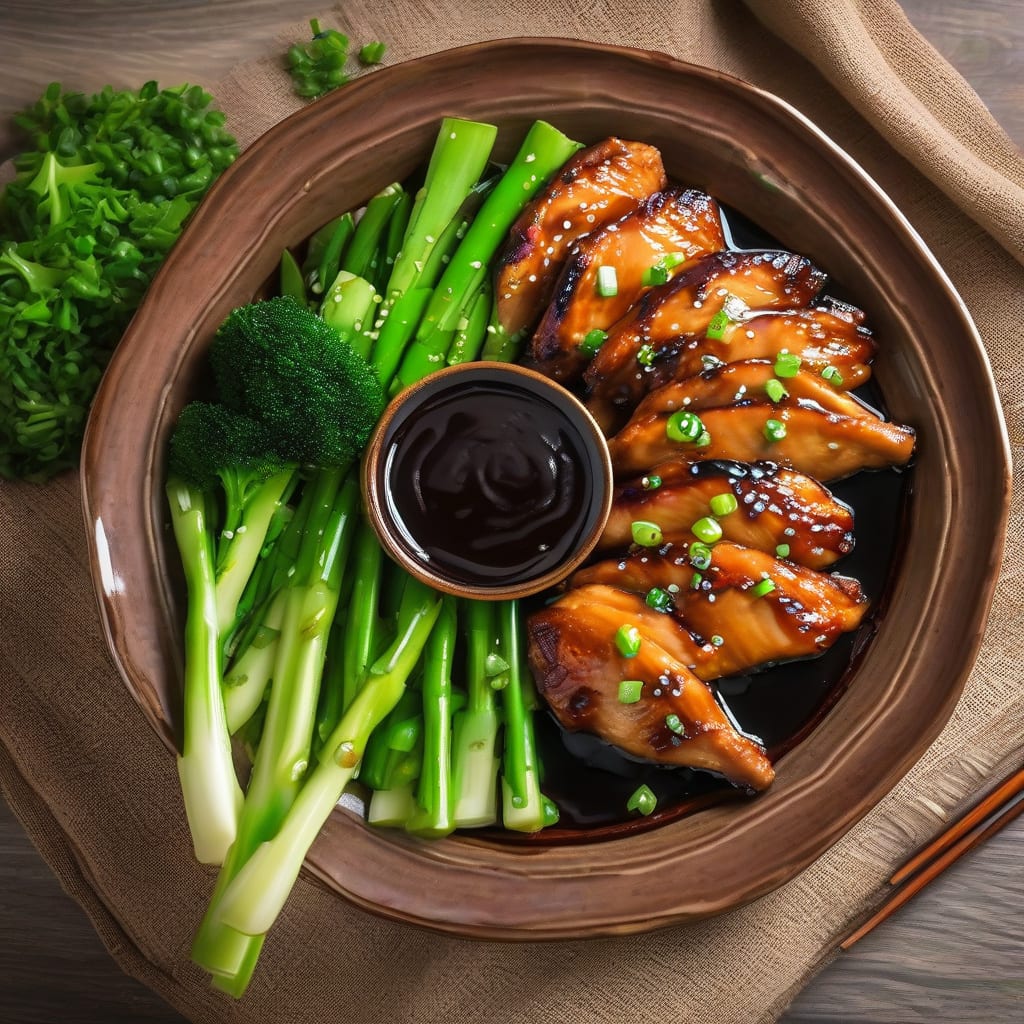
I’ve perfected a teriyaki chicken recipe that delivers both sweet glaze and tender results every time. 🔥 The secret lies in a balanced marinade that infuses flavor while keeping the chicken juicy.
Cooking at the right temperature is crucial – 400°F gives that perfect caramelized exterior while maintaining tender meat inside. I’ve found that a 20-minute cook time works best for most chicken breasts.
You’ll achieve tender chicken with a beautifully glazed exterior that’s perfect for serving over rice or with steamed vegetables. This recipe is ideal for weeknight dinners or meal prep – the leftovers reheat beautifully too.
Ingredients for Teriyaki Chicken
Gather these ingredients for a restaurant-quality teriyaki chicken dinner at home.
| Ingredient | Amount | Notes |
|---|---|---|
| Boneless, Skinless Chicken Breasts 🍗 | 1 ½ lb | Pounded to even thickness |
| Soy Sauce 💧 | ½ cup | Low-sodium preferred |
| Brown Sugar 🍮 | ¼ cup | Packed light brown |
| Rice Vinegar 🍚 | 2 tbsp | Unseasoned rice vinegar |
| Ginger 🧄 | 2 tbsp | Freshly grated ginger |
| Garlic Cloves 🧄 | 3 cloves | Minced |
| Sesame Oil 🫒 | 1 tsp | Toasted sesame oil |
| Cornstarch 🌾 | 1 tbsp | For thickening sauce |
| Green Onions 🌿 | ¼ cup | Thinly sliced for garnish |
| Sesame Seeds 🌼 | 1 tbsp | Toasted for garnish |
| Black Pepper 🌶️ | ¼ tsp | Freshly ground |
[recipe_ingredient_scaler]
[recipeingredientscaler]
The chicken quality matters here. Look for organic or free-range chicken breasts for the best flavor. Most grocery stores have them pre-cut, which saves time. I usually grab mine from Whole Foods or my local butcher when I’m doing a big batch.
For the teriyaki sauce, Kikkoman soy sauce is my go-to for authenticity. Fresh ginger is a game-changer—don’t skip it. No fresh ginger? Crystallized ginger works in a pinch. The sesame oil adds that authentic Asian flair, but use it sparingly as it’s potent. If you’re out of sesame oil, avocado oil is a decent substitute.
This recipe reheats beautifully—keeps for 3-4 days in the fridge. Freeze individual portions for up to 3 months. When reheating, add a splash of water or broth to revive the sauce. The leftovers make great lunch prep or quick dinners throughout the week.
❤️
Why You’ll Love teriyaki chicken
- Quick Prep: I can whip up this teriyaki chicken recipe in no time, thanks to the simple marinade made with soy sauce, brown sugar, and ginger – it’s genuinely throw-it-together-while-you’re-cooking-rice easy.
- Flavor Bomb: The combination of soy sauce, brown sugar, and rice vinegar creates a ridiculously good sweet-savory sauce that makes my teriyaki chicken incredibly crave-worthy. That sticky glaze on the chicken is basically my weakness.
- Meal Prep Magic: Honestly, this teriyaki chicken recipe is a total meal prep lifesaver – I can make a big batch on Sunday and use it for lunches or dinners throughout the week. It’s perfect for busy families or work lunches.
- Leftover Love: I’ll be real: I love that this recipe makes great leftovers. The chicken stays juicy, and the flavors meld together even more beautifully when refrigerated overnight, making it a solid choice for a budget-friendly meal plan.
Step-by-Step Instructions for Teriyaki Chicken
Here’s the method that delivers perfectly glazed, tender chicken every time.
👨🍳 Step 1: Prepare the Chicken and Sauce
Start by pounding the 1.5 lb Boneless, Skinless Chicken Breasts to an even thickness between two sheets of plastic wrap. This ensures uniform cooking and prevents dry spots. Meanwhile, whisk together the 0.5 cup Soy Sauce, 0.25 cup Brown Sugar, 2 tbsp Rice Vinegar, and 1 tsp Sesame Oil in a bowl until the sugar dissolves completely. The mixture should be smooth and well combined.
Add the 2 tbsp freshly grated Ginger and 3 minced Garlic Cloves to the sauce mixture. Whisk until fully incorporated, then set the sauce aside. The ginger and garlic will infuse the sauce with aromatic flavors that complement the chicken beautifully.
🍳 Step 2: Cook the Chicken
Heat a large skillet or wok over medium-high heat. Add a small amount of oil to the pan, just enough to coat the bottom. Once the oil is hot and shimmering, add the prepared chicken breasts. Cook for 5-7 minutes per side until the chicken is cooked through and reaches an internal temperature of 165°F. The exact cooking time may vary depending on the thickness of the chicken breasts.
Once the chicken is cooked, transfer it to a plate and cover it with foil to keep warm. Don’t worry if the chicken isn’t perfectly glazed at this stage—the sauce will be applied later.
🥘 Step 3: Thicken the Sauce and Glaze the Chicken
Pour the prepared teriyaki sauce into the same skillet used for cooking the chicken. Bring the sauce to a boil over medium heat, scraping up any browned bits from the bottom of the pan. These browned bits add depth of flavor to the sauce.
Mix the 1 tbsp Cornstarch with a small amount of water until smooth, then stir it into the sauce. Continue to simmer the sauce for 2-3 minutes until it thickens to your desired consistency. The sauce should coat the back of a spoon and have a glossy sheen.
Return the cooked chicken to the skillet, spooning the teriyaki sauce over the top to glaze it evenly. Let it simmer in the sauce for 1-2 minutes to absorb the flavors. The chicken should be well coated and glossy.
🍽️ Step 4: Serve and Garnish
Transfer the glazed chicken to a serving platter or individual plates. Garnish with 0.25 cup thinly sliced Green Onions and 1 tbsp toasted Sesame Seeds. Sprinkle a pinch of 0.25 tsp freshly ground Black Pepper over the top for added flavor and texture.
Serve the teriyaki chicken hot, accompanied by steamed vegetables or your favorite sides. The combination of the sweet teriyaki glaze, tender chicken, and crunchy garnishes creates a delicious and satisfying meal.
👨🍳
Pro Tips for Making teriyaki chicken
- Don’t Overmarinate: Resist the urge to marinate your chicken for too long – 2-3 hours is plenty, as the acidity in the soy sauce and rice vinegar can start to break down the proteins and make the chicken mushy.
- Use Fresh Ginger: Grate your ginger just before using to release its oils and get that bright, zesty flavor that makes teriyaki sauce pop – don’t skip this step, as pre-ground ginger just can’t compare.
- Get the Sear Right: Sear your chicken in a hot pan with a small amount of oil before finishing it in the teriyaki sauce to get a nice caramelized crust on the outside, which adds depth to the dish.
- Reduce the Sauce: After cooking the chicken, reduce the teriyaki sauce over medium heat until it’s thick and syrupy, coating the back of a spoon – this concentrates the flavors and gives you a glaze that’s perfect for serving.
Pro Cooking Tips for This Dish
To achieve perfect teriyaki chicken, start by ensuring your chicken breasts are pounded to an even ¼ inch thickness. This prevents uneven cooking and helps the chicken cook through in 5-7 minutes per side at medium-high heat. I always use a meat mallet to pound between two sheets of plastic wrap – it makes the process quick and mess-free.
The key to a great teriyaki glaze is in the sauce reduction. After cooking the chicken, bring the teriyaki sauce to a boil in the same skillet, scraping up all the browned bits from the bottom. This adds incredible depth to the final dish. Simmer the sauce for 2-3 minutes until it thickens nicely – you’ll know it’s ready when it coats the back of a spoon. I like to mix the 1 tablespoon cornstarch with a little water first to prevent lumps.
Temperature control is crucial when cooking teriyaki chicken. Make sure your skillet is hot enough that the chicken sizzles immediately when added. I prefer using a cast-iron skillet because it retains heat beautifully, but any heavy-bottomed pan will work. The chicken is done when it reaches an internal temperature of 165°F – I always use an instant-read thermometer to check.
For the best flavor, don’t skip the 2 tablespoons freshly grated ginger and 3 minced garlic cloves in the marinade. These aromatics make a huge difference in the final taste. If you’re short on time, you can prepare the marinade in advance – it keeps in the fridge for up to 3 days. I like to make a double batch and freeze half for later.
Garnishing properly elevates this dish from good to great. After glazing the chicken, sprinkle ¼ cup thinly sliced green onions and 1 tablespoon toasted sesame seeds over the top. The freshness of the green onions and crunch of sesame seeds perfectly complement the sweet, savory glaze. For an extra professional touch, serve on a wooden board or platter.
For meal prep, this recipe keeps beautifully in the refrigerator for 3-4 days. When reheating, add a splash of water or broth to revive the sauce. You can also freeze individual portions for up to 3 months – just thaw overnight in the fridge before reheating. The flavors actually meld together even better after a day or two, making leftovers just as delicious as freshly made. 🔥
Tips & Tricks for Perfect Teriyaki Chicken
A few simple techniques can elevate this dish from good to great. Let’s dive into the details that make all the difference.
The Importance of Even Thickness: In Step 1, pounding the chicken breasts to an even thickness ensures they cook uniformly. This prevents dry spots and guarantees tender results every time. I like to use plastic wrap to prevent mess and ensure even pounding.
Maximizing Flavor: The combination of ginger and garlic in the sauce creates a depth of flavor that’s hard to resist. Make sure to grate the ginger freshly for the best results, as it releases oils that enhance the overall taste. Don’t skip mincing the garlic finely, either, as it disperses throughout the sauce beautifully.
Cooking to Perfection: When cooking the chicken in Step 2, achieving that perfect 165°F internal temperature is crucial. Use a meat thermometer to avoid guesswork. If you don’t have one, make a small cut in the thickest part to check for doneness—the meat should be white and juicy.
Glazing Like a Pro: In Step 3, when glazing the chicken, let it simmer in the sauce for the full 1-2 minutes. This allows the flavors to penetrate the meat, making each bite succulent and flavorful. Stir the sauce constantly to prevent it from burning or sticking to the pan.
Nutrition Facts
340kcal

Trained in classic French technique but raised on slow-cooked ribs and spicy rubs, she blends culinary skill with smoke and soul.
- Recipe for Boneless Pork Chops in Cast Iron Skillet: Sear and Baste to Juicy Perfection - October 3, 2026
- Recipe for Boneless Cross Rib Roast: Slow-Roasted Beef with Herb Crust - October 3, 2026
- Hamburgers in Sauce Recipe Crock Pot: Slow-Cooked Savory Delight - October 3, 2026