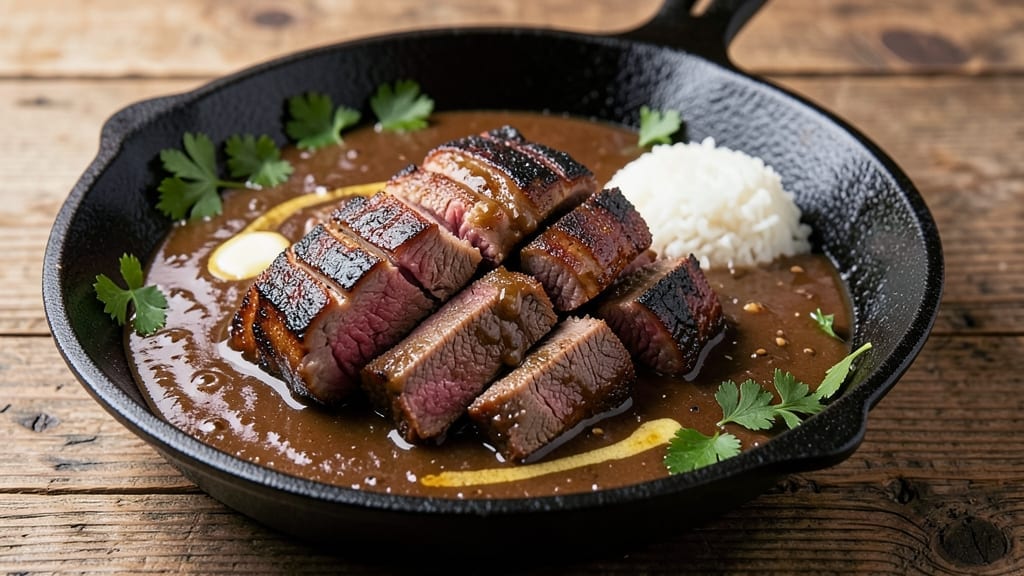
Transforming pan drippings into beef brisket gravy is where slow-cooked magic happens—those golden brown bits packed with deep, smoky flavor become the foundation of a sauce that elevates every bite.
I remember the first time I tasted brisket gravy made from scratch at my family cookout, and it changed how I approached leftovers forever. The key lies in scraping every last bit from the pan and building layers of richness through a simple roux.
This gravy recipe delivers restaurant-quality depth in just 15 minutes of active time, using only 5 basic ingredients you likely already have. The secret is patience—letting the drippings bubble gently to develop their natural caramelized notes before adding broth.
A touch of cornstarch ensures the perfect silky texture without overpowering the brisket’s natural richness. It’s the kind of sauce that turns simple mashed potatoes into a showstopper.
What you’ll end up with is a velvety, deeply flavorful gravy that clings perfectly to sliced brisket or spooned over creamy potatoes. The aroma alone will have everyone at the table asking for seconds, and the taste?
That’s where the real magic happens—complex, savory, and impossibly satisfying. This is gravy that proves even the simplest ingredients can create something extraordinary when handled with care.
Perfect for serving alongside your brisket or using as a base for other dishes, this gravy keeps well in the refrigerator for up to 5 days.
The technique is foolproof, but the results feel like you’ve been cooking all day. Let’s get started—your next brisket dinner just got even better.
Ingredients for beef brisket gravy
Five simple ingredients transform humble pan drippings into velvety brisket gravy perfection.
| Ingredient | Amount | Notes |
|---|---|---|
| Beef Pan Drippings 🥩 | 2 cups | From cooked brisket, cooled |
| Unsalted Butter 🧈 | 2 tbsp | Full-fat for richness |
| All-Purpose Flour 🌾 | 2 tbsp | Diamond Crystal preferred |
| Beef Broth 💧 | 1 cup | Low-sodium preferred |
| Cornstarch 🌾 | 1 tsp | For silky texture |
[recipe_ingredient_scaler]
The drippings are everything—scrape every last bit from the pan, even the crispy browned edges. Costco or Walmart sell pre-cooked brisket packs that work perfectly here (just ask for the drippings). If you’re starting fresh, render extra fat from the brisket before cooking to maximize flavor. That golden roux? It’s where the magic happens—cook it low and slow until it smells like caramelized heaven. I always use Diamond Crystal flour because it’s lighter than most brands, giving you a smoother gravy. For the broth, Kirkland Signature or Swanson low-sodium options keep the flavor balanced.
No beef drippings? Brown 1 tbsp butter with 1 tbsp flour first, then add 1 cup beef broth to mimic the process. Short on cornstarch? All-purpose flour works at double the amount, but you’ll need to whisk it in faster to avoid lumps. The butter is non-negotiable—it adds that luxurious mouthfeel. If you’re using salted butter, reduce the broth’s sodium by half. For extra depth, stir in a dash of Worcestershire sauce at the end (trust me on this). The gravy should coat the back of a spoon—if it’s too thin, simmer longer; if too thick, thin with warm water.
This gravy peaks immediately after making but keeps beautifully for 5 days in the fridge. Reheat gently on the stove, stirring constantly to prevent scorching. For leftovers, I store it in a glass jar with a tight seal—keeps the flavors locked in. Freezes for 3 months if you want to make a big batch ahead. The best part? It tastes even better the next day as the flavors meld. Serve it over mashed potatoes, cornbread, or straight from the spoon—no judgment here.
Why You’ll Love This Recipe
- Pan Drippings Magic: I swear by this trick—just scrape up those rich, caramelized bits from your brisket pan, and boom. Instant depth without extra effort. No fancy prep, just pure flavor extraction.
- Rich Without Fuss: That butter-flour roux? It’s the secret weapon. Thick, velvety, and packed with umami from the beef broth—no heavy cream, no complicated steps. Just melt, stir, simmer.
- Leftovers That Shine: Turns dry brisket into a dreamy second meal. Slather it on toast, drizzle over mashed potatoes, or freeze it for future cravings. My freezer’s full of this stuff because it’s that good.
- Budget-Friendly Luxury: Uses what you already have—pan drippings, basic pantry staples—and stretches one brisket into multiple meals. Here’s what sold me: that restaurant-quality taste for a fraction of the cost.
Step-by-step instructions for crafting brisket gravy
Here’s how to transform simple pan drippings into velvety, restaurant-quality gravy.
Melt Butter and Bloom the Flour
Place a heavy-bottomed saucepan over medium heat and add the 2 tablespoons unsalted butter. Let it melt completely, swirling occasionally, until it foams and bubbles gently. This takes about 2 minutes—watch closely to avoid browning.
Once the butter has melted and is just beginning to turn golden, immediately whisk in the 2 tablespoons all-purpose flour. Stir constantly for 1-2 minutes until you see a smooth, thick paste forming. This process, called blooming, removes the raw flour taste and creates a rich roux that forms the foundation of your gravy. The mixture should smell nutty and toasty, not burnt.
Cook the Roux to Perfect Color
Continue stirring the flour mixture over medium heat for 3-4 minutes until it turns a deep, golden brown color. You’re aiming for what chefs call a “medium roux”—lighter than peanut butter but darker than caramel. This color development adds depth of flavor to your gravy.
Here’s the thing—don’t walk away. A roux burns faster than you think, and once it turns dark brown or black, it becomes bitter. If it starts to smell burnt, immediately remove the pan from heat and let it cool slightly before proceeding. The roux should coat the back of a spoon but still be pourable.
Deglaze with Pan Drippings
Carefully pour in the 2 cups beef pan drippings from your cooked brisket, scraping up any browned bits from the bottom of the pan with a wooden spoon. These bits are packed with flavor—don’t miss a single one. The liquid should immediately start simmering and bubbling vigorously.
Let the mixture bubble away for 5-7 minutes, stirring occasionally, until it reduces by about one-third. You’ll notice the gravy thickening as the liquid evaporates. The aroma should be rich and meaty—this is where your brisket’s deep flavor infuses into the sauce. If the gravy starts to separate or looks too thin, reduce the heat slightly to prevent boiling over.
Incorporate Broth and Thicken
Gradually whisk in the 1 cup beef broth, about ¼ cup at a time, allowing each addition to be fully absorbed before adding more. This gradual approach prevents the gravy from becoming too thin. After adding all the broth, bring the mixture to a gentle simmer and let it cook uncovered for 8-10 minutes, stirring occasionally.
The gravy should now be thick enough to coat the back of a spoon but still flow smoothly. If it’s too thick for your preference, you can thin it with a splash of warm water or additional broth. For extra silky texture, whisk in the 1 teaspoon cornstarch mixed with 1 tablespoon cold water, then simmer for another 2 minutes until fully incorporated. This creates a glossy finish that’s characteristic of professional gravies.
Strain and Serve
Line a fine-mesh strainer with cheesecloth or a coffee filter if you want an especially smooth gravy. Pour the gravy through the strainer into a clean saucepan, pressing gently on the solids to extract all the flavor. This step removes any lumps but preserves all that rich brisket essence.
Taste and adjust seasoning with salt and freshly ground black pepper if needed. Your gravy should be rich, velvety, and deeply flavorful—each spoonful should transport you back to that brisket’s smoky aroma. Serve immediately over sliced brisket or use to enhance mashed potatoes, biscuits, or cornbread for a truly comforting meal.
Pro Tips For Making Beef Brisket Gravy
- STRAIN THE DRIPPINGS WELL: Don’t skip this step—even if the pan looks clean, tiny bits of crispy meat and fat will clog your gravy and make it grainy. Use a fine-mesh strainer or cheesecloth, and press hard. I learned this the hard way when my gravy turned into a sludge after 10 minutes of simmering.
- COOK THE ROUX LOW AND SLOW: That butter-flour mix burns faster than you think. Start with medium-low heat and stir like your life depends on it—especially in the first 2 minutes. If it smells nutty instead of toasty, you’ve gone too far. A well-made roux is the backbone of your gravy, so don’t rush it.
- THICKEN WITH CORNSTARCH LAST: If your gravy isn’t thickening enough, resist the urge to dump in more flour. Instead, mix 1 tablespoon cornstarch with 2 tablespoons cold water, then whisk it in at the very end. It thickens instantly without altering the flavor, and you won’t end up with a floury aftertaste.
- DEGLAZE WITH BROTH, NOT WATER: Those pan drippings hold deep flavor, but they won’t release it with plain water. Splash in beef broth instead—it pulls out the caramelized bits and keeps the gravy rich. I used to waste good drippings by adding water, and the gravy always tasted flat. Don’t make that mistake.
Troubleshooting this dish
Roux Gone Wrong
If your roux turns dark brown or smells burnt, you’ve gone too far. Immediately remove from heat and let it cool slightly before adding liquid—this prevents a bitter, acrid flavor.
I’ve ruined more than a few rouxes this way, but the key is patience: watch it constantly and remove it just before it reaches your target color. A medium roux should be the color of peanut butter, not toasted bread. 🌡️
Gravy Too Thin
If your gravy is too thin after simmering, don’t panic. Whisk in a 1:1 mixture of cornstarch and cold water (start with 1 tsp cornstarch + 1 tbsp water) and simmer for 2-3 minutes until thickened.
Alternatively, reduce the heat and let it simmer uncovered for 5-10 more minutes—the liquid will evaporate naturally. I’ve saved many a thin gravy this way, especially when rushing to serve.
Gravy Too Thick
Thick gravy? No problem. Thin it gradually with warm water or beef broth, 1 tbsp at a time, whisking constantly to avoid lumps. Avoid cold liquid—it can shock the sauce and cause separation.
If it’s still too thick, reheat gently while stirring. Pro tip: A splash of heavy cream (about 1 tbsp) can also lighten the texture while adding richness. 🥄
Lumpy Gravy
Lumps happen when flour isn’t fully dissolved or cornstarch isn’t whisked smoothly. To fix it, place the saucepan over low heat and whisk vigorously for 1-2 minutes until smooth. If lumps persist, strain the gravy through a fine-mesh sieve lined with cheesecloth for a silky finish.
I keep a small sieve and cheesecloth in my kitchen just for this purpose—it’s a game-changer for restaurant-quality results.
Flat or Bland Flavor
If your gravy tastes bland, it likely needs more depth. Boost flavor by adding 1 tsp Worcestershire sauce or ½ tsp smoked paprika for a smoky kick. A splash of red wine (about 2 tbsp) or a pinch of ground black pepper can also elevate it.
Remember, brisket gravy should taste like it’s been simmering for hours—don’t be afraid to season boldly. 💡
Gravy Separates
Separation usually means the gravy was heated too quickly or didn’t simmer long enough. To fix it, whisk in 1 tbsp cold butter and simmer gently for 2-3 minutes—the fat helps emulsify the sauce.
If that doesn’t work, make a quick slurry with 1 tsp cornstarch + 1 tbsp water, whisk it in, and simmer until smooth. Patience is key here; rushing leads to separation. 🔥
Nutrition facts
Frequently asked questions
Can I make this gravy without beef drippings?
If you don’t have brisket drippings, simply brown 1 tablespoon butter with 1 tablespoon flour to make a quick roux, then add 1 cup beef broth instead. For extra depth, deglaze with a splash of red wine or add ½ teaspoon smoked paprika to mimic the smoky flavor. The result will still be delicious, though slightly less intense.
How do I know when my roux is done?
A perfect medium roux should be the color of peanut butter—not lighter like caramel, not darker like toast. Stir constantly over medium heat for 3-4 minutes until it smells nutty and toasty. Remove it just before it reaches your target color to avoid bitterness.
Can I make this gravy ahead of time?
Yes! This gravy tastes even better the next day as flavors meld. Store it in an airtight container in the fridge for up to 5 days or freeze for 3 months. Reheat gently on the stove, stirring constantly to prevent scorching. The texture may thicken slightly—just add a splash of warm water or broth if needed.
What if my gravy turns out too thin?
No worries! Whisk in a 1:1 mixture of cornstarch and cold water (start with 1 teaspoon cornstarch + 1 tablespoon water) and simmer for 2-3 minutes until thickened. Alternatively, reduce heat and simmer uncovered for 5-10 more minutes to let the liquid evaporate naturally. Patience is key—don’t rush it!
Is this gravy gluten-free?
This recipe uses all-purpose flour, which contains gluten. For a gluten-free version, substitute the flour with 2 tablespoons gluten-free flour blend or cornstarch (use 3 tablespoons total for thickening power). The texture will be slightly different but still flavorful. Always check labels to ensure your gluten-free flour is 100% gluten-free.

Trained in classic French technique but raised on slow-cooked ribs and spicy rubs, she blends culinary skill with smoke and soul.
- Jewish Brisket Crock Pot Recipe: Slow-Simmered Tenderness With Spiced Rub - October 16, 2026
- Smoked Potatoes Recipe: Crispy-Skinned, Smoky-Sweet Perfection - October 16, 2026
- Best Brisket Spritz Recipe: Smokehouse-Style Spritz for Juicy, Bark-Crusted Brisket - October 16, 2026