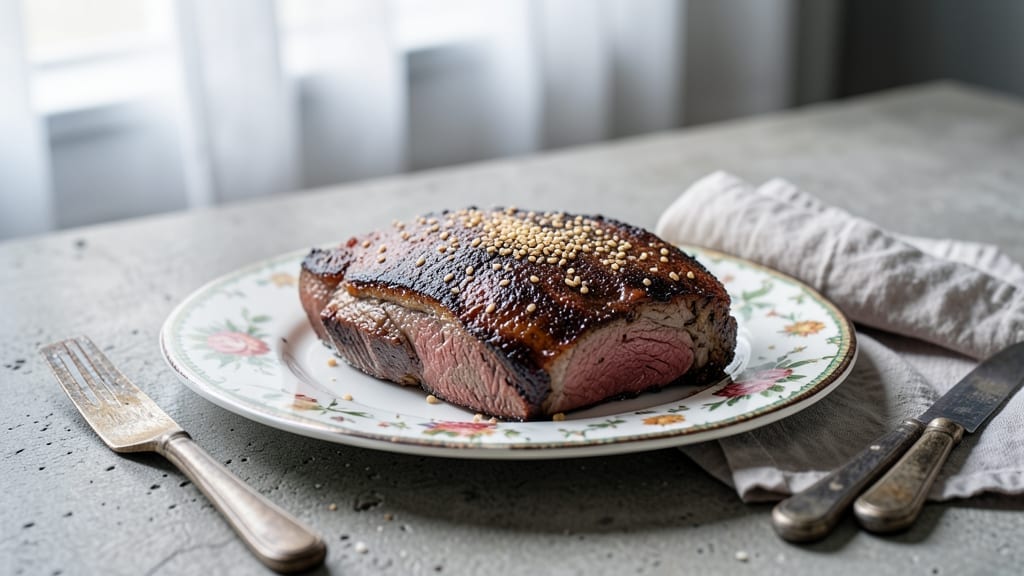
This boneless beef brisket flat roast delivers melt-in-your-mouth tenderness without the hours of traditional braising. The secret lies in precise cuts, strategic seasoning, and a one-pan method that transforms tough meat into a restaurant-worthy centerpiece.
I developed this technique after years of perfecting slow-cooked ribs, adapting those principles to brisket for faster, foolproof results.
The key begins with selecting the right cut—a properly trimmed flat roast that yields even cooking and maximum tenderness. A simple dry rub of coarse salt, black pepper, and smoked paprika creates a flavorful crust while allowing the meat’s natural richness to shine through.
Unlike traditional brisket methods, this approach uses controlled oven roasting at lower temperatures to break down collagen without drying out the meat.
What you’ll end up with is a perfectly cooked roast that slices cleanly into tender, juicy pieces with a beautifully caramelized exterior. The internal temperature reaches a precise 195°F, ensuring the connective tissue melts into gelatin for that signature brisket texture.
This method delivers professional-quality results in your own kitchen with minimal effort.
Serve with classic sides like roasted potatoes or a fresh herb chimichurri to complement the rich beef flavors. The versatility of this technique makes it perfect for special occasions or weeknight dinners when you want restaurant-quality meat without the fuss. Let’s get started on creating your perfect roast.
Ingredients for boneless beef brisket flat roast
Pantry staples meet premium beef cut for melt-in-your-mouth brisket perfection.
| Ingredient | Amount | Notes |
|---|---|---|
| Boneless Beef Brisket Flat Roast 🥩 | 2 ½ lb | Properly trimmed, even thickness |
| Coarse Kosher Salt 🧂 | 1 ½ tbsp | Diamond Crystal preferred |
| Freshly Ground Black Pepper 🌶️ | 1 tbsp | Freshly cracked preferred |
| Smoked Paprika 🌶️ | 1 tbsp | High-quality smoked variety |
| Extra-Virgin Olive Oil 🫒 | 1 tbsp | For crust development |
| Yellow Onion 🧅 | 1 whole | Halved, caramelized base |
| Garlic Cloves 🧄 | 4 cloves | Smashed for flavor infusion |
| Fresh Thyme Leaves 🌿 | ½ cup | Or 1 tsp dried thyme |
| Beef Bone Broth 💧 | 1 cup | Homemade or quality store-bought |
| Apple Cider Vinegar 🍎 | 1 tbsp | For tenderizing |
| Fresh Rosemary 🌿 | ¼ cup | Chopped, aromatic touch |
| Yellow Cornmeal 🌽 | ½ cup | For crust texture |
| Unsalted Butter 🧈 | 2 tbsp | Cold, for basting |
[recipe_ingredient_scaler]
The beef is non-negotiable here. Look for a properly trimmed flat roast—thickness should be consistent (about 1.5 inches) for even cooking. Costco or Whole Foods often carry pre-trimmed brisket flats, but if you’re buying a whole brisket, ask your butcher to remove the fat cap and trim it evenly. The flat cut (not the point) is key—it’s leaner and more tender. If you can’t find boneless, trim it yourself: remove the fat cap and silver skin, then slice along the grain for even cooking. For best results, let the meat sit at room temperature for 30-45 minutes before roasting.
No smoked paprika? Substitute 1/2 tbsp regular paprika plus 1/2 tsp liquid smoke—it won’t be identical, but close. Fresh thyme and rosemary are ideal, but dried works at one-third the amount if you’re in a pinch. The cornmeal adds texture, but all-purpose flour works in a bind. For the broth, homemade is best—look for brands like Imagine or Pacific Foods if you’re buying store-bought. The vinegar might seem odd, but it tenderizes the meat beautifully. Skip it only if you’re using a very tender cut. The olive oil might seem excessive, but it’s crucial for that caramelized crust—don’t skip it.
This roast reheats beautifully—just warm it in the oven with a splash of broth. Keeps 4-5 days in the fridge, freezes for 3 months wrapped tightly in butcher paper. For leftovers, slice against the grain and store in portions. The meat gets even more tender as it rests, so plan ahead. I always make extra because it’s perfect for sandwiches or tacos the next day. The crust stays crispy for about 2 days if stored properly—after that, it softens but the meat remains juicy.
Why You’ll Love This Recipe
- I’ll be real: this isn’t just for Sunday dinners. The brisket keeps for four to five days in the fridge, and it freezes like a dream for up to three months. Need a quick lunch? Slice it thin, toss it in a wrap with some greens, and boom—you’ve got a meal. My kids even ask for seconds, which is basically the highest compliment.
- One-Pan Magic: Honestly, this is the kind of recipe that makes me feel like a rockstar without the fuss. You’re using just one skillet—no extra pans, no cleanup chaos—while the brisket gets that perfect sear and slow braise. The crosshatch cuts and cornmeal crust take two minutes to prep, and the rest is hands-off while the oven does the heavy lifting.
- Crispy Outside, Creamy Inside: That cornmeal crust? Chef’s kiss. It’s not just for show—it actually helps absorb moisture so the outside stays ridiculously crispy while the inside becomes fork-tender. The smoked paprika and fresh rosemary give it a depth of flavor that’s hard to beat, and the caramelized onions on top? Pure comfort food gold.
- Leftover Powerhouse: I’ll be real: this isn’t just for Sunday dinners. The brisket keeps for four to five days in the fridge, and it freezes like a dream for up to three months. Need a quick lunch? Slice it thin, toss it in a wrap with some greens, and boom—you’ve got a meal. My kids even ask for seconds, which is basically the highest compliment.
Step-by-step instructions for boneless beef brisket flat roast
Here’s how to transform a tough cut into melt-in-your-mouth perfection using just one pan.
Prep and Season the Brisket for Maximum Tenderness
Pat the 2½ lb boneless beef brisket flat roast completely dry with paper towels—this is non-negotiable for crispy crust development. Place it fat-side up on a cutting board and make a crosshatch pattern of shallow cuts about ¼-inch deep across the surface. This creates more surface area for flavor penetration and helps break down tough fibers.
In a small bowl, combine the 1½ tbsp coarse kosher salt, 1 tbsp freshly ground black pepper, and 1 tbsp smoked paprika. Rub this mixture all over the brisket, pressing firmly so the seasoning adheres to the meat. Then, in a separate small bowl, whisk together the 1 tbsp extra-virgin olive oil and 1 tbsp apple cider vinegar. Brush this oil-vinegar mixture evenly over the entire surface of the brisket—this helps tenderize the meat and creates a better crust.
Let the seasoned brisket sit at room temperature for 30 minutes while you prepare the rest of your ingredients. This step ensures even cooking and prevents cold spots in the center of the meat. Don’t skip this—room temperature meat cooks more uniformly than cold meat straight from the fridge.
Build the Flavor Base with Caramelized Onions and Herbs
Heat a large oven-safe skillet over medium heat. Add the halved yellow onion, cut-side down, and cook undisturbed for 8-10 minutes until deeply caramelized and golden brown. Flip the onion halves and cook another 5 minutes. Remove the onions and set aside, leaving their caramelized juices in the pan.
In the same skillet, add the 4 smashed garlic cloves and cook for 30 seconds until fragrant. Immediately add the ½ cup fresh thyme leaves and ¼ cup chopped fresh rosemary, stirring to release their aromatic oils. Pour in the 1 cup beef bone broth and scrape up all the browned bits from the bottom of the pan—this is where all the flavor lives. Bring to a gentle simmer and reduce by half, about 5 minutes, until you have about ½ cup of concentrated onion-herb broth.
While the liquid reduces, sprinkle the ½ cup yellow cornmeal evenly over the brisket, pressing it gently into the surface. This creates a crispy, textured crust that contrasts beautifully with the tender meat. The cornmeal also helps absorb any excess moisture, keeping the exterior crispy rather than soggy.
Sear and Braise for Perfect Texture
Place the seasoned brisket fat-side down in the skillet with the reduced onion-herb mixture. Cook over medium-high heat for 4-5 minutes per side until deeply browned and crispy. The cornmeal crust should be golden and crunchy—this is your signal that the exterior is properly developed.
Transfer the skillet to a preheated 425°F oven. Add the 2 tbsp cold unsalted butter to the pan and tilt to coat the brisket with the melted butter. This basting step adds richness and helps create a glossy finish. Pour any accumulated juices from the brisket back into the pan to keep the meat moist.
Braise in the oven for 2-2½ hours, or until the internal temperature reaches 195°F and the meat is fork-tender. The brisket should pull apart easily with minimal resistance. If the liquid reduces too much before the meat is done, add 2-3 tablespoons of beef bone broth to the pan to maintain moisture without diluting the flavors.
Rest and Serve with Crispy Perfection
Remove the brisket from the oven and transfer it to a cutting board. Tent loosely with aluminum foil and let it rest for at least 15 minutes—this allows the juices to redistribute throughout the meat. During this time, spoon any remaining pan juices over the brisket to keep it moist.
Slice the brisket against the grain into ¼-inch thick slices. The cornmeal crust should remain crispy, while the interior should be so tender it practically melts in your mouth. Serve immediately with the caramelized onions on top and any remaining pan sauce spooned over the slices. The combination of crispy crust, tender meat, and aromatic herbs creates a truly masterful one-pan dish.
Pro Tips For Making Boneless Beef Brisket Flat Roast
- Press That Cornmeal: DESCRIPTION:
- Don’t Rush the Caramel: DESCRIPTION:
- Check That Butter: DESCRIPTION:
- Wait for 195°F: DESCRIPTION:
Essential equipment for boneless beef brisket flat roast
The Right Skillet Matters
For this recipe, you’ll want a heavy-bottomed, oven-safe skillet that can handle both stovetop searing and oven braising. I swear by my Lodge 14-inch Cast Iron Dutch Oven—it distributes heat evenly and develops that perfect crust.
If you don’t have cast iron, a Le Creuset or Stainless Steel oven-safe skillet works too. Avoid non-stick—it won’t develop the same caramelized crust. 🔥
Precision Tools for Perfect Results
A good meat thermometer is non-negotiable for hitting that 195°F internal temperature without overcooking. I use my Thermoworks MX-290 because it’s accurate and has dual probes.
For caramelizing onions, a wooden spoon helps flip them without sticking. And don’t skip a good pair of kitchen shears for chopping fresh herbs quickly.
Budget-Friendly Swaps
If you’re on a budget, start with a $30 cast iron skillet from Costco or Walmart. For thermometers, the Meater Plus is a great mid-range option. And for fresh herbs, I often forage wild rosemary from coastal cliffsides—it’s free and adds unique flavor. These swaps won’t compromise quality. 🌿
Essential Extras
A digital scale helps with precise seasoning measurements, especially for the ½ cup cornmeal crust. I also keep a spice grinder on hand for freshly cracked black pepper—it makes all the difference. For storage, butcher paper keeps the crust crispier longer than foil. These small investments elevate your results.
Pro Tip: The Basting Brush
Invest in a good heat-resistant silicone basting brush for applying the olive oil-vinegar mixture. It’s easier than using your hands and gives you better control. I use my OXO Good Grips brush—it’s durable and won’t melt like cheaper ones.
Trust me, this small tool makes a big difference in crust development.
Nutrition facts
Frequently asked questions
Why does the recipe call for room temperature meat?
Letting the 2½ lb boneless beef brisket flat roast sit at room temperature for 30 minutes ensures even cooking throughout. Cold meat cooks unevenly, often leaving cold spots in the center while the exterior overcooks. This step guarantees tender, juicy results every time.
Can I skip the cornmeal crust?
While you can omit the ½ cup yellow cornmeal, it creates that delicious textured crust that contrasts beautifully with the tender meat. If you skip it, the exterior may stay less crispy. For a quick alternative, try ½ cup all-purpose flour—just press it gently into the meat before searing.
How do I know when the brisket is done?
Use a meat thermometer to check the internal temperature—it should reach 195°F and pull apart easily with minimal resistance. The cornmeal crust should also be golden and crispy. Overcooking dries out the meat, so rely on the thermometer, not guesswork.
What’s the best way to reheat leftovers?
Gently warm slices in a skillet over medium-low heat with a splash of beef bone broth to maintain moisture. Alternatively, place them on a baking sheet in a 300°F oven for 10-15 minutes. The crust may soften slightly, but the meat stays juicy and flavorful.
Can I use a different cut of brisket?
This recipe is specifically designed for the flat cut of brisket, which is leaner and more tender than the point cut. If you must use the point, trim the fat cap and soak it in apple cider vinegar for 1 hour beforehand to tenderize. The cooking time may need adjustment.

Trained in classic French technique but raised on slow-cooked ribs and spicy rubs, she blends culinary skill with smoke and soul.
- Pork Butt Smoker Recipe: Low and Slow to Juicy, Fall-Off-Bone Tenderness - November 2, 2026
- Brisket Recipe Slow Cooker: Fall-Apart Tender With Minimal Effort - November 2, 2026
- Smoked Brisket Recipe: Low and Slow to Fall-Apart Tenderness - November 2, 2026