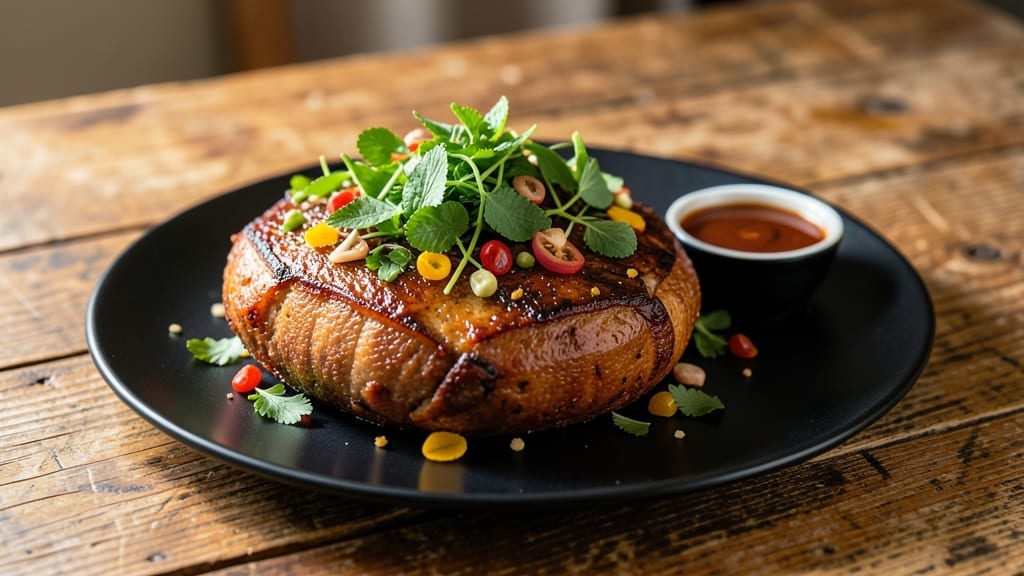
This brisket pie recipe transforms tender smoked brisket into a rich, layered masterpiece with a golden, flaky crust that seals in all the smoky flavors.
The secret lies in balancing perfectly slow-cooked meat with a buttery, well-baked crust that becomes crisp at the edges while staying tender underneath—just like your grandmother used to make, but with modern precision.
What sets this brisket pie apart is the juicy filling—smoked brisket braised until fork-tender, combined with a savory gravy that soaks into the crust without making it soggy.
The crust itself is a foolproof blend of all-purpose flour and cold butter, rolled out and baked just until it’s set, creating those signature flaky layers that make every bite irresistible.
By the time you pull this pie from the oven, you’ll have a centerpiece dish that’s rich, hearty, and packed with deep, smoky flavors—each slice offering tender brisket, savory gravy, and a buttery crust that melts in your mouth.
The aroma alone will have everyone gathered around the table, and the first bite will silence any doubts about homemade pie being worth the effort.
Serve it warm with a side of pickled vegetables or a dollop of whipped cream to balance the richness. This recipe delivers restaurant-quality results with a method that’s straightforward enough for a weeknight dinner but impressive enough for holidays.
Let’s get started on creating a pie that’ll become your new signature dish.
Ingredients for brisket pie
Rich, smoky brisket meets buttery crust layers—this pie delivers comfort in every bite.
| Ingredient | Amount | Notes |
|---|---|---|
| Smoked Brisket 🥩 | 4 lb | Pre-cooked, sliced thin |
| All-Purpose Flour 🌾 | 4 cups | For pie crust |
| Unsalted Butter 🧈 | 1 ½ cups | Cold, cubed |
| Beef Broth 💧 | 2 cups | Low-sodium preferred |
| Whole Milk 🥛 | 1 cup | For gravy richness |
| Granulated Sugar 🍚 | 2 tbsp | For gravy balance |
| Cornstarch 🌽 | 2 tbsp | For gravy thickening |
| Salt 🧂 | 1 ½ tsp | Fine grain preferred |
| Black Pepper 🌶️ | 1 tsp | Freshly ground |
| Onion 🧅 | 1 whole | Diced, for gravy |
| Garlic Cloves 🧄 | 4 cloves | Minced, for gravy |
| Egg 🥚 | 1 whole | For egg wash |
| Coarse Salt 🧂 | 1 tbsp | For crust seasoning |
[recipe_ingredient_scaler]
The brisket is everything here. Pre-smoked works best—look for Costco or butcher shops for quality cuts. Slice it thin against the grain for tenderness. If you’re cooking it yourself, low-and-slow is key—aim for 12-14 hours at 225°F. The fat cap should be at least 1/4 inch thick for juiciness. I always buy mine pre-cooked to save time, but if you’re starting from raw, plan ahead—this isn’t a quick project. The beef broth should be low-sodium so you can control the seasoning.
No pre-smoked brisket? Beef chuck roast works in a pinch—just cook it until fork-tender (about 3 hours at 300°F). Short on flour for the crust? Half all-purpose, half whole wheat adds depth but keeps it flaky. The cornstarch for gravy can be swapped for arrowroot powder at half the amount. For the crust, butter should be cold—no exceptions. If your butter’s soft, pop it in the freezer for 20 minutes. The whole milk in the gravy is non-negotiable—it adds richness that evaporated milk can’t match. And if you’re worried about the sugar, start with 1 tbsp and taste as you go.
This pie tastes even better the next day, so make it ahead! Wrap tightly in foil and refrigerate for up to 3 days. For the crust, freeze the dough for 30 minutes before rolling to prevent sticking. The gravy reheats beautifully—just stir in a splash of broth if it thickens too much. I always bake the pie uncovered for the last 10 minutes to get that perfect golden crust. If you’re short on time, use a pre-made pie crust—just brush it with melted butter before adding the filling. The coarse salt on the crust? Don’t skip it—it enhances the buttery flavor.
Why You’ll Love This Recipe
- I’ll be real: the smoked brisket comes pre-cooked, so all you’re doing is slicing and layering. No hours of braising or stressing over doneness—just pure, smoky goodness waiting to be wrapped in that golden crust.
- No-Cook Filling Magic: I’ll be real: the smoked brisket comes pre-cooked, so all you’re doing is slicing and layering. No hours of braising or stressing over doneness—just pure, smoky goodness waiting to be wrapped in that golden crust.
- Crust That Crumbles Right: That coarse salt on top? It’s not just decoration—it turns the crust into something crispy, almost buttery-shattered. The whole milk in the gravy keeps it rich, but the cornstarch thickens it just enough to coat every brisket slice like a hug.
- Leftovers That Travel Well: This pie holds up beautifully for days. Wrap it tightly in foil, and you’ve got a meal that’s just as good cold as it is warm—perfect for packing lunches or feeding a crowd without last-minute scrambling.
Step-by-step instructions for brisket pie recipe
Here’s how to create layers of smoky tenderness and golden flakiness that’ll make this pie unforgettable.
Prepare the Perfect Pie Crust
In a large bowl, combine the 4 cups all-purpose flour with 1½ tsp salt and 1 tsp black pepper. Cut in the 1½ cups unsalted butter (cold and cubed) using a pastry cutter or your fingers until the mixture resembles coarse crumbs with pea-sized butter pieces remaining. This texture is crucial for flaky layers.
Gradually add 1 cup whole milk and mix just until the dough comes together. Avoid overworking it—you want to keep the gluten development minimal for that tender, flaky texture. Turn the dough onto a lightly floured surface and divide it into two equal portions. Shape each into a disk, wrap in plastic wrap, and refrigerate for at least 1 hour (or up to 24 hours).
Assemble the Juicy Brisket Filling
Preheat your oven to 375°F. Roll out one of the chilled pie crusts and fit it into a 9-inch pie dish, trimming any excess dough. Prick the bottom with a fork to prevent air pockets. Arrange the 4 lb smoked brisket (pre-cooked and sliced thin) evenly over the crust, slightly overlapping the slices if needed. This ensures every bite gets that rich, smoky flavor.
In a small saucepan, combine 2 cups beef broth, 2 tbsp granulated sugar, 2 tbsp cornstarch, 1 diced onion, and 4 minced garlic cloves. Bring to a simmer over medium heat, stirring constantly, until the mixture thickens to a gravy-like consistency—about 5-7 minutes. This gravy will keep the brisket moist and add depth to each slice. Pour the warm gravy evenly over the brisket.
Create the Top Crust and Seal the Pie
Roll out the second pie crust and place it over the brisket filling. Trim the edges to create a clean border, then crimp the top and bottom crusts together using your fingers or a fork. Cut a few small slits in the top crust to allow steam to escape—this prevents a soggy bottom. Brush the top crust generously with a beaten egg for a golden finish.
Sprinkle 1 tbsp coarse salt evenly over the top crust, focusing on the edges where the dough meets. This adds extra flavor and helps create a crispy, shimmering crust. Here’s the thing—don’t skip the salt on top. It makes all the difference in the final texture and taste. Place the pie on a baking sheet to catch any drips and bake for 45-50 minutes until the crust is golden brown and the filling is bubbling.
Bake to Golden Perfection
Transfer the pie to a wire rack and let it cool for at least 1 hour before slicing. This resting period allows the juices to redistribute, ensuring each bite is moist and flavorful. The crust should be crisp and flaky, not soggy, and the brisket filling should be warm and inviting.
To serve, cut into 6 equal wedges (since this recipe serves 6). Each slice should reveal layers of tender brisket, rich gravy, and that irresistible flaky crust. The contrast between the smoky brisket and the buttery, golden crust is what makes this pie truly special. Enjoy it warm with a side of roasted vegetables or a simple green salad.
Pro Tips For Making Brisket Pie
- Chill the Butter: I learned this the hard way—when your 1.5 cups of unsalted butter isn’t cold, the crust turns out greasy instead of flaky. Pop it in the freezer for 20 minutes before cutting it into cubes, and keep those cubes frozen until you’re ready to mix them into the flour. Trust me, your future self will notice the difference in that first bite.
- Simmer the Gravy Right: That beef broth gravy needs constant stirring once you add the cornstarch and sugar—about 5-7 minutes on medium heat. I used to walk away, and it’d either burn or turn gluey. Keep your eye on it, and if it thickens too fast, just add a splash of milk to loosen it up. The goal is silky, not pasty.
- Vent the Top Crust: Cutting those small slits in the top crust isn’t just for looks—it’s what keeps your pie from turning into a soggy brick. Skip them, and you’ll end up with a steam trap that makes the bottom crust mushy. A few quick snips with a knife is all it takes, and your pie will stay crisp.
- Salt the Edges First: That 1 tbsp of coarse salt on the crust edges isn’t just decoration—it’s the secret to a crisp, shimmering finish. Sprinkle it before baking, and focus on where the top and bottom crusts meet. The salt draws out moisture, creating that golden, crackly texture that makes the pie look (and taste) restaurant-worthy.
Serving suggestions for this recipe
Plating Like a Pro
When serving this brisket pie, I always use a large, rustic wooden cutting board for that classic pie presentation. Slice into 6 equal wedges using a sharp serrated knife—start from the center and work outward to maintain clean cuts.
Arrange the wedges on a platter with the crust edges slightly overlapping for that cozy, homemade look. 🔥
Garnish for Impact
A sprinkle of freshly cracked black pepper over each slice adds a subtle kick and visual contrast to the golden crust. I also like to garnish with a few thinly sliced green onions or a drizzle of hot honey for a touch of sweetness.
The honey not only enhances the smoky flavors but also adds a beautiful glossy finish.
Warm Sides Pairing
This brisket pie shines alongside classic comfort sides like creamy mashed potatoes or buttery cornbread. I often serve it with a simple green salad dressed in a light vinaigrette to balance the richness.
For extra indulgence, add a scoop of vanilla bean ice cream on the side—it’s a Southern twist that many guests adore.
Presentation Touches
For a restaurant-worthy touch, place each wedge on a small slate or ceramic plate. A few fresh rosemary sprigs or a tiny wooden pick can elevate the plating.
If you’re serving at a gathering, I recommend arranging the pie in the center of the table with the sides arranged around it for a cohesive, inviting spread.
Serving Temperature
This pie tastes best served warm, with the crust still crisp and the filling steaming slightly. If you’ve made it ahead, let it sit at room temperature for 20-30 minutes before serving to ensure the juices redistribute evenly.
I always reheat the pie briefly in the oven at 300°F for 10-15 minutes if it’s been refrigerated.
Nutrition facts
Frequently asked questions
Why does the recipe call for pre-cooked brisket?
The pre-cooked brisket ensures you skip the long smoking or braising process while still delivering that rich, tender texture. If you prefer to cook it yourself, use a low-and-slow method at 225°F for 12-14 hours until fork-tender. This step guarantees the meat stays juicy and flavorful without drying out during baking.
Can I use a different type of meat instead of brisket?
While brisket is ideal, you can substitute with beef chuck roast cooked until fork-tender. Just ensure it’s sliced thin and cooked low-and-slow for the best texture. The gravy will still work beautifully, but the smoky flavor will be less pronounced.
What if my pie crust gets soggy during baking?
A soggy crust often happens if the filling isn’t hot enough before adding the top crust. Always pour the warm gravy over the brisket first, then seal the pie. Bake on a baking sheet to catch drips, and avoid overfilling the crust—this keeps it crisp and flaky.
How do I store leftovers without ruining the texture?
Wrap the cooled pie tightly in foil and refrigerate for up to 3 days. To reheat, place it in a 300°F oven for 10-15 minutes until warm. Avoid microwaving, as it can make the crust soggy. The crust will crisp up again once reheated properly.
Can I make the pie crust ahead of time?
Shape the dough into disks, wrap tightly in plastic, and refrigerate for up to 24 hours. For extra convenience, freeze the dough for 30 minutes before rolling to prevent sticking. This ensures your crust stays flaky and easy to work with.

Trained in classic French technique but raised on slow-cooked ribs and spicy rubs, she blends culinary skill with smoke and soul.
- Chinese Braised Beef Brisket with Daikon Recipe: Silky Tender Meat and Crunchy Roots - October 18, 2026
- Oklahoma Joe’s Smoked Beans Recipe: Slow-Smoked Flavor That Rivals the Original - October 18, 2026
- Beef Brisket Chili Recipe: Slow-Simmered Richness with Deep Flavor Layers - October 18, 2026