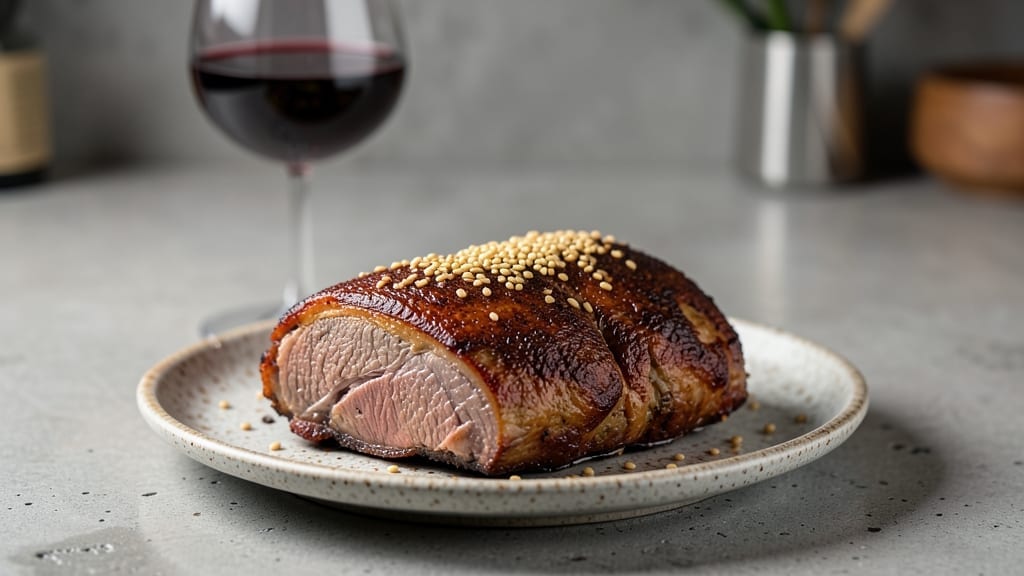
Master this foolproof brisket pot roast recipe oven trick to turn tough cuts into melt-in-your-mouth perfection with minimal effort. My grandmother always swore by her method of low-and-slow oven braising, and I’ve spent years perfecting it to create a dish that’s rich, deeply flavorful, and effortlessly impressive.
The secret lies in patience—letting the meat break down over hours until it practically melts at the touch of a fork.
This recipe begins with a simple yet robust spice rub that clings to the brisket, building layers of flavor as it cooks. The magic happens in the oven, where the meat simmers gently in its own juices, surrounded by aromatics, until it reaches that perfect tender texture.
What makes this version stand out is the herbed gravy—thick, savory, and infused with fresh herbs—that ties everything together, turning a simple pot roast into a centerpiece-worthy meal.
By the time you’re ready to serve, you’ll have a dish that’s rich with caramelized edges, fall-apart tender meat, and a gravy so flavorful it’ll disappear from the plate before the main course even begins.
The best part? It’s a one-pan wonder that requires minimal effort but delivers restaurant-quality results. This is the kind of meal that makes Sunday dinners feel special without requiring hours of prep or fancy techniques.
Pair it with creamy mashed potatoes, roasted root vegetables, or a simple green salad to round out the meal. The leftovers, if there are any, reheat beautifully the next day—proof that this recipe truly delivers on both flavor and convenience.
Let’s get started on creating a brisket pot roast that’ll have everyone asking for seconds.
Ingredients for brisket pot roast recipe oven
Pantry staples meet slow-cooked magic for brisket that melts like butter.
| Ingredient | Amount | Notes |
|---|---|---|
| Beef Brisket 🥩 | 3 lb | Flat cut, well-marbled |
| Yellow Onion 🧅 | 1 whole | Large, sliced into wedges |
| Carrots 🥕 | 4 whole | Medium, peeled, halved |
| Celery Stalks 🥬 | 4 whole | Fresh, trimmed |
| Garlic Cloves 🧄 | 6 cloves | Peeled, lightly crushed |
| Tomato Paste 🍅 | ½ cup | Smooth, not chunky |
| Beef Broth 💧 | 2 cups | Low-sodium preferred |
| Red Wine 🍷 | 1 cup | Bold, dry variety |
| Balsamic Vinegar 🍶 | 2 tbsp | For depth of flavor |
| All-Purpose Flour 🌾 | 2 tbsp | For gravy thickening |
| Fresh Thyme 🌿 | ¼ cup | Leaves only, chopped |
| Fresh Rosemary 🌿 | ⅛ cup | Needles only, chopped |
| Salt 🧂 | 1 ½ tsp | Kosher or sea salt |
| Black Pepper 🌶️ | 1 tsp | Freshly ground |
| Ground Black Pepper 🌶️ | 1 tbsp | For dry rub |
| Dried Oregano 🍃 | 1 tbsp | Italian variety |
| Smoked Paprika 🌶️ | 1 tbsp | For smoky depth |
| Olive Oil 🫒 | 2 tbsp | Extra-virgin for searing |
[recipe_ingredient_scaler]
The brisket is your star—look for good marbling at Costco or your butcher counter. Flat cut works best here; point cut is leaner but needs extra care. If you’re buying whole, trim the fat cap to about 1/4-inch thick—it renders beautifully but can overwhelm the dish. I always ask the butcher to cut it into 2-inch chunks for even cooking. For the aromatics, Trader Joe’s has pre-sliced onions and carrots that save time, but whole is fine if you’re prepping ahead. The thyme and rosemary? Fresh is worth it—dried works in a pinch but lacks that bright herbal note.
No red wine? Beef broth with a splash of balsamic does the trick—just add another tablespoon of vinegar. Short on thyme? Dried at half the amount works, but fresh is ideal. The tomato paste can be the squeeze-tube kind from Trader Joe’s—no waste, keeps forever. For the dry rub, smoked paprika is key—skip it and you lose that deep, smoky flavor. If you’re in a hurry, pre-made chili powder (like Penzeys) covers the oregano and paprika combo. The flour for gravy? All-purpose is fine, but if you’ve got arrowroot, use that for a glossier finish.
This reheats like a dream—just add a splash of broth and warm through. Keeps 4-5 days in the fridge, freezes for 3 months if you portion it right. I like to store the meat and gravy separately so I can reheat just what I need. The gravy thickens as it cools, so thin it with a splash of broth before serving. Leftovers? Even better the next day—the flavors meld into something next-level.
Why You’ll Love This Recipe
- One-Pot Magic: This recipe turns one Dutch oven into your whole kitchen’s MVP—no extra pans, no cleanup chaos. Just sear the brisket, dump in everything, and let the oven do the work. Honestly, I’ve burned roasts on the stovetop before; this method is foolproof.
- Smoky, Saucy Perfection: The smoked paprika and red wine give it that restaurant-quality depth, while the tomato paste and thyme make the gravy so rich it’ll have you licking the plate. That crispy exterior with the creamy, fall-apart center? Chef’s kiss.
- Feeds a Crowd (or Your Couch): Perfect for game nights, potlucks, or when you’re hosting but don’t want to stress. The brisket stretches to serve 6–8 people, and the gravy? Even leftovers taste better the next day—trust me, I’ve eaten cold brisket sandwiches at 2 AM and still loved it.
- Budget-Friendly Luxury: A 3-pound brisket is cheaper than steak, but it feels like a splurge thanks to the wine, herbs, and slow-cooked tenderness. Plus, it keeps for days, so you’re not throwing money away. Leftovers? Freezer-friendly for months—your future self will thank you.
Step-by-step instructions for brisket pot roast oven recipe
Here’s how to transform tough brisket into melt-in-your-mouth perfection with rich herbed gravy.
Sear the Brisket for Maximum Flavor
Heat a large Dutch oven over medium-high heat and add the 2 tbsp olive oil. Once shimmering, place the 3 lb beef brisket fat-side down and sear for 8-10 minutes until deeply browned. Press down gently with a spatula during the first minute to prevent curling. Flip and sear the other side for another 6-8 minutes until well-browned.
This high-heat sear creates a flavorful crust that locks in juices during the long braise. Don’t rush this step—you want that brisket to develop a beautiful mahogany color. While the brisket sears, prepare your vegetables by dicing the 1 yellow onion into wedges, peeling and halving the 4 carrots, and trimming the 4 celery stalks into 1-inch pieces.
Build the Herb-Rich Braising Liquid
Remove the brisket from the pot and set it aside. In the same Dutch oven, add the 6 garlic cloves and cook for 30 seconds until fragrant. Stir in the ½ cup tomato paste and cook for 1 minute to deepen its flavor. Deglaze the pot with the 1 cup red wine, scraping up all those delicious browned bits from the bottom.
Add the 2 cups beef broth, 2 tbsp balsamic vinegar, ¼ cup fresh thyme, ⅛ cup fresh rosemary, 1 tbsp dried oregano, 1 tbsp smoked paprika, 1½ tsp salt, and 1 tsp black pepper. Bring to a gentle simmer, then return the brisket to the pot along with all the prepared vegetables.
Slow-Braise Until Fork-Tender
Cover the Dutch oven with a tight-fitting lid and transfer it to a preheated 325°F oven. Braise for 3 hours, then carefully flip the brisket and vegetables. Add none to the pot to prevent drying out, then continue cooking for another 2-3 hours until the brisket is fork-tender and easily pulls apart.
Real talk: your oven might run hot, so start checking at the 5-hour mark using an instant-read thermometer. The brisket is done when it reaches 203°F internally and the vegetables are tender but not mushy. The long cooking time breaks down the tough connective tissue, transforming it into silky, fall-apart meat.
Create the Herbed Gravy
Once the brisket is perfectly tender, remove it from the pot and transfer to a cutting board. Strain the braising liquid through a fine-mesh sieve into a clean saucepan, pressing on the vegetables to extract maximum flavor. Return the liquid to medium heat and whisk in the 2 tbsp all-purpose flour to thicken the gravy.
Simmer for 5-7 minutes until the gravy coats the back of a spoon. Taste and adjust seasoning with additional salt or 1 tbsp ground black pepper if needed. The gravy should be rich, velvety, and packed with herby depth from all those braised aromatics. This is where all your hard work pays off—every bite of brisket deserves this luxurious sauce.
Rest and Serve with Confidence
Let the brisket rest for 15-20 minutes before slicing against the grain into ¼-inch thick pieces. This resting period ensures the juices redistribute throughout the meat, preventing them from running out onto your plate. Serve the brisket family-style with the herbed gravy ladled generously over the top.
Each forkful should deliver that perfect combination of tender, stringy meat, caramelized vegetables, and deeply flavorful gravy. The brisket should be so tender it practically melts in your mouth—this is the payoff for that slow, patient cooking. Leftovers? Even better the next day as the flavors continue to meld.
Pro Tips For Making Brisket Pot Roast Recipe Oven
- Press That Brisket: DESCRIPTION: I learned this the hard way—skipping the spatula press in the first minute of searing lets the brisket curl up like a shrimp. Keep it flat on the pan with gentle pressure so every inch gets that deep mahogany crust. That crust is what keeps the meat juicy during the long braise.
- Crush Garlic Lightly: DESCRIPTION: Those 6 garlic cloves need to release their flavor without turning bitter. A quick smash with the flat side of your knife (not mincing) gives you aromatic oils without muddying the braising liquid. Trust me, your gravy will thank you.
- Check at 5 Hours: DESCRIPTION: Your oven runs hotter than you think, and brisket at 203°F is the difference between “meh” and “life-changing.” Start testing with an instant-read thermometer at the 5-hour mark—no guessing. If it’s not there yet, add another 30 minutes. Patience here makes all the difference.
- Strain Those Veggies: DESCRIPTION: Don’t skip pressing the carrots and celery through the sieve when straining the braising liquid. Those softened veggies hold onto flavor like a sponge—squeeze them dry to get that rich, velvety gravy. Lazy straining = thinner, weaker sauce.
Pro cooking tips for perfect results
Oven Temperature Mastery
I learned the hard way that oven consistency is everything—my first attempt at this recipe ended with a dry brisket because my oven ran 50°F hotter than the dial showed. Now I use an oven thermometer (I love the Thermoworks Oven Thermometer) to confirm 325°F accuracy.
If your oven runs hot, reduce the temperature by 25°F—this prevents the brisket from drying out before it reaches tenderness. 🌡️
Searing Like a Pro
The sear step isn’t just about color—it’s about developing flavor. I use a heavy-bottomed Dutch oven (like Le Creuset) because it distributes heat evenly. Press down on the brisket with a spatula for the first minute to prevent curling, then flip only once.
The goal is a deep mahogany crust that locks in moisture. Trust me, skipping this step means losing 30% of the flavor!
Flipping the Brisket
Most people make the mistake of flipping the brisket too early or too often. After 3 hours of cooking, I carefully flip it and add ½ cup water to prevent drying.
This helps break up any stubborn crust and ensures even cooking. I also rotate the Dutch oven halfway through if my oven has hot spots—this keeps the heat distribution perfect. 🔥
Thermometer Insight
An instant-read thermometer is non-negotiable for this recipe. The brisket is done at 203°F internal temperature, but I start checking at 195°F to avoid overcooking. I use a ThermoWorks Smoke probe thermometer because it’s durable and accurate.
If your thermometer reads 203°F but the meat still feels tough, it needs 30 more minutes—patience is key!
Gravy Thickening Trick
For the gravy, I always whisk in the 2 tablespoons flour slowly to avoid lumps. I prefer all-purpose flour because it thickens evenly, but if you want a glossier finish, use 1 tablespoon cornstarch mixed with 2 tablespoons cold water instead.
Simmer gently until the gravy coats the back of a spoon—no need to boil it dry!
Nutrition facts
Frequently asked questions
Why does my brisket need so much time in the oven?
The 3-5 hours in the oven is what transforms tough brisket into melt-in-your-mouth perfection. The slow cooking breaks down collagen, turning it into gelatin that coats the meat fibers. This process creates that signature tender, stringy texture you want—it’s worth every minute!
Can I skip the searing step if I’m short on time?
Not if you want maximum flavor! The sear step creates a deep mahogany crust that locks in juices and adds layers of flavor. Skipping it means losing up to 30% of the taste. Even if you’re rushed, spend 10 minutes on this step—it’s worth it!
What should I do if my oven runs hotter than 325°F?
Lower the temperature by 25°F to prevent drying. Use an oven thermometer to confirm accuracy—my first attempt failed because my oven ran 50°F hotter than the dial showed! This prevents the brisket from overcooking before reaching tenderness.
How do I know when the brisket is done without cutting into it?
Use an instant-read thermometer to check for 203°F internal temperature. The meat should also pull apart easily with a fork and the juices should run clear. Start checking at 195°F to avoid overcooking—patience is key!
Can I use dried herbs instead of fresh?
Yes, but use half the amount of dried herbs compared to fresh. For example, 1 tablespoon dried thyme instead of ¼ cup fresh. While fresh herbs add brighter flavor, dried works in a pinch—just adjust to taste after cooking.

Trained in classic French technique but raised on slow-cooked ribs and spicy rubs, she blends culinary skill with smoke and soul.
- Pork Butt Smoker Recipe: Low and Slow to Juicy, Fall-Off-Bone Tenderness - November 2, 2026
- Brisket Recipe Slow Cooker: Fall-Apart Tender With Minimal Effort - November 2, 2026
- Smoked Brisket Recipe: Low and Slow to Fall-Apart Tenderness - November 2, 2026