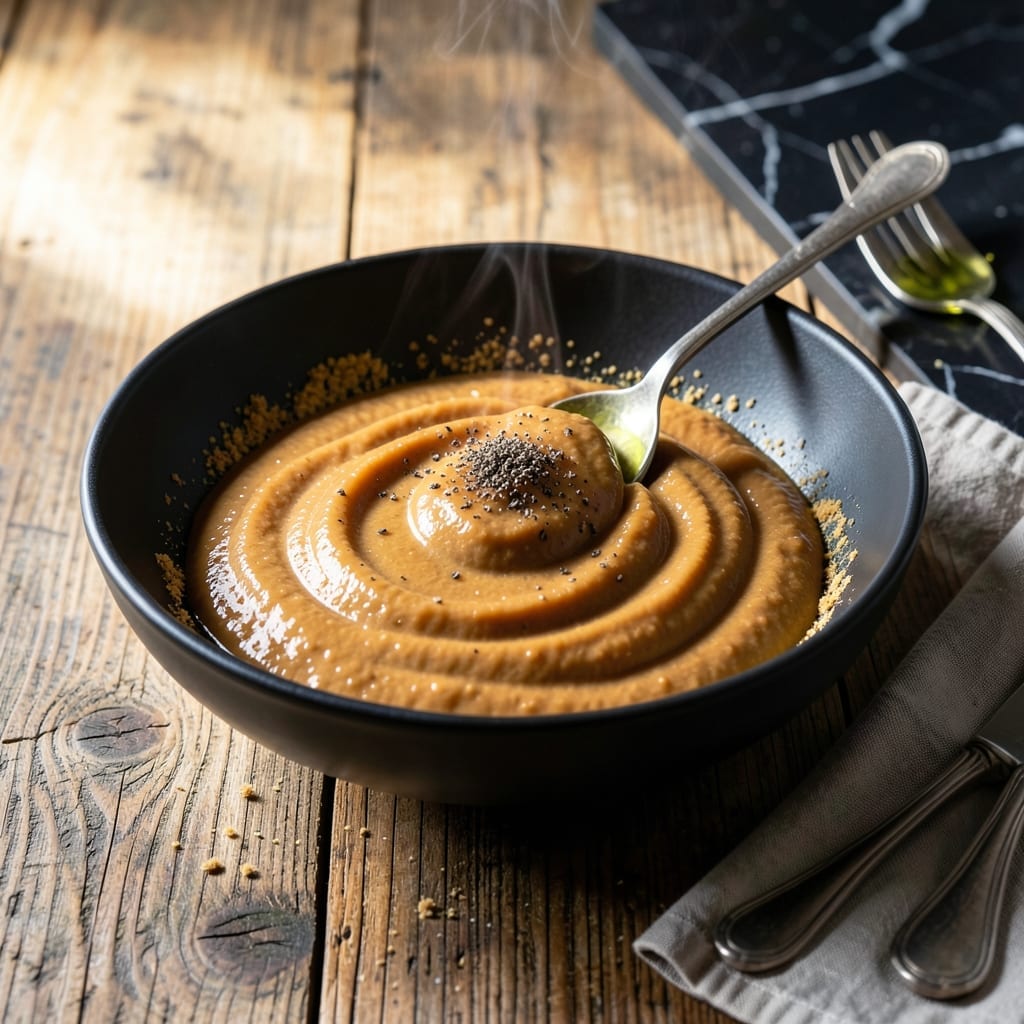
Mastering this sauce base transformed my cooking, bridging my French training with comfort food roots. This technique creates the foundation for rich, velvety sauces that elevate any dish.
The process is precise but simple: cook equal parts fat and flour to create a smooth paste, then slowly incorporate liquid. I use chicken fat for depth, but butter works equally well for a milder flavor.
What emerges is a smooth, thickened base that can become gravy, béchamel, or velouté with the right additions. The key is patience—rushing creates lumps instead of silky perfection.
Use this to build sauces for chicken, vegetables, or casseroles. The possibilities are endless once you’ve mastered the technique.
Ingredients for Chicken Roux
A few humble ingredients form the backbone of countless French-inspired sauces and gravies.
| Ingredient | Amount | Notes |
|---|---|---|
| Chicken Fat 🍗 | ½ cup | Rendered from chicken or store-bought |
| Unsalted Butter 🧈 | ½ cup | For milder flavor alternative |
| All-Purpose Flour 🌾 | 1 cup | Sifted for smooth texture |
| Whole Milk 🥛 | 2 cups | Warm for better incorporation |
| Chicken Stock 🍲 | 2 cups | Homemade or low-sodium preferred |
| Kosher Salt 🧂 | 1 tsp | Diamond Crystal brand recommended |
| White Pepper 🌶️ | ½ tsp | Freshly ground for best flavor |
| Fresh Thyme Sprigs 🌿 | 2 whole | Optional for aromatic depth |
| Bay Leaf 🍃 | 1 whole | Dried, for subtle complexity |
| Shallot 🧅 | 1 whole | Finely minced for base flavor |
[recipe_ingredient_scaler]
The fat is everything here. Rendered chicken fat adds unmatched depth (save it from roasting a chicken), but European-style butter (like Plugrá) works beautifully for a milder result. For store-bought chicken fat, Epic or Fatworks brands are excellent. The flour should be all-purpose—no substitutions—as its protein content creates the perfect structure for a velvety roux.
No chicken fat? Clarified butter or ghee (which has a higher smoke point) works in a pinch. For a dairy-free version, olive oil or vegetable oil can replace the butter, though the flavor will be less rich. The milk and stock should be warm—cold liquid can cause the roux to seize. If you’re making a dark roux for gumbo, double the cooking time but keep the heat low to avoid burning.
A finished roux keeps in the fridge for 3-4 days or can be frozen for up to 3 months. Store it in an airtight container with plastic wrap pressed directly on the surface to prevent a skin from forming. For best results, use it within a week—fresh roux has the most thickening power.
Why You’ll Love This Recipe
- One Pot Wonder: Between us, this comes together in a single saucepan with just chicken fat, butter, flour, and stock—no fancy tools required.
- Rich Comfort: The chicken stock and milk create this velvety, savory base that’s honestly ridiculous over mashed potatoes or rice.
- Meal Prep Magic: I make a big batch on Sunday and it transforms into gravy, soup starter, or casserole binder all week.
- Pantry Hero: Uses ingredients I always have on hand, and a little goes a long way to stretch meals without stretching my budget.
Step-by-Step Instructions for Chicken Roux
Master this foundational technique and you’ll create silky, flavorful sauces with professional results every time.
Step 1: Render and Combine the Fats
In a heavy-bottomed saucepan over medium heat, melt the 0.5 cup Chicken Fat and 0.5 cup Unsalted Butter together. I like to use a light-colored pan so I can monitor the color changes easily as the roux develops.
Stir occasionally with a wooden spoon until both fats are fully melted and combined. The mixture should be smooth and glossy, with no visible separation. This fat mixture is what gives your roux its rich, deep flavor foundation.
Step 2: Create the Roux Base with Flour
Gradually whisk in the 1 cup All-Purpose Flour to the melted fats, adding it in ¼ cup increments to prevent lumps. The mixture will initially look like wet sand, but keep whisking—it will smooth out as the flour absorbs the fat.
Continue cooking over medium heat for 5-7 minutes, stirring constantly, until the mixture turns a light golden color. This is a blonde roux, perfect for velouté and béchamel-based sauces. The aroma should be nutty and toasty, not burnt.
At this stage, you’ve created the base that will thicken your sauce. The key is constant motion—don’t walk away, as flour can burn quickly.
Step 3: Build Flavor with Aromatics
Add the finely minced Shallot to the roux and cook for 1-2 minutes until it softens and becomes translucent. The shallot adds a subtle, sweet depth to the sauce base without overpowering it.
Next, add the 2 whole Fresh Thyme Sprigs and 1 whole Bay Leaf. Stir for 30 seconds to bloom the herbs in the fat, releasing their aromatic oils. This step infuses the roux with layers of flavor that will carry through your final sauce.
Step 4: Incorporate Liquids for Velouté
Slowly pour in the 2 cups Chicken Stock, whisking constantly to prevent lumps. The mixture will thicken immediately as the liquid hits the hot roux. Keep the heat at medium and continue whisking until smooth.
Once the chicken stock is fully incorporated, add the 2 cups Whole Milk in the same manner. The sauce will become creamy and velvety. Bring the mixture to a gentle simmer, then reduce heat to low.
Step 5: Season and Simmer to Perfection
Stir in the 1 tsp Kosher Salt and 0.5 tsp White Pepper. The white pepper adds warmth without the visual specks of black pepper, keeping your sauce beautifully smooth in appearance.
Simmer the sauce for 10-15 minutes, stirring occasionally, until it reaches your desired consistency. It should coat the back of a spoon with a velvety texture. Taste and adjust seasoning if needed, then strain out the thyme sprigs and bay leaf before using.
This chicken roux is now ready to be the base for gravies, creamy soups, or any sauce where you want rich, savory depth. Use it immediately or store it in the refrigerator for up to 3 days.
Pro Tips For Making Chicken Roux
- Use Equal Fat-Flour: Measure your chicken fat and butter to match the flour by weight—this 1:1 ratio guarantees a smooth, lump-free roux every time. I learned this the hard way after too many grainy sauces.
- Whisk Constantly: Keep that whisk moving over medium-low heat for at least 5-7 minutes. Sounds tedious, but it’s the only way to cook the flour without scorching the butter or chicken fat.
- Warm Your Dairy: Take the whole milk and chicken stock out of the fridge 10 minutes before adding—cold liquid seizes up the roux and makes it clump. After ruining a batch, I now set a timer for this step.
- Strain for Silkiness: If your roux looks a little lumpy after adding the liquids, strain it through a fine-mesh sieve. It’s an extra 30 seconds that turns good gravy into restaurant-smooth sauce.
Troubleshooting Perfect Results
Lumpy Roux Rescue
If your roux looks like cottage cheese, don’t panic. Whisk in 1-2 tbsp cold water or milk to break up lumps. I learned this trick during my French training—it works like magic. Keep the heat low and whisk vigorously for 30-60 seconds. 💡
Burnt Flavor Fix
If you detect a burnt smell, immediately transfer your roux to a clean pot to stop cooking. Add ½ cup warm stock and whisk vigorously. Strain through a fine-mesh sieve if bits remain. Prevention is better: use medium-low heat and stir constantly.
Thin Sauce Solution
If your final sauce is too thin, mix 1 tbsp cornstarch with 1 tbsp cold water and whisk into the simmering sauce. Cook for 2-3 minutes until thickened. Alternatively, make a quick beurre manié with 1 tbsp butter and 1 tbsp flour, then whisk in.
Too Thick?
Thicken too much? Whisk in warm stock or milk 1 tbsp at a time until reaching desired consistency. I find chicken stock adds better flavor than water. Remember, the sauce will thicken slightly more as it cools. 🔥
Oil Separation
If fat separates on the surface, it means the roux wasn’t cooked long enough initially. Whisk vigorously while adding 1-2 tbsp cold liquid to re-emulsify. Next time, cook your roux for the full 5-7 minutes before adding liquids.
Color Concerns
For a blonde roux, stop cooking when it reaches a pale golden color. If it darkens too much, your sauce may taste bitter. Start over with fresh fat and flour, keeping the heat at medium and stirring constantly. Patience is your best tool here.
Nutrition Facts
Frequently Asked Questions
What’s the ideal fat-to-flour ratio?
Use equal parts by volume. For this recipe, that’s 1 cup fat (chicken fat + butter) to 1 cup flour. This creates the perfect balance for thickening without being too heavy or greasy.
How do I know when my roux is done?
It’s ready when it reaches a light golden color and smells nutty, after about 5-7 minutes of constant stirring. Stop at pale gold for velouté or cook longer for darker sauces like gumbo. Never let it brown too deeply.
Can I make this ahead of time?
Store in an airtight container in the fridge for 3-4 days or freeze for up to 3 months. Press plastic wrap directly on the surface to prevent a skin from forming.
Why did my sauce turn out grainy?
Graininess usually means the roux wasn’t cooked long enough before adding liquid. Cook for the full 5-7 minutes next time, stirring constantly. If it happens, whisk in 1-2 tbsp cold milk to smooth it out.

Trained in classic French technique but raised on slow-cooked ribs and spicy rubs, she blends culinary skill with smoke and soul.
- Recipe for Boneless Pork Chops in Cast Iron Skillet: Sear and Baste to Juicy Perfection - October 3, 2026
- Recipe for Boneless Cross Rib Roast: Slow-Roasted Beef with Herb Crust - October 3, 2026
- Hamburgers in Sauce Recipe Crock Pot: Slow-Cooked Savory Delight - October 3, 2026