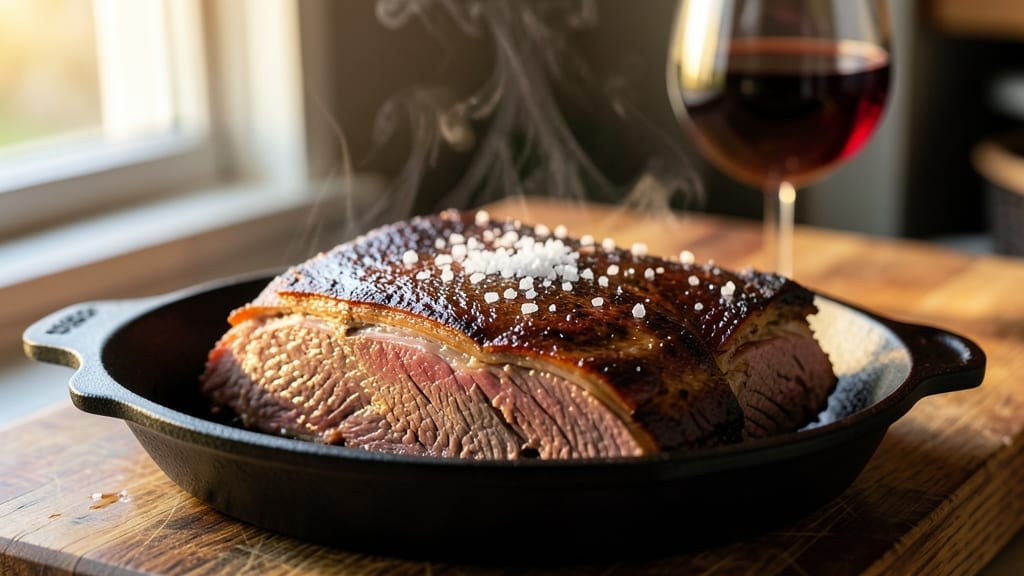
This corned beef brisket Dutch oven recipe turns a humble cut into a fork-tender, edge-crisp masterpiece that steals every meal. The secret lies in balancing traditional pickling spices with precise braising techniques, where the Dutch oven’s retained heat creates an ideal environment for deep flavor development.
I’ve perfected this method over years of testing, ensuring every bite delivers that perfect harmony of smoky, tangy, and savory notes that define a great corned beef dish.
What sets this recipe apart is the combination of slow simmering and final crisping—key steps that elevate it beyond basic pot roast. The Dutch oven’s heavy walls distribute heat evenly, preventing hot spots that can dry out the meat, while the lid traps steam to keep the brisket moist.
You’ll start with a well-seasoned brisket, then let the spices infuse over hours, resulting in meat that practically falls apart when pulled. The crispy edges? That comes from a quick sear in a hot skillet after braising, adding texture contrast that makes every bite exciting.
By the time you serve this dish, your table will be filled with the rich aroma of slow-cooked meat and aromatic spices, and your guests will be reaching for seconds without hesitation.
The crispy edges add a satisfying crunch, while the tender interior melts in your mouth—a perfect balance that turns a weeknight dinner into a memorable experience. Whether you’re feeding a crowd or treating yourself to a special meal, this recipe delivers restaurant-quality results at home.
Ready to tackle this project? The process is straightforward once you understand the key techniques—prepping the meat, building the flavor base, and managing the cooking time. We’ll walk through each step in detail, including tips for adapting the recipe to your schedule or equipment.
Let’s get started on creating a corned beef brisket that will have everyone asking for the recipe.
Ingredients for corned beef brisket dutch oven
A few simple ingredients transform humble brisket into restaurant-quality Dutch oven magic.
| Ingredient | Amount | Notes |
|---|---|---|
| Beef Brisket 🥩 | 4 lb | Whole packer cut, trimmed of excess fat |
| Yellow Onions 🧅 | 2 whole | Sliced into 1/2-inch pieces |
| Carrots 🥕 | 4 whole | Cut into 2-inch chunks |
| Garlic Cloves 🧄 | 8 cloves | Smashed but not minced |
| Bay Leaves 🌿 | 4 whole | Fresh preferred for aroma |
| Mustard Seeds 🌶️ | 1 tbsp | Whole, lightly toasted |
| Black Peppercorns 🌶️ | 1 tbsp | Crushed, not ground |
| Allspice Berries 🌿 | 1 tsp | Whole, lightly crushed |
| Kosher Salt 🧂 | 2 tbsp | Plus extra for seasoning |
| Apple Cider Vinegar 🍎 | 1 cup | For tangy depth |
| Beef Broth 💧 | 2 cups | Low-sodium preferred |
| Dark Brown Sugar 🍯 | ½ cup | Packed for moisture |
| Olive Oil 🫒 | 2 tbsp | For searing brisket |
| Fresh Thyme 🌿 | 2 sprigs | Or 1 tsp dried thyme |
[recipe_ingredient_scaler]
The brisket is everything here. Look for a well-marbled packer cut from the grocery store’s butcher counter—the fat keeps it moist during hours of cooking. If your store doesn’t have it pre-cut, ask for the whole brisket and trim it yourself (the pointy end is tougher, so save that for stock). For spices, Penzeys or bulk bins give the best flavor, but the regular grocery store stuff works fine if it’s fresh. The key is toasting the mustard seeds and peppercorns in a dry pan for 30 seconds before adding liquid—this unlocks their aroma. I always grab extra bay leaves too; they disappear into the pot but add serious depth.
No apple cider vinegar? White vinegar or red wine vinegar works in a pinch, though apple adds that perfect tang. Running short on thyme? Fresh rosemary at half the amount gives a different but equally delicious profile. The carrots can be baby carrots if that’s what’s in your fridge, but the chunks hold up better to long cooking. For the broth, low-sodium is critical—you’ll be adding salt anyway. If you’re in a hurry, beef bouillon powder works (just dissolve it in hot water first). And trust me on the brown sugar—it caramelizes slightly during cooking, adding a subtle sweetness that balances the tang.
This keeps beautifully for 4-5 days in the fridge, and the flavor actually improves as it sits. I like to portion it into individual containers so I can grab leftovers for sandwiches all week. For longer storage, freeze it in the same Dutch oven—just thaw overnight in the fridge before reheating. The crispy edges? They’re best eaten fresh, so save that step for when you’re ready to serve. If you’re making this ahead, just skip the final sear until serving day—it reheats beautifully, and you can always crisp it up again in a hot skillet.
Why You’ll Love This Recipe
- I’ll be real: this is the ultimate meal prep. The flavor gets better as it sits, so you’re left with a fridge full of corned beef that’s practically begging to be reheated. Toss it in a sandwich, pile it over mashed potatoes, or just eat it straight with a fork. My kids even ask for leftovers—no small feat for a family that’s picky about repetition.
- One-Pot Magic: Honestly, this is the kind of recipe where you throw everything in one Dutch oven and forget about it—except for the occasional peek. No messy prep, no multiple pans, just that deep, savory aroma filling your kitchen. The onions and carrots caramelize right alongside the brisket, soaking up all those toasted mustard seeds and crushed peppercorns while you do other things.
- Tangy-Sweet Perfection: Between the apple cider vinegar and dark brown sugar, this isn’t your basic brisket—it’s got layers. The vinegar cuts through the richness, while the sugar caramelizes into that glossy sauce that clings to every crispy edge. That first bite? The garlic and thyme hit first, then the meat melts like butter. It’s the kind of dish that makes you go back for seconds without thinking.
- Fridge Goldmine: I’ll be real: this is the ultimate meal prep. The flavor gets better as it sits, so you’re left with a fridge full of corned beef that’s practically begging to be reheated. Toss it in a sandwich, pile it over mashed potatoes, or just eat it straight with a fork. My kids even ask for leftovers—no small feat for a family that’s picky about repetition.
Step-by-step instructions for corned beef brisket Dutch oven recipe
Here’s how to transform a tough brisket into melt-in-your-mouth perfection with crispy edges.
Sear the Brisket to Lock in Flavors
Heat a heavy Dutch oven over medium-high heat. Add the 2 tbsp olive oil and swirl to coat the bottom evenly. Place the 4 lb beef brisket fat-side down in the pot and let it sear undisturbed for 8-10 minutes until a deep golden crust forms. This step is crucial—it creates that crispy edge you’re after while sealing in juices.
Flip the brisket and sear the other side for another 6-8 minutes. The fat should render out and become bubbly. Remove the brisket and set it aside on a plate—it’ll rest while we build the flavor base. Don’t rush this; patience now means better texture later.
Build the Flavor Base with Aromatics
In the same Dutch oven (those browned bits are pure flavor), add the 2 yellow onions and 4 carrots cut into chunks. Cook for 5 minutes until they begin to soften and release their sweetness. Add the 8 smashed garlic cloves, 1 tbsp mustard seeds, 1 tbsp crushed black peppercorns, and 1 tsp crushed allspice berries. Stir everything together and cook for another 2 minutes until fragrant.
Here’s where the magic happens: Pour in the 1 cup apple cider vinegar and scrape up all those delicious browned bits from the bottom. The vinegar will deglaze the pan, creating a tangy foundation for your corned beef. Let it simmer for 3 minutes until the liquid reduces by half. Add the 2 sprigs fresh thyme, 4 bay leaves, and 2 tbsp kosher salt, stirring to combine. This aromatic blend will infuse the brisket with deep, complex flavors.
Slow-Simmer the Brisket to Tenderness
Return the seared brisket to the Dutch oven, fat-side up. Pour in the 2 cups beef broth and sprinkle the ½ cup dark brown sugar over the top. The sugar will caramelize slightly during cooking, adding another layer of richness. Bring everything to a gentle simmer over medium-low heat.
Cover the Dutch oven and let it cook for 2.5 to 3 hours, maintaining a steady simmer. Here’s the key: The liquid should bubble gently but not boil vigorously. Check occasionally and add ½ cup water if it reduces too much. You’re looking for a brisket that’s fork-tender but still holds its shape when pierced. The edges should develop a beautiful caramelized crust from the sugar and vinegar.
Finish with Crispy Edges and Rich Sauce
Once the brisket reaches 200-203°F internal temperature (about 30 minutes into the final hour), increase the heat to medium-high and uncover the pot. Let the liquid reduce by half again—this concentrates the flavors and creates that glossy, slightly thickened sauce. The brisket should develop crispy edges as the moisture evaporates.
Remove the brisket and let it rest for 15 minutes before slicing. This resting period is essential—it allows the juices to redistribute throughout the meat. While it rests, skim any excess fat from the sauce and adjust seasoning if needed. Serve the brisket sliced against the grain with the rich pan sauce spooned over the top. The contrast of tender meat with crispy edges and tangy-sweet sauce makes this dish unforgettable.
Pro Tips For Making Corned Beef Brisket Dutch Oven
- CRISP THE FAT FIRST: That first sear isn’t just about color—it’s about rendering the fat slowly into crispy, flavor-packed bits. I used to rush this, but now I let the brisket sit fat-side down for the full 8-10 minutes, even if it means staring at it like a hawk. Those golden shards are the secret to the sauce’s depth, so resist the urge to flip early.
- TOAST THE SPICES: Lightly toast the mustard seeds and allspice berries in the Dutch oven for 30 seconds before adding the vinegar. I learned this the hard way—skipping it makes them release bitterness instead of warm, nutty aroma. Just until they smell like a spice shop, not smoke.
- DON’T LET IT BOIL: A rolling boil turns tough meat mushy. After adding the broth, adjust the heat so the liquid just shivers—tiny bubbles at the edges, maybe one or two breaking the surface. I used to walk away and come back to a pot of watery brisket. Now I check every 15 minutes and add water before it gets desperate.
- SKIP THE CROWDING: If your Dutch oven looks packed after adding onions, carrots, and brisket, you’ve gone too far. The veggies should fit in a single layer, and the brisket should have room to breathe. I once stuffed mine in tight—ended up with soggy onions and a brisket that didn’t caramelize. Trust me, the pot’s not that small.
Pro cooking tips for corned beef brisket dutch oven
Mastering the Sear
That initial sear is where this dish gets its signature crispy edges—don’t skip it! Use a heavy Dutch oven and medium-high heat to develop that golden crust. I swear by letting the fat render undisturbed for 8-10 minutes on each side.
The key is patience: resist the urge to flip too soon. That bubbly fat is your friend—it’s what creates the delicious, caramelized crust you’ll love. 🔥
Spice Toasting Trick
Toasting your mustard seeds and peppercorns in a dry pan for 30 seconds before adding liquid unlocks their full aromatic potential. I use a cast-iron skillet for this step—it heats up fast and distributes heat evenly.
This tiny detail transforms bland spices into the aromatic foundation of your dish. Don’t skip it!
Liquid Control
The secret to perfect texture is maintaining a gentle simmer throughout the cooking process. If your liquid reduces too quickly, add ½ cup water to keep the brisket moist.
I check every 30 minutes and adjust as needed. Overly dry meat is a common mistake—this simple check saves the day. The goal is tender meat, not dry meat!
Final Crisp Boost
For those perfect crispy edges, uncover the Dutch oven during the last 30 minutes of cooking. This evaporates excess moisture and lets the sugar caramelize, creating that beautiful, glossy finish.
I also recommend using a wooden spoon to gently press down on the brisket edges—this helps crisp them up faster. It’s a game-changer!
Resting is Non-Negotiable
After removing the brisket from the oven, let it rest for at least 15 minutes before slicing. This allows the juices to redistribute evenly throughout the meat. I’ve learned this the hard way—slicing too soon means dry, tough bites.
Trust me, it’s worth the wait! The brisket will thank you with every tender, juicy slice. ✨
Nutrition facts
Frequently asked questions
Why does my Dutch oven need to be heavy for this recipe?
A heavy Dutch oven distributes heat evenly, preventing hot spots that can dry out the brisket. The thick walls also retain heat better, ensuring the brisket cooks gently and consistently. This helps develop that perfect crispy edge while keeping the interior tender.
What if my brisket isn’t fork-tender after 3 hours?
Check the internal temperature—it should reach 200-203°F. If it’s lower, cover and cook another 30-60 minutes, adding ½ cup water if needed. Undercooked brisket can often be saved by extending simmer time. Patience is key!
Can I use pre-cooked or frozen brisket?
Pre-cooked brisket works but may need 1-2 extra hours to re-tenderize. Frozen brisket should thaw completely first—thaw in the fridge overnight. Never cook frozen meat directly in the Dutch oven. Always start with room-temperature meat for even cooking.
How do I prevent the sauce from getting too watery?
Simmer uncovered during the last 30 minutes to reduce the liquid by half. Skim excess fat before serving, and if needed, thicken the sauce with a cornstarch slurry (1 tbsp cornstarch mixed with 2 tbsp cold water). This balances the tangy-sweet flavors beautifully.

Trained in classic French technique but raised on slow-cooked ribs and spicy rubs, she blends culinary skill with smoke and soul.
- Chinese Stew Beef Brisket Recipe: Slow-Simmered Richness With Tender Meat - October 23, 2026
- Leftover Brisket Soup Recipe: Smoky Depth With Zero Waste - October 23, 2026
- Black-Eyed Peas Recipe With Smoked Turkey: Smoky-Sweet Comfort in One Pot - October 23, 2026