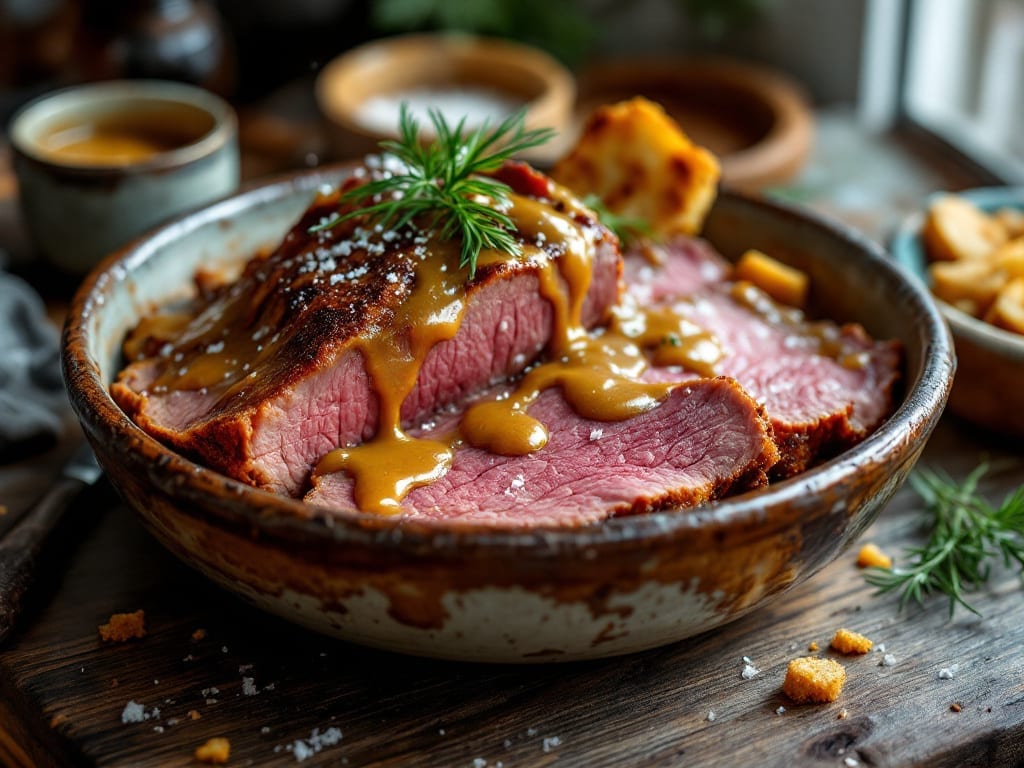
This tender corned beef brisket recipe turns tough cuts into melt-in-your-mouth perfection with crispy edges and deep, aromatic flavors through slow simmering. The secret lies in a precise blend of spices and a slow-cooking method that breaks down collagen into tender, juicy meat. After years of testing, I’ve perfected this technique to deliver restaurant-quality results at home—no special equipment required.
This recipe focuses on two critical techniques: a flavorful brine that penetrates the meat overnight, and a controlled cooking process that ensures even tenderness. The brisket cooks low and slow, allowing the spices to meld while the edges develop that coveted crispy texture.
With careful timing and attention to detail, you’ll achieve a brisket that’s so tender it practically falls apart with a fork.
By the end, you’ll have a brisket that’s rich in flavor, perfectly tender throughout, and with edges that are crisp enough to stand up to shredding. The aroma alone will have everyone gathering around the table, and each slice will reveal layers of spice and moisture.
This is the kind of dish that elevates a simple meal into a memorable experience.
Serve with classic sides like coleslaw, roasted potatoes, or crusty bread to soak up every bit of the flavorful juices. The leftovers reheat beautifully, making this an ideal recipe for meal prep or feeding a crowd. Let’s get started on creating your perfect corned beef brisket.
Ingredients for tender corned beef brisket
Sixteen ingredients transform tough brisket into melt-in-your-mouth perfection with crispy edges and restaurant-quality depth.
| Ingredient | Amount | Notes |
|---|---|---|
| Corned Beef Brisket 🥩 | 4 lb | Packer cut, 1-1.5 inch thick |
| Yellow Mustard 🍯 | ¼ cup | For binding brine ingredients |
| Kosher Salt 🧂 | ¾ cup | Non-iodized preferred |
| Brown Sugar 🍚 | ½ cup | Light or dark variety |
| Black Peppercorns 🌶️ | 2 tbsp | Freshly cracked preferred |
| Bay Leaves 🍃 | 4 whole | Fresh or high-quality dried |
| Garlic Cloves 🧄 | 8 cloves | Peeled, smashed slightly |
| Onions 🧅 | 2 whole | Yellow or red, sliced |
| Beer 🍺 | 2 cups | Dark lager or stout preferred |
| Water 💧 | 4 cups | For brine and cooking liquid |
| Apple Cider Vinegar 🍏 | ¼ cup | For tangy depth |
| Cloves 🌿 | 6 whole | Whole, for aromatic punch |
| Allspice Berries 🌶️ | 1 tbsp | Crushed lightly for warmth |
| Juniper Berries 🌿 | 1 tbsp | Optional, for earthy depth |
| Cornstarch 🌾 | ¼ cup | For crispy edges |
[recipe_ingredient_scaler]
The brisket cut is everything here. Packer cut (1-1.5 inches thick) delivers the best balance of tenderness and surface area for crisping. Most butchers will trim it for you, but if you’re buying whole, look for even thickness and good marbling. Costco and local butcher shops are your best bets for quality—avoid pre-packaged briskets at regular grocery stores, as they often lack the fat needed for flavor and moisture. If you can’t find packer cut, flat cut works, but expect slightly longer cooking time. The key is to choose a piece that’s well-marbled and fresh—it should smell clean and bright, not sour or ammonia-like.
No allspice or juniper berries? Substitute with 1 tsp ground allspice and 1/2 tsp ground cinnamon for warmth. Running low on bay leaves? Dried thyme at 1 tbsp adds similar earthiness. The beer is non-negotiable for depth—if you must skip it, use 2 cups beef broth plus 1 tbsp Worcestershire sauce. For the brine, Diamond Crystal kosher salt dissolves better than table salt. The cornstarch for crispy edges? Arrowroot powder works too, but cornstarch gives that classic crunch. Fresh garlic and onions are ideal, but frozen chopped works in a pinch if you’re short on time.
Brined brisket keeps 3-4 days in the fridge before cooking—use that time to prep other components. The cooked brisket reheats beautifully, but for best texture, reheat in the oven at 300°F for 15-20 minutes with a splash of beef broth. Leftovers freeze for up to 3 months when properly wrapped. For meal prep, slice against the grain and portion into airtight containers with a little rendered fat to keep slices moist. The crispy edges lose their crunch when reheated, so save those for the first serving where they truly shine.
Why You’ll Love This Recipe
- I’ll be real: this brisket is so tender that even the second day is a win. Slice it thin for sandwiches, toss it into hash the next night, or just reheat it straight up—it’s the kind of meal that keeps giving without losing its charm.
- Here’s what sold me: it’s the perfect centerpiece for gatherings, but it won’t stress you out. Whether it’s a holiday spread or a lazy weekend brunch, this brisket holds its own—and the cleanup? One sheet pan, one spatula, done.
Step-by-step instructions for tender corned beef brisket
This method delivers melt-in-your-mouth tenderness with perfectly crispy edges every time.
Prepare the Spice Rub and Brine
In a medium bowl, combine the 0.75 cup kosher salt, 0.5 cup brown sugar, 2 tbsp cracked black peppercorns, 4 whole bay leaves (lightly crushed), 8 cloves smashed garlic, 6 whole cloves, 1 tbsp crushed allspice berries, and 1 tbsp crushed juniper berries. Mix thoroughly until evenly distributed. Add the 0.25 cup yellow mustard and stir until fully incorporated – this helps bind the spice mixture to the meat.
Place the 4 lb corned beef brisket in a large resealable plastic bag or deep dish. Pour the spice mixture over the brisket, coating it completely on all sides. Add the 0.25 cup apple cider vinegar and massage it into the meat. Seal the bag and refrigerate for 12-24 hours, turning occasionally. This step ensures deep flavor penetration and helps tenderize the meat through osmosis.
Build the Cooking Liquid
In a large Dutch oven or heavy pot with a tight-fitting lid, combine the 4 cups water and 2 cups beer. Bring to a simmer over medium-high heat until small bubbles form around the edges. This liquid will form the flavor base for your brisket.
While the liquid heats, peel and slice the 2 whole onions into ¼-inch thick rounds. Add them to the pot along with the 4 whole bay leaves. Simmer for 5 minutes until the onions soften slightly and the liquid develops a subtle aromatic depth. This preparation layer creates a flavorful foundation that will infuse the brisket during cooking.
Slow-Simmer the Brisket
Remove the brisket from the refrigerator and pat it dry with paper towels. This step is crucial for developing crispy edges. Place the brisket in the Dutch oven, fat-side up, and pour enough of the hot cooking liquid over it to cover completely by about 1 inch. Bring to a gentle simmer over medium-low heat – you should see just small bubbles breaking the surface occasionally.
Cover with the lid and maintain this low simmer for 3-4 hours. The goal is to keep the temperature between 190-200°F – this slow cooking transforms the tough brisket into tender, fork-tender meat. Check the liquid level occasionally and add hot water as needed to maintain the 1-inch coverage. The brisket is ready when it reaches an internal temperature of 205°F at its thickest point and a fork slides in easily.
Create the Crispy Edges
Once the brisket reaches 205°F, carefully remove it from the pot and place it on a wire rack set over a baking sheet. This elevated position allows air circulation for crisping. In a small bowl, whisk together the 0.25 cup cornstarch with ¼ cup of the reserved cooking liquid until smooth. Brush this mixture generously over the top of the brisket, focusing on the edges and any exposed surfaces.
Return the brisket to the pot (fat-side up) and place it in a 400°F preheated oven for 20-25 minutes. The high heat will crisp the edges while keeping the interior tender. You’ll know it’s perfect when the surface develops a deep golden-brown crust that crackles when touched. This final step creates the signature crispy texture that contrasts beautifully with the tender interior.
Rest and Serve
Remove the brisket from the oven and transfer it to a cutting board. Tent loosely with aluminum foil and let it rest for 15-20 minutes. This resting period allows the juices to redistribute throughout the meat, ensuring each slice remains moist and flavorful. During this time, skim any fat that has risen to the surface of the cooking liquid and reserve 1 cup of the flavorful broth for serving.
Slice the brisket against the grain into ¼-inch thick slices and arrange on a platter. Pour the reserved cooking liquid over the slices and serve immediately. The result should be perfectly tender meat with crispy edges, infused with deep, complex flavors from the slow-simmered spice blend. Each bite should deliver both the satisfying texture contrast and rich, aromatic depth promised by this recipe.
Pro Tips For Making Tender Corned Beef Brisket
- SCORE THE FAT: Use a sharp chef’s knife to cut shallow slits (about ¼-inch deep) into the fat cap before cooking. This lets the brown sugar and mustard penetrate deeper—no, it won’t make the meat fall apart, but it’ll give you that sticky, caramelized crust you’re after.
- SALT THE NIGHT BEFORE: If your brisket isn’t pre-cured, sprinkle kosher salt generously over the surface 12–24 hours ahead. Let it sit uncovered in the fridge—this draws out moisture, so when you sear it, the crust forms faster and sticks better. (Yes, it’s messy, but worth it.)
- CRUSH THOSE PEPPERCORNS: Skip the pre-ground pepper—crack whole black peppercorns with the flat side of your knife and scatter them directly on the brisket. They toast into tiny, aromatic nuggets during cooking, adding depth the jarred stuff can’t match. (And they’re easier to control.)
- BASTE WITH PATIENCE: Don’t drown the brisket in mustard—brush on a thin layer every 30 minutes in the last hour of cooking. The mustard burns fast, and you’ll end up with bitter smoke instead of that tangy glaze. Less is more; trust the process.
Essential equipment for tender corned beef brisket
Dutch Oven Essentials
Your Dutch oven is the workhorse of this recipe—I recommend a 5-6 quart enameled cast iron like the Lodge 5.5 Qt or Le Creuset Stoneware. The heavy base distributes heat evenly for consistent simmering, while the tight lid traps steam to tenderize the brisket.
Look for one with two loop handles for safe maneuvering when full of liquid. If you don’t own one, a heavy-bottomed stainless steel pot with a lid works, though it may take slightly longer to heat. 🔥
Precision Thermometer
An instant-read meat thermometer is non-negotiable for perfect results. I swear by the ThermoWorks Smoke or Meater—both have bluetooth connectivity to track internal temps wirelessly. Insert the probe into the thickest part of the brisket and monitor as it approaches 205°F.
For the simmering liquid, a candy or deep-fry thermometer helps maintain 190-200°F without guessing. Without one, you risk overcooking or undercooking the meat. 🌡️
Wire Rack for Crisping
The crispy edges are what make this brisket special, and a wire rack is your secret weapon. Place it over a baking sheet to elevate the brisket during the final 400°F oven step. I use a stainless steel rack from OXO or a foldable cooling rack—both work perfectly.
This elevation allows air to circulate, creating that golden-brown crust while keeping the interior juicy. No rack? Use a trivet or even a clean cake cooling rack in a pinch. ⚡
Mixing Bowls and Whisk
For the spice rub and cornstarch slurry, grab a medium stainless steel bowl (like OXO Good Grips) and a whisk for smooth mixtures. The cornstarch slurry needs to be lump-free—I use a small whisk to ensure no clumps remain.
A measuring cup and spoon help with precise ingredient ratios, especially for the 0.25 cup cornstarch and 0.25 cup apple cider vinegar. Avoid plastic bowls for the brine—they can absorb odors. 💡
Tongs for Handling
Kitchen tongs are your best friend when transferring the brisket from pot to rack and back. I prefer heavy-duty stainless steel tongs like Mercer Culinary Genesis—they handle the weight and heat without warping. Avoid flimsy silicone or plastic tongs, as they can melt or tear when handling hot, wet meat. These tongs also help flip the brisket if needed during the simmering phase. 💪
Optional: Immersion Circulator
For next-level precision, an immersion circulator (like Breville Joule) lets you control the simmering temperature to within 1°F. This eliminates the guesswork of maintaining 190-200°F on the stovetop.
If you’re serious about low-and-slow cooking, this is a game-changer—but it’s not essential for this recipe. A well-regulated stovetop or oven can still deliver fantastic results. ✨
Nutrition facts
Frequently asked questions
Why does the recipe call for a 12-24 hour brine?
The extended brine time is key for two reasons: it tenderizes the tough brisket fibers through osmosis, and it ensures deep flavor penetration. The salt and spices need time to work their magic, breaking down proteins while infusing every inch of the meat. For best results, don’t skip the minimum 12 hours—this is where the magic happens!
Can I use a different cut of beef instead of brisket?
While brisket is ideal for this recipe, you could substitute with chuck roast or short ribs for similar results. However, avoid leaner cuts like sirloin—they won’t develop the same rich texture. The cooking time may vary slightly depending on the cut’s thickness and fat content, so use your meat thermometer as the guide.
What if my brisket isn’t tender after 3-4 hours?
If your brisket isn’t fork-tender at 205°F, it likely needs more time. Extend the simmering by 1-2 hours and check again—patience is key! For stubborn tough spots, try increasing the temperature slightly (210°F) for the final 30 minutes. Never rush this step, as brisket needs that slow breakdown to become truly tender.
How can I make this recipe ahead of time?
The brined brisket keeps for 3-4 days in the fridge before cooking, making it perfect for meal prep. For leftovers, store cooked brisket in airtight containers with some cooking liquid to keep it moist. Reheat gently in the oven at 300°F for 15-20 minutes—microwaving can make it dry. The crispy edges won’t survive reheating, but the tender meat will still be delicious!
What’s the best way to serve this brisket?
This rich, tender brisket pairs perfectly with classic sides like creamy coleslaw, buttery mashed potatoes, or crusty bread to soak up the juices. For a full meal, try serving with roasted root vegetables or a simple green salad. The flavorful cooking liquid makes an excellent gravy—just strain and reduce it with a cornstarch slurry for thickness.

Trained in classic French technique but raised on slow-cooked ribs and spicy rubs, she blends culinary skill with smoke and soul.
- Masterbuilt Smoker Beef Brisket Recipe: Bark-To-Meat Ratio Hack for Unmatched Flavor - October 15, 2026
- Costco Beef Brisket Recipe: Low-and-Slow Masterpiece With Molasses-Kissed Crust - October 15, 2026
- Smoked Herring Recipe: Scandinavian-Style With Dill and Mustard Cream - October 15, 2026