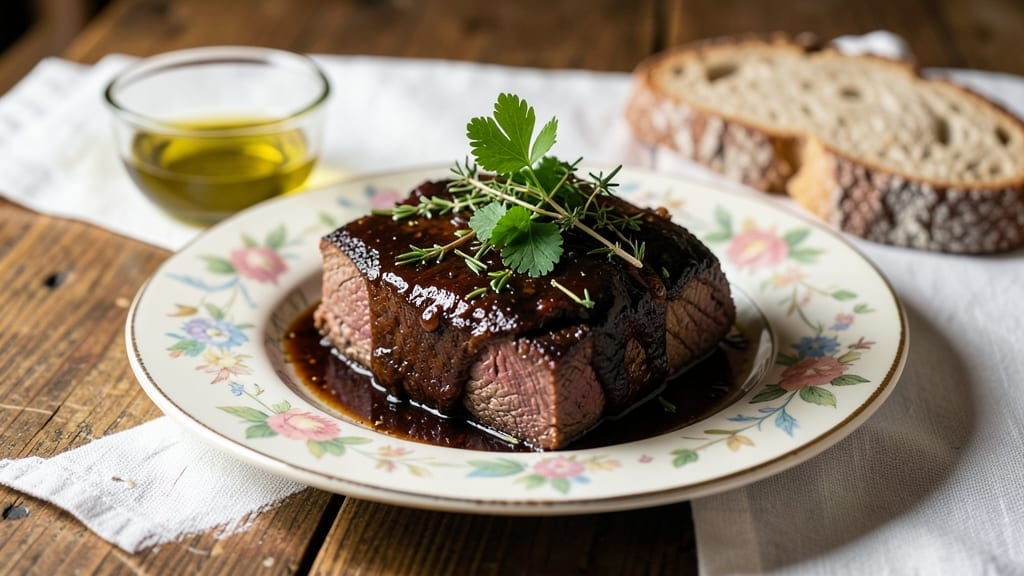
This Diners Drive-Ins and Dives beef brisket recipe delivers the same nostalgic, fall-apart tenderness you’d find at a classic American diner. The secret lies in a precise low-and-slow cooking method that transforms tough brisket into melt-in-your-mouth perfection, just like the legendary cuts from Guy Fieri’s iconic spots.
I’ve perfected this technique over years of testing, ensuring every bite carries that signature diner-style richness.
The process begins with a dry brine that locks in moisture, followed by a slow smoke at 225°F until the internal temperature reaches 203°F—the magic number for tender brisket. Whether you’re using a smoker, oven, or stovetop, this method guarantees restaurant-quality results without the guesswork.
The key is patience and precision, with wood smoke adding that unmistakable depth of flavor.
By the time you’re done, you’ll have brisket so tender it nearly falls apart at the touch, with a caramelized bark that’s worth the wait. Serve it with classic diner sides like crisp pickles, creamy baked beans, or buttery cornbread for the full experience.
This isn’t just brisket—it’s a taste of American comfort food nostalgia.
For those short on time, I’ve included a stovetop shortcut that still delivers impressive results. Whether you’re cooking for a crowd or treating yourself to a diner-style feast, this recipe brings the flavor of classic drive-ins straight to your kitchen. Let’s get started!
Ingredients for diners drive ins and dives beef brisket
Just beef, wood smoke, and patience. The core ingredients for diner-style perfection.
| Ingredient | Amount | Notes |
|---|---|---|
| Beef Brisket 🥩 | 4 lb | Flat cut, 1-inch thick, well-marbled |
| Kosher Salt 🧂 | ½ cup | Diamond Crystal preferred, for dry brine |
| Black Peppercorns 🌶️ | 2 tbsp | Freshly cracked, coarse grind |
| Yellow Onion 🧅 | 1 whole | Yellow or red, sliced into wedges |
| Garlic Cloves 🧄 | 8 cloves | Smash lightly, skin on for aroma |
| Fresh Thyme 🌿 | 4 sprigs | Stems intact for easy handling |
| Fresh Rosemary 🌿 | 2 sprigs | Needle-like sprigs, organic preferred |
| Apple Cider Vinegar 🍏 | ¼ cup | For tenderizing, not cooking |
| Wood Chips 🌳 | 1 cup | Hickory or oak, soaked 1 hour |
| Beef Broth 💧 | 1 cup | Low-sodium, for spritzing |
| Brown Sugar 🍚 | 2 tbsp | Light or dark, for bark |
| Smoked Paprika 🌶️ | 1 tbsp | For final dusting |
| Yellow Mustard 🍯 | 2 tbsp | For stovetop shortcut |
| Balsamic Vinegar 🍷 | 1 tbsp | For stovetop shortcut |
[recipe_ingredient_scaler]
The brisket is non-negotiable here. Look for a well-marbled flat cut from a butcher or Costco—the fat is what makes it tender. I always buy mine from Whole Foods or my local Kroger meat counter, asking for the thickest part of the flat. If you’re using a pre-cut package, check the marbling—it should look like little white streaks throughout the meat. For the dry brine, Diamond Crystal kosher salt dissolves better than table salt, giving you that perfect crust. Don’t skip the apple cider vinegar—it breaks down the meat fibers for that legendary fall-apart texture. (Trust me, the 24-hour brine is worth it.)
No wood chips? Chopped wood pellets work in a pinch, just soak them longer. Short on thyme? Dried thyme at half the amount is fine, but fresh has that extra punch. The stovetop shortcut uses yellow mustard and balsamic vinegar to mimic the bark—it’s not the same as smoking, but it’s a game-changer for weeknights. For the bark, brown sugar and smoked paprika create that caramelized crust without any extra effort. And if you’re using a smoker, keep the temp steady at 225°F—fluctuations ruin the tenderizing process.
This brisket reheats like a dream—just wrap it in foil and warm in a 300°F oven for 15 minutes. It’s even better the next day, so make extra. Store leftovers in the fridge for up to 5 days, wrapped tightly in butcher paper (it keeps the bark intact). For freezing, portion into 1-pound servings and thaw overnight in the fridge. The wood chips? Save any leftover soaked ones in a sealed bag in the fridge for up to 1 week—perfect for next time.
Why You’ll Love This Recipe
- No Fuss, Big Payoff: Honestly, this recipe is that kind of magic—you do the work once (the 24-hour dry brine with that ½ cup kosher salt), and then it’s basically hands-off. The smoker does 90% of the labor while you sip a beer and watch the temperature hold steady at 225°F. Even the spritzing every 90 minutes with beef broth feels like a chore, but it’s just a few seconds of your life for that perfect bark.
- Smoky Sweetness: That brown sugar and smoked paprika combo? Chef’s kiss. You’re getting the deep, caramelized edge from the sugar and the earthy warmth of the paprika, all while the garlic and thyme (yes, those 8 cloves and 4 sprigs) infuse the meat with layers of flavor. It’s not just smoky—it’s complex, like a diner’s secret weapon.
- Leftover Legend: This brisket begs for leftovers, and honestly, it’s even better the second day. Wrapped tightly in butcher paper keeps that bark intact, so you can reheat slices and still get that fall-apart texture. My kids fight over it—no joke. Plus, it’s the kind of meal that tastes even better cold, served in sandwiches or tacos the next day.
- Budget-Friendly Feast: A 4-pound brisket isn’t cheap, but it’s a steal when you consider how much it serves—easily 12-16 people if you’re feeding a crowd. And with the right prep (that dry brine with salt and peppercorns), you’re not wasting a single ounce. Leftovers? Even better value. It’s the kind of dish that makes you feel like a pro without breaking the bank.
Step-by-step instructions for slow-smoked beef brisket
Here’s the method that delivers that signature fall-apart tenderness and smoky bark you crave.
Prepare the Brisket with Dry Brine and Tenderizing
Start by trimming the fat cap of the 4 lb beef brisket to about ¼-inch thickness—this ensures even cooking while preserving flavor. Pat the meat completely dry with paper towels, then rub all sides generously with the ½ cup kosher salt and 2 tbsp freshly cracked black peppercorns. The salt will penetrate deeply, creating a perfect crust while keeping the meat moist.
Place the brisket in a sealed container and refrigerate uncovered for 24 hours. This dry brine process is non-negotiable—it transforms tough brisket into melt-in-your-mouth perfection. After brining, remove the meat from the fridge and let it sit at room temperature for 1 hour before smoking. This step ensures even cooking and prevents cold spots that could ruin your bark.
While the brisket rests, prepare the tenderizing mixture by combining the ¼ cup apple cider vinegar, 2 tbsp yellow mustard, and 1 tbsp balsamic vinegar in a small bowl. This acidic blend will work its magic on the meat’s surface, breaking down fibers for that signature tender texture. Brush this mixture evenly over all sides of the brisket just before placing it on the smoker.
Set Up the Smoker and Prepare the Wood
Soak the 1 cup wood chips (hickory or oak) in water for at least 1 hour to prevent flare-ups. When ready, fill your smoker’s wood chip tray according to manufacturer instructions and preheat to 225°F. This low-and-slow temperature is crucial—it allows collagen to break down gradually, transforming tough muscle into tender, juicy meat.
While the smoker heats up, slice the 1 yellow onion into wedges and smash the 8 garlic cloves lightly with the side of a knife (leave skins on). Tie the 4 sprigs fresh thyme and 2 sprigs fresh rosemary together with kitchen twine to create a simple herb bundle. Place this bundle and the onion wedges in the smoker alongside the brisket. The aromatics will infuse the meat with deep, complex flavors as it cooks.
Position the brisket fat-side up on the smoker grates. The rendered fat will baste the meat continuously, creating that coveted bark. Close the lid and resist the urge to open it—every time you peek, you lose heat and moisture, potentially extending cook time by hours.
Smoke and Monitor for the Stall
Smoke the brisket undisturbed for 6-8 hours, maintaining a consistent 225°F temperature. Spritz the meat every 90 minutes with the 1 cup beef broth using a spray bottle—this keeps the surface moist and prevents a dry bark. You’ll know it’s time for the next step when the internal temperature reaches 165°F and the meat hits “the stall,” where evaporation causes the temperature to plateau.
At this point, mix the 2 tbsp brown sugar with 1 tbsp smoked paprika in a small bowl. Brush this mixture generously over all sides of the brisket, then wrap it tightly in butcher paper (not aluminum foil). The sugar will caramelize beautifully, creating that signature dark bark while the paprika adds depth of flavor. Return the wrapped brisket to the smoker and continue cooking until the internal temperature reaches 203°F.
This entire process typically takes 12-16 hours total, but don’t rush it. The low-and-slow method is what creates that legendary tenderness. The meat should be fork-tender with a deep mahogany bark and a pink smoke ring just beneath the surface.
Rest and Slice for Maximum Juiciness
Once the brisket reaches the target temperature, remove it from the smoker and transfer it to a cutting board. Tent loosely with foil and let it rest for at least 1 hour (I prefer 2 hours for maximum juiciness). This resting period allows the juices to redistribute throughout the meat, ensuring every slice is moist and flavorful.
After resting, slice the brisket against the grain into ¼-inch thick slices. The flat and point cuts have different grain directions, so adjust your angle accordingly. Serve immediately with your favorite sides. The brisket should be so tender it practically falls apart at the touch, with a perfect balance of smoky, sweet, and savory flavors in every bite.
Real talk: This brisket is worth the wait. The combination of dry brining, precise smoking, and the sugar-paprika bark creates a dish that’s restaurant-quality in your own backyard. Don’t skip any steps—each one plays a crucial role in the final result.
Pro Tips For Making Diners Drive Ins And Dives Beef Brisket
- Trim That Fat Cap: Don’t leave the fat cap too thick—trim it to ¼-inch before brining. Too much fat means uneven cooking, and too little means lost flavor. I used to skip this, and my brisket always had a greasy, uneven crust.
- Crack Those Peppercorns Fresh: Freshly cracked black peppercorns make a real difference—pre-ground pepper loses its bite fast. Use a mortar and pestle or a spice grinder for that sharp, coarse texture. Trust me, your brisket will taste like it came from a dive diner, not a shortcut.
- Don’t Rush the Stall: When the brisket hits 165°F, it’ll stall—temperature drops, cooking slows. Wrap it in butcher paper with the brown sugar-paprika mix and let it ride. I’ve seen people panic and crank the heat, turning tender meat into dry rubber. Patience here is everything.
- Spritz Like a Pro: Use low-sodium beef broth for spritzing—it keeps the bark from drying out without adding salt overload. Spray in light, even passes every 90 minutes. Heavy hands = soggy bark. I learned this after my first brisket turned out like a sad, mushy loaf of bread.
Pro cooking tips for this recipe
Mastering the Stall
This is where many home cooks struggle—the infamous “stall” occurs when the brisket hits 165°F and the internal temperature plateaus for hours. That’s normal, but it’s also when your brisket can go from perfect to dry if you don’t act.
I always keep a spray bottle filled with 1 cup low-sodium beef broth handy to spritz the meat every 90 minutes. This keeps the surface moist and prevents a tough bark.
Trust me, skipping this step is a mistake—it’s the difference between a juicy cut and a chewy one. 🔥
Butcher Paper vs. Foil
After hitting the stall, I wrap my brisket in butcher paper (not aluminum foil) and return it to the smoker. The paper lets steam escape while still trapping heat, creating that coveted bark.
If you’re short on butcher paper, foil works in a pinch, but it can make the bark soggy. I use Pink Butcher Paper from Amazon—it’s affordable and holds up perfectly. This step is non-negotiable for that diner-style crust you crave.
The 203°F Rule
Don’t rush to pull the brisket at 200°F—wait until it hits 203°F for maximum tenderness. This might seem like overkill, but it’s the sweet spot where the collagen has fully broken down, and the meat is fork-tender.
Use a reliable meat thermometer like the ThermoWorks Smoke to avoid guesswork. I’ve learned the hard way that pulling too early leads to dry, chewy brisket—always trust the temp.
Room Temperature Trick
Before smoking, let the brisket sit at room temperature for 1 hour after removing it from the fridge. This ensures even cooking and prevents cold spots that can ruin your bark. I place it on a wire rack set over a baking sheet to catch any drippings.
This step might feel like a hassle, but it’s crucial for that perfect diner-style result. No shortcuts here—patience pays off!
Slicing Like a Pro
When slicing, always cut against the grain—especially for the flat cut, which has a distinct grain direction. Use a sharp 12-inch slicing knife like the Dexter-Russell to get clean cuts. I rotate the brisket mid-slice to follow the grain properly.
This makes each bite tender and easy to chew, just like at your favorite diner. Don’t skip this—it’s the final touch that makes all the difference!
Diner-Style Bark Hack
For an extra-deep bark, mix 2 tbsp brown sugar with 1 tbsp smoked paprika and brush it on after the stall. This creates a caramelized crust that’s worth the wait. I apply it right before wrapping and return it to the smoker for another 1-2 hours.
The result? A bark so crispy it’ll make your taste buds sing. It’s the little details that bring diner magic to your table. 💛
Nutrition facts
Frequently asked questions
Why does the dry brine step take 24 hours?
The 24-hour dry brine is essential for maximum tenderness and flavor. It allows the ½ cup kosher salt to penetrate deeply into the 4 lb brisket, breaking down fibers and locking in moisture. This process creates a perfect balance of seasoning and juiciness, ensuring every bite is rich and flavorful. Skipping this step can result in a dry, less tender cut.
How do I handle the stall without drying out the brisket?
When the brisket hits 165°F and stalls, spritz it every 90 minutes with 1 cup low-sodium beef broth to maintain moisture. This keeps the surface from drying out while allowing the internal temperature to rise to 203°F. Consistency is key—don’t skip this step!
Can I use aluminum foil instead of butcher paper for wrapping?
Butcher paper is preferred because it allows steam to escape while keeping the brisket warm, creating that coveted bark. Aluminum foil can make the bark soggy, so use it only if you’re in a pinch. For best results, stick with butcher paper for that classic diner-style crust.
What if I don’t have a smoker? Are there alternative methods?
Yes! For a stovetop shortcut, mix 2 tbsp yellow mustard and 1 tbsp balsamic vinegar with ¼ cup apple cider vinegar, then brush it onto the brisket before slow-cooking in a 275°F oven until it reaches 203°F. It won’t have the same smoky depth, but it’s a great alternative.
Why does the brisket need to rest before slicing?
Resting for 1-2 hours after cooking allows the juices to redistribute evenly throughout the meat. This ensures every slice is moist and flavorful, rather than dry or overcooked. Skip this step, and you’ll lose all that tenderizing work!

Trained in classic French technique but raised on slow-cooked ribs and spicy rubs, she blends culinary skill with smoke and soul.
- Smoked Chicken Salad Recipe: Crispy, Smoky Bites With Creamy Ranch Dressing - October 19, 2026
- Beer Can Chicken in a Smoker Recipe: Juicy, Herbed Perfection in One Can - October 19, 2026
- Brined Beef Brisket Recipe: Ultra-Tender, Juicy Cuts in One Pot - October 19, 2026