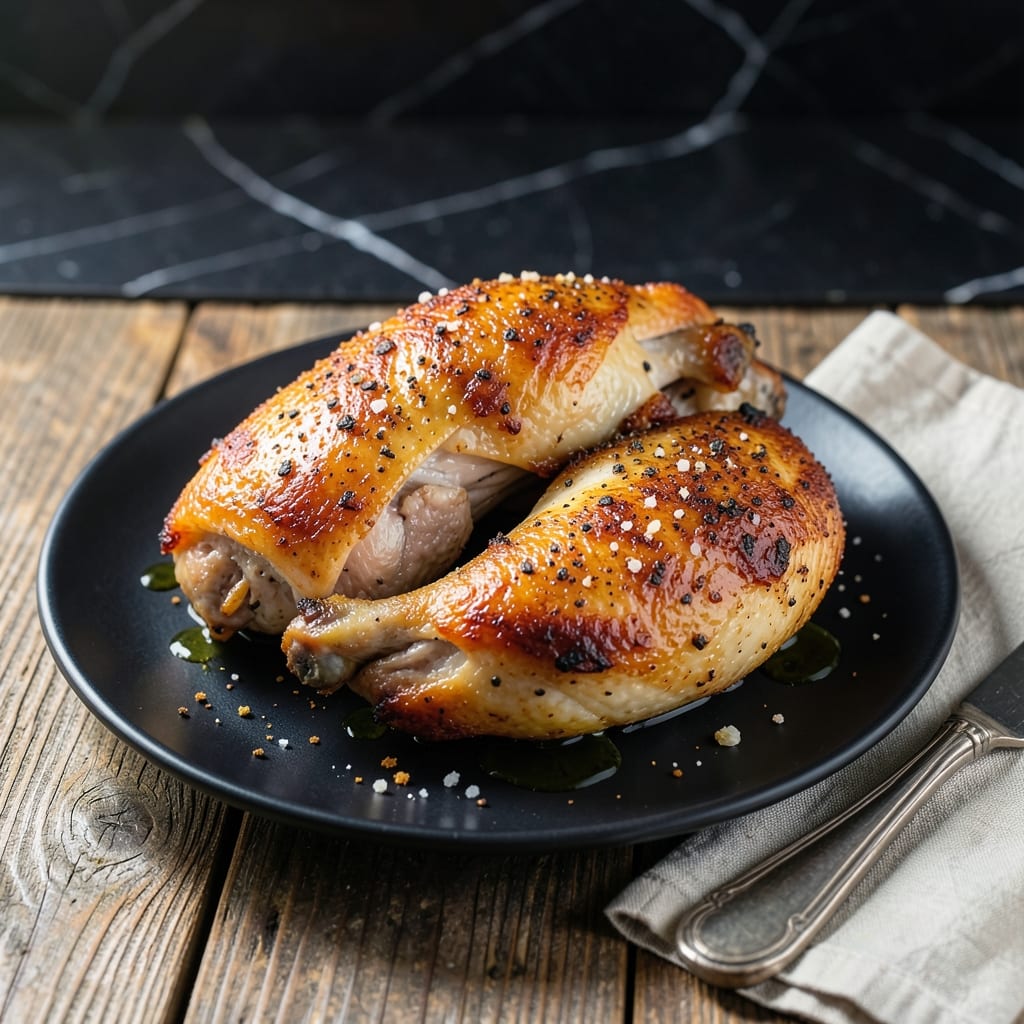
Achieving crispy skin and moist meat in chicken requires precision. I’ve perfected this method through years of trial and error.
This technique relies on high, dry heat to render the fat and create a golden crust while sealing in juices. The key is patience—letting the skin crisp without rushing the process.
You’ll end up with chicken that’s shatteringly crispy on the outside and tender inside, with every bite delivering the perfect contrast. It’s a foolproof way to elevate simple poultry.
No special equipment needed—just a reliable skillet or oven and attention to detail. This method works for whole pieces or cut-up portions.
Ingredients for Dry Chicken
Precise ingredients for shatteringly crispy skin and tender meat every single time.
| Ingredient | Amount | Notes |
|---|---|---|
| Chicken Thighs 🍗 | 2 lb | Bone-in, skin-on preferred |
| Kosher Salt 🧂 | 1 ½ tsp | Diamond Crystal brand recommended |
| Black Pepper 🌶️ | ½ tsp | Freshly ground for best results |
| Garlic Powder 🧄 | 1 tsp | Not garlic salt substitute |
| Onion Powder 🧅 | 1 tsp | Enhances savory depth |
| Smoked Paprika 🌶️ | ½ tsp | Adds subtle smokiness |
| Dried Thyme 🌿 | ½ tsp | Dried works perfectly here |
| Baking Powder 🧂 | ½ tsp | For extra crispiness |
| Olive Oil 🫒 | 1 tbsp | High smoke point variety |
| Unsalted Butter 🧈 | 2 tbsp | For basting chicken skin |
| Fresh Rosemary 🌿 | 2 sprigs | Optional for aromatic finish |
| Lemon Wedges 🍋 | 4 pieces | For serving and brightness |
[recipe_ingredient_scaler]
The chicken thighs are non-negotiable here. Bone-in, skin-on provides the fat needed for crispy skin while keeping the meat moist. Source from Whole Foods or a trusted butcher for consistent quality. Look for pieces with smooth, unbroken skin and even thickness. For the salt, Diamond Crystal kosher salt is the professional standard—its coarse texture adheres better to the skin.
No bone-in thighs? Bone-in chicken breasts work in a pinch but require more careful cooking. Swap the smoked paprika for regular paprika if you prefer milder flavor. The baking powder is key—do not substitute. For herb variations, fresh thyme can replace dried at three times the amount. The butter can be omitted, but the flavor and browning won’t be as rich.
Store raw chicken in its original packaging on the bottom shelf for up to 2 days. The spice blend can be pre-mixed and kept in an airtight container for 3 months. Cooked chicken holds beautifully—reheat in a 400°F oven for 10 minutes to restore crispiness.
Why You’ll Love This Recipe
- One Pan Wonder: I toss the thighs with salt, pepper, and those powders, then roast—no marinating, no fuss.
- Crave-Worthy Crust: The garlic and onion powder form this ridiculous golden crust that had my picky nephew asking for thirds.
- Meal Prep MVP: I make a double batch on Sunday and it reheats beautifully for lunches all week. (Yes, even on a Tuesday night)
- Budget Hero: Chicken thighs stay cheap, and this uses just five ingredients I always have on hand.
Step-by-Step Instructions for Crispy Skin Chicken Thighs
Master the technique to achieve perfectly crisp skin while maintaining juicy, moist meat underneath.
Step 1: Season and Dry the Chicken Thighs
Pat the 2 lb chicken thighs completely dry with paper towels. This step is critical—any moisture on the skin will prevent proper crisping. I pay special attention to the skin surface, ensuring it’s bone-dry before seasoning.
In a small bowl, combine the 1.5 tsp kosher salt, 0.5 tsp black pepper, 1 tsp garlic powder, 1 tsp onion powder, 0.5 tsp smoked paprika, 0.5 tsp dried thyme, and 0.5 tsp baking powder. The baking powder is my secret for extra crispiness—it raises the skin’s pH for better browning.
Rub this seasoning mixture evenly over all sides of the chicken thighs, pressing it into the skin. Let the seasoned thighs rest uncovered in the refrigerator for 1 hour to allow the skin to dry completely and the flavors to penetrate.
Step 2: Preheat and Prepare the Cooking Surface
Place a heavy skillet—cast iron works best—over medium-high heat for 5 minutes to get it screaming hot. You want the pan to be nearly smoking when you add the chicken. This initial high heat is essential for achieving that deep golden brown color on the skin.
While the pan heats, remove the chicken from the refrigerator and let it sit at room temperature for 10 minutes. This ensures even cooking throughout the thigh. Add the 1 tbsp olive oil to the pan and swirl to coat the bottom evenly just before adding the chicken.
Step 3: Sear the Chicken Skin-Side Down
Carefully place the chicken thighs in the pan skin-side down. You should hear a satisfying sizzle when they hit the oil. Press down gently on each thigh with a spatula for the first 30 seconds to ensure full contact with the pan and prevent curling.
Cook undisturbed for 8-10 minutes until the skin is deep golden brown and crispy. Resist the urge to move the thighs—this allows a proper crust to form. You’ll know it’s ready to flip when the edges appear crispy and the skin releases easily from the pan.
Flip the thighs and add the 2 tbsp unsalted butter and 2 sprigs fresh rosemary to the pan. Tilt the pan slightly and baste the chicken with the melted butter and rosemary for 2-3 minutes until the thighs reach an internal temperature of 165°F.
Step 4: Rest and Serve
Transfer the chicken to a wire rack set over a baking sheet. This allows air to circulate underneath, preserving the crispiness of the skin. Tent loosely with foil and let rest for 5-10 minutes. The carryover heat will bring the internal temperature to 170°F.
The resting period allows the juices to redistribute, ensuring moist meat throughout. Serve with the 4 pieces lemon wedges for a bright contrast to the rich, crispy chicken. Each bite should deliver shatteringly crisp skin giving way to tender, juicy meat underneath.
Pro Tips For Making Dry Chicken
- Pat the Chicken Dry: Use paper towels to thoroughly dry the thighs before seasoning—water is the enemy of crispy skin. I learned this the hard way after wondering why my chicken always steamed instead of browned.
- Season Aggressively: Don’t be shy with the kosher salt, garlic powder, and onion powder. Chicken thighs can handle bold seasoning, and the dry rub needs to stick well to the skin.
- Use High Heat: Crank your pan or oven to high—400°F or hotter—to get that skin crackling crisp before the meat overcooks. After burning a few batches, I finally figured out low heat just dries it out.
- Rest Before Serving: Let the thighs rest 5-10 minutes after cooking so the juices redistribute. Sounds weird, but it works: skipping this step leaves the meat tough and dry, even if it’s cooked perfectly.
Make-Ahead Tips for dry chicken
Overnight Dry Brine
For the juiciest results, I season the 2 lb chicken thighs with the spice blend up to 24 hours ahead. Let them sit uncovered in the fridge—this dries the skin while the salt penetrates deeply. Just
Pre-Spice Mix
Mix all your dry rub ingredients (1.5 tsp salt, 0.5 tsp baking powder, etc.) in bulk and store in an airtight container for up to 3 months. This saves time on busy nights while ensuring consistent flavor.
Partial Cook Method
Sear the thighs skin-side down for 5 minutes until golden, then refrigerate uncovered. Finish cooking the next day—this gives you crispy skin with minimal active time. Works great for meal prep.
Room Temp Start
Take the chicken out of the fridge 30 minutes before cooking. This small step ensures even cooking and prevents the skin from steaming. I learned this trick during my Charleston apprenticeship.
Crispy Storage
Store cooked thighs on a wire rack in the fridge for up to 3 days. To revive, bake at 400°F for 10 minutes to restore the crunch. Never stack them—this traps moisture and ruins the texture. ❄️
Freezer Prep
Freeze uncooked, seasoned thighs flat on a tray first, then transfer to bags. They’ll keep for 3 months. Thaw overnight in the fridge before cooking for best results.
Nutrition Facts
Frequently Asked Questions
Why do I need to dry the skin so thoroughly?
Moisture is the enemy of crispiness. Any water on the skin creates steam, which softens it instead of crisping. Pat it completely dry with paper towels before seasoning.
Can I use boneless thighs instead?
Boneless thighs lack the fat and collagen that create crispy skin. If you must, cook at medium heat and watch closely to prevent overcooking. The texture won’t be as good.
How do I know when the skin is crispy enough?
The skin should be deep golden brown and release easily from the pan. If it sticks, it’s not ready. Cook undisturbed for 8-10 minutes before checking.
What if my chicken cooks too fast?
Lower the heat to medium and use a heavier pan. Cast iron retains heat better than thin aluminum. Always check internal temp with a meat thermometer.

Trained in classic French technique but raised on slow-cooked ribs and spicy rubs, she blends culinary skill with smoke and soul.
- Recipe for Boneless Pork Chops in Cast Iron Skillet: Sear and Baste to Juicy Perfection - October 3, 2026
- Recipe for Boneless Cross Rib Roast: Slow-Roasted Beef with Herb Crust - October 3, 2026
- Hamburgers in Sauce Recipe Crock Pot: Slow-Cooked Savory Delight - October 3, 2026