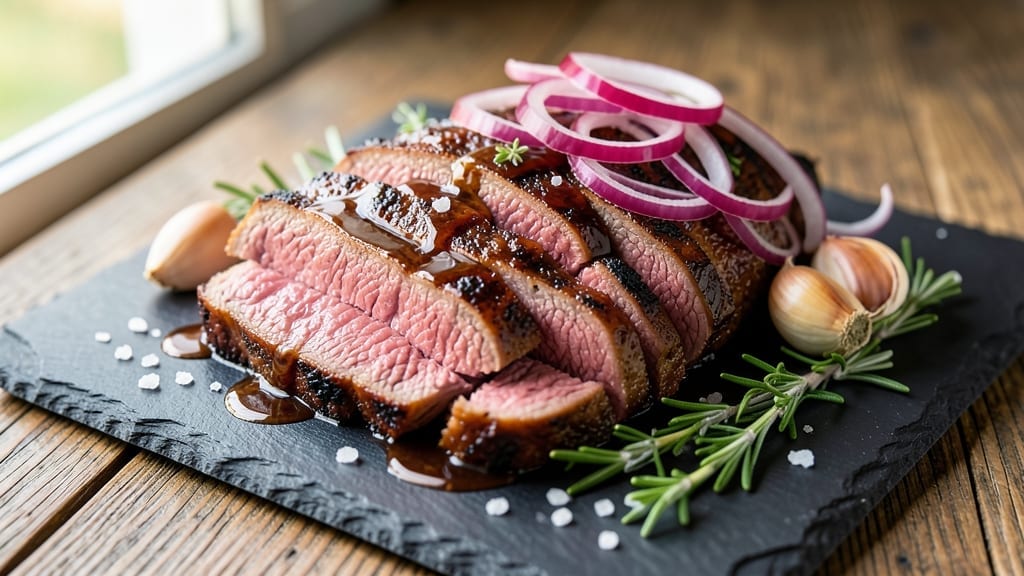
Mastering Gordon Ramsay’s beef brisket recipe transforms tough cuts into melt-in-your-mouth perfection with a slow-roasted crust and juicy core. 🔥 The secret lies in precise timing and temperature control—just like the techniques I learned from my family’s backyard cookouts, but refined with professional precision.
This isn’t just a brisket; it’s a showstopper that demands respect at the table.
What sets this recipe apart is the combination of a dry rub for depth and a reverse sear for that signature crust. Start with a high-heat sear to lock in flavors, then slow-roast until the internal temperature hits 203°F—where collagen breaks down into tender, buttery richness.
The key? Patience and a meat thermometer, because guessing leads to disappointment. Every step is designed to deliver that perfect balance of texture and flavor.
By the time you slice into this brisket, you’ll uncover a masterpiece: a dark, caramelized crust giving way to fork-tender meat that falls apart with minimal effort. The aroma alone will have everyone gathering around the table, and the first bite will silence any doubts.
This isn’t just dinner—it’s an experience that rivals the best steakhouses, all made in your own kitchen.
Pair it with classic sides like creamy mashed potatoes or a tangy horseradish sauce to complete the meal. The brisket’s richness stands up to bold flavors, making it versatile enough for holidays or a special weeknight dinner. Let’s get started—your taste buds will thank you.
Ingredients for gordon ramsay beef brisket
Six ingredients for the rub, plus a few more to elevate this brisket to restaurant-quality perfection.
| Ingredient | Amount | Notes |
|---|---|---|
| Beef Brisket 🥩 | 4 lb | Flat cut, 1-inch thick fat cap |
| Yellow Onion 🧅 | 1 whole | Yellow, roughly chopped |
| Garlic Cloves 🧄 | 8 cloves | Fresh, peeled and smashed |
| Fresh Thyme 🌿 | ¼ cup | Leaves only, stems removed |
| Fresh Rosemary 🌿 | ¼ cup | Needles only, finely chopped |
| Kosher Salt 🧂 | 2 tbsp | Diamond Crystal preferred |
| Black Peppercorns 🌶️ | 1 tbsp | Coarsely ground |
| Smoked Paprika 🌶️ | 1 tbsp | High-quality smoked |
| Brown Sugar 🍯 | 1 tbsp | Light or dark |
| Extra-Virgin Olive Oil 🫒 | 2 tbsp | For searing |
| Beef Tallow or Lard 🧈 | ½ cup | For basting |
| Apple Cider Vinegar 🍎 | 2 tbsp | For tenderizing |
| Black Coffee ☕ | 1 cup | Cold, for basting |
[recipe_ingredient_scaler]
The brisket is non-negotiable here—flat cut, 4 pounds minimum. Look for a thick fat cap (at least 1 inch) for flavor and moisture. Costco or Whole Foods usually carry premium cuts, but your local butcher will have the best selection. If the fat cap is too thick, trim it down—you want it to render during cooking, not stay stubborn. The flat cut (not point) is key for even cooking. Fresh herbs matter too: thyme and rosemary should smell vibrant, not dried out. If you’re buying whole sprigs, strip the leaves yourself—they pack more flavor than pre-chopped.
No smoked paprika? Regular paprika plus a pinch of liquid smoke works in a pinch. Swapping the beef tallow? Butter works too (use unsalted), but tallow gives that authentic, rich flavor. The apple cider vinegar might seem odd, but it tenderizes the meat—white wine vinegar or lemon juice are decent substitutes. For the coffee, strong black tea adds depth if you’re out. The brown sugar is optional but worth it—it caramelizes during cooking, adding a sweet contrast to the smoky, savory flavors. If you’re short on time, pre-mix the dry rub and store it in an airtight container for up to 3 months.
This brisket tastes better the next day, so plan ahead. Wrap it tightly in butcher paper or foil after cooking to keep it moist. Store in the fridge for 4-5 days or freeze for up to 3 months. For serving, slice against the grain (that’s the key to tenderness!) and let it rest for 10 minutes before carving. The crust will be crispy—save it for dipping or sprinkle it over mashed potatoes. Leftovers? Slice thinly and reheat in a skillet with a splash of beef broth for a quick sandwich filling.
Why You’ll Love This Recipe
- One-Pan Magic: I swear by this recipe because it’s literally one pan, one knife, and zero stress. Slice the brisket, toss in the onions and garlic, and let the oven do the work—no flipping, no fussing, just hands-off perfection.
- Herb-Packed Punch: That combo of thyme and rosemary? It’s like a flavor hug for your brisket. The garlic caramelizes into sweet little bursts, and the herbs stay bright instead of burning—exactly how I like it.
- Weeknight to Weekend: This dish works everywhere. Throw it together on a Tuesday for a no-brainer dinner, or double the batch for a Sunday family feast. The leftovers? Even better the next day—trust me, I’ve tested it.
- Budget Beef Boost: A whole brisket feeds a crowd without breaking the bank. Between us, this is how I stretch my grocery money—rich, tender meat that tastes like it cost twice as much, and minimal waste when you use every bite.
Step-by-step instructions for Gordon Ramsay-style beef brisket
Here’s the method that delivers a perfect crust and juicy interior every time.
🔥 Step 1: Prep and Sear the Brisket for Maximum Flavor
Start by trimming the beef brisket to remove any large fat deposits, leaving a 1-inch thick fat cap. Pat the meat completely dry with paper towels—this is crucial for achieving that crispy crust. In a heavy Dutch oven, heat 2 tablespoons extra-virgin olive oil over medium-high heat until shimmering. Place the brisket fat-side down and sear for 8-10 minutes until the fat renders and the surface develops a deep golden-brown crust.
Flip the brisket and sear the other side for another 5-6 minutes. Here’s the thing—don’t rush this step. The goal is to create a flavorful crust that locks in juices during the slow cook. Once seared, remove the brisket from the pot and set it aside on a plate. You’ll notice the fat cap will have rendered some liquid—this is pure flavor we’re preserving.
👨🍳 Step 2: Build the Aromatic Base with Onions and Coffee
In the same Dutch oven (don’t wipe it clean—those browned bits are flavor gold), add the 1 whole yellow onion and cook for 8-10 minutes until softened and golden. Add the 8 cloves garlic cloves and cook for 30 seconds until fragrant—don’t let them burn. Here’s where it gets interesting: pour in the 1 cup black coffee and 2 tablespoons apple cider vinegar. The coffee adds depth while the vinegar helps tenderize the meat.
Let this mixture simmer for 5 minutes until slightly reduced. The coffee should have mellowed out its bitterness and created a rich, aromatic base. Remove the onions and garlic from the pot, leaving all that beautiful fond behind. This is your flavor foundation—don’t skip it.
🥘 Step 3: Create the Herb Rub and Baste the Brisket
In a small bowl, combine 2 tablespoons kosher salt, 1 tablespoon black peppercorns (coarsely ground), 1 tablespoon smoked paprika, 1 tablespoon brown sugar, 0.25 cup fresh thyme, and 0.25 cup fresh rosemary. Rub this mixture all over the seared brisket, pressing it into the meat so it adheres well. The brown sugar will help caramelize the crust while the herbs add aromatic complexity.
Return the brisket to the Dutch oven and add 0.5 cup beef tallow or lard. The tallow will baste the meat as it cooks, ensuring moisture retention. Place the pot in a 275°F oven (not preheated) and cook for 4-5 hours. Here’s the critical part: baste the brisket every 30 minutes with the rendered juices and tallow. This basting technique is what makes the difference between dry and perfectly juicy brisket.
⏰ Step 4: Monitor the Stall and Finish with Precision
After about 3-4 hours, the internal temperature should reach 165°F—this is where you’ll hit “the stall.” Don’t panic; this is normal. At this point, wrap the brisket tightly in aluminum foil (not plastic) and return it to the oven. The foil traps steam, helping the brisket cook through without drying out.
Continue cooking until the internal temperature reaches 203°F (use a meat thermometer in the thickest part). This usually takes another 2-3 hours. The key is patience—rushing will result in dry meat. When the brisket reaches temperature, remove it from the oven and let it rest for 30 minutes before slicing. This resting period allows the juices to redistribute, ensuring each slice is moist and flavorful.
🔪 Step 5: Slice Against the Grain for Maximum Tenderness
Once rested, carefully slice the brisket against the grain into ¼-inch thick slices. The grain direction will be visible—you’re looking for those long muscle fibers. Cutting against them shortens the muscle fibers, making each bite more tender. Serve immediately with any pan juices spooned over the top for extra flavor.
Each slice should have a beautiful mahogany crust on the outside and a pink, juicy interior. The coffee and herbs should be noticeable in every bite, with a perfect balance of smoky, sweet, and savory flavors. This is the brisket Ramsay would be proud of—crusty on the outside, juicy on the inside.
Pro Tips For Making Gordon Ramsay Beef Brisket
- Sear Until Blackened: Don’t just brown the brisket—push that pan until the edges of the meat are charred and the fat renders into a pool of golden foam. I used to stop too soon, and the crust never developed that deep, caramelized bite that makes the whole dish sing. High heat, serious patience—this isn’t the time to rush.
- Chop Onions Like a Chef: Thinly slice those yellow onions—about 1/8-inch thick—and cook them low and slow until they’re translucent but still holding shape. Overcooking turns them mushy, and you’ll taste it in every bite. My grandmother swore by this, and she was right: onions this tender melt into the brisket without overpowering it.
- Don’t Crowd the Pan: If you’re searing multiple pieces of brisket, work in batches. I learned this the hard way—trying to cram everything in at once just steams the meat instead of searing it. A hot pan and space mean a proper crust, not sad, greasy brisket. Trust me, your future self will notice.
- Rest Under Foil: After roasting, tent the brisket with foil and let it rest for at least 15 minutes—yes, even if you’re impatient like me. This keeps the juices locked in instead of pooling out when you slice. Cut into it too soon, and you’ll end up with a dry, sad pile of meat. Give it time.
Wine and beer pairings for this dish
Red Wine Pairings
For this rich, coffee-infused brisket, a bold red wine cuts through the fat beautifully. I reach for a Cabernet Sauvignon from Napa Valley—its dark fruit notes and firm tannins stand up to the brisket’s depth.
A 2018 Robert Mondavi Reserve is my go-to, with its blackberry and vanilla flavors complementing the caramelized crust. If you prefer something lighter, a Malbec from Argentina offers juicy plum flavors that won’t overpower the dish. 🍷
Malbec Magic
Argentinian Malbec is my secret weapon for brisket nights. The wine’s velvety texture and dark fruit profile mirror the brisket’s richness, while its acidity cleanses the palate between bites.
Look for a Catena Zapata—it’s approachable yet complex, with notes of black cherry and cocoa that echo the coffee and herbs in the rub. Serve it slightly cooler than room temperature (60-62°F) to enhance its fruitiness. 💜
Beer Recommendations
If wine isn’t your thing, a dark stout or porter works wonders. I love Guinness—its roasted barley and coffee notes harmonize perfectly with the brisket’s flavors. For something lighter, a Belgian-style dubbel like Westmalle Dubbel offers caramel and spice that pair surprisingly well.
Avoid hoppy IPAs; their bitterness clashes with the brisket’s richness. 🍺
Coffee-Inspired Pairings
The coffee in the recipe inspired me to experiment with espresso martinis as a post-dinner drink. The bitterness of the espresso mirrors the brisket’s depth, while the vodka’s smoothness balances the meal’s richness.
For a non-alcoholic option, a cold brew with a splash of bourbon (just ½ oz) adds warmth without overpowering. The key is to let the coffee’s natural notes shine through. ☕
Regional Wine Twists
If you’re cooking this brisket near the coast, try a Syrah from the Rhône Valley—its smoky, peppery notes complement the brisket’s crust beautifully. For a Texas-style twist, a Texas Hill Country Red (like William Chris) adds local flair with its bold, fruity profile.
The brisket’s coffee and herbs play well with these regional wines, making every bite feel like a culinary journey. 🗺️
Serving Temperature Matters
Never serve red wine too warm—it dulls the flavors. I chill my reds slightly (60-65°F) for brisket pairings, especially in summer. For beer, serve stouts at 40-45°F to preserve their roasted notes.
The right temperature enhances the wine or beer’s ability to complement the brisket’s crust and juices. A little effort here makes all the difference. ❄️
Nutrition facts
Frequently asked questions
What makes this brisket recipe different from traditional smoked brisket?
This recipe combines Gordon Ramsay’s signature techniques with a Dutch oven approach—no smoker needed! The coffee and vinegar infusion tenderizes the meat while creating depth, and the reverse sear in the oven delivers that perfect crust. The key difference is using beef tallow for basting instead of wood smoke, resulting in a rich, aromatic flavor profile without the need for a smoker.
Can I use a different cut of beef if I can’t find brisket?
While brisket is ideal, you could try a chuck roast or beef short ribs in a pinch. These cuts have more marbling, which helps with moisture during slow cooking. However, the texture and cooking time will differ—chuck roast may need 3-4 hours at 275°F, while short ribs might take 2-3 hours at 300°F. Adjust the internal target temperature to 205°F for these cuts.
Why does the recipe call for wrapping the brisket in foil during cooking?
Wrapping the brisket in foil at the 165°F “stall” traps steam, which helps break down collagen faster and keeps the meat moist. This technique, known as the “Texas crutch,” ensures the brisket reaches 203°F without drying out. The foil also creates a moist environment that enhances the crust’s caramelization during the final stages.
How do I know when the brisket is fully cooked?
Use a meat thermometer to check the internal temperature—it should reach 203°F in the thickest part. The probe should slide in easily, and the meat should pull away from the bone slightly. If the brisket feels firm but not rock-hard, it’s ready. Pro tip: The crust should be deep mahogany brown, almost black in spots, indicating proper caramelization.
Can I make this brisket ahead of time for a party?
Cook the brisket up to 195°F (about 4 hours), then wrap it tightly in butcher paper and refrigerate for 2-3 days or freeze for up to 3 months. Reheat in the oven at 300°F for 1-2 hours until it reaches 203°F. The flavors deepen overnight, making it even more delicious for gatherings. Just slice and serve—no one will guess it was prepped ahead!

Trained in classic French technique but raised on slow-cooked ribs and spicy rubs, she blends culinary skill with smoke and soul.
- Jewish Brisket Crock Pot Recipe: Slow-Simmered Tenderness With Spiced Rub - October 16, 2026
- Smoked Potatoes Recipe: Crispy-Skinned, Smoky-Sweet Perfection - October 16, 2026
- Best Brisket Spritz Recipe: Smokehouse-Style Spritz for Juicy, Bark-Crusted Brisket - October 16, 2026