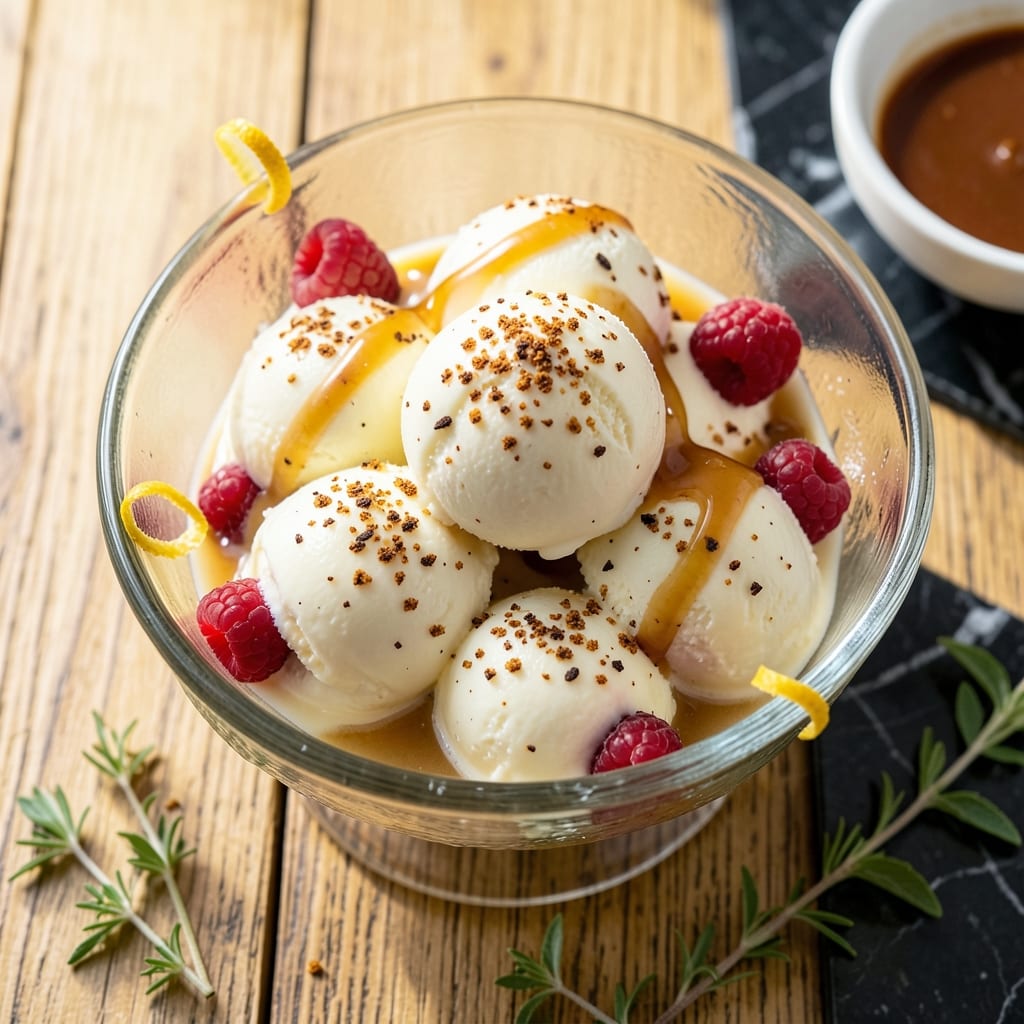
There’s something deeply satisfying about making ice cream from scratch, especially when it delivers that nostalgic, old-fashioned creaminess. This recipe uses vanilla pudding to create an ultra-rich base that’s impossible to resist.
I developed this method to maximize flavor while minimizing effort. The pudding mix ensures a smooth, velvety texture without the need for constant churning or special equipment. It’s a straightforward process that yields professional-quality results.
What you’ll get are scoops of ultra creamy ice cream with that classic vanilla flavor we all love. The pudding base prevents ice crystals from forming, so every bite stays perfectly smooth, even after storage.
Perfect for summer gatherings or a cozy night in. Here’s how to make it.
Ingredients for Homemade Ice Cream Recipe with Vanilla Pudding
Pantry staples plus a few fridge essentials create these ultra-creamy, nostalgic scoops you’ll crave.
| Ingredient | Amount | Notes |
|---|---|---|
| Whole Milk 🥛 | 2 cups | Cold, full-fat for creaminess |
| Heavy Whipping Cream 🥛 | 2 cups | Cold, 36-40% fat content |
| Granulated Sugar 🍚 | ¾ cup | Fine white sugar preferred |
| Instant Vanilla Pudding Mix 🍮 | 1 package | 3.4 oz box, Jell-O brand recommended |
| Pure Vanilla Extract 🌿 | 2 tsp | High-quality for depth of flavor |
| Table Salt 🧂 | ¼ tsp | Fine grain, enhances flavors |
| Large Egg Yolks 🥚 | 4 whole | Room temperature, pasteurized optional |
| Sweetened Condensed Milk 🥛 | 1 can | 14 oz can, for ultra-creamy texture |
| Vanilla Bean 🌿 | 1 whole | Split and scraped, optional for extra flavor |
| Rock Salt 🧂 | 2 cups | For ice cream maker, if using |
| Ice Cubes ❄️ | 4 cups | For ice cream maker, if using |
[recipe_ingredient_scaler]
The pudding mix is non-negotiable here—Jell-O instant vanilla is the gold standard (that 3.4 oz box). Whole milk and heavy cream are musts for that old-school richness; don’t even think about skim. I grab my dairy from Whole Foods since their cream has a higher fat content, but any grocery store brand works. The vanilla matters too—pure extract, not imitation. That little bottle of the good stuff makes a world of difference.
No instant pudding? Cook-and-serve works too—just cool it completely first. Skip the vanilla bean if it’s not in budget (the extract alone does the job). Half-and-half at double the amount can sub for heavy cream in a pinch, though the texture won’t be as luscious. For a lighter version, 2% milk is fine, but the result won’t be as decadent. Always use fresh dairy—sour cream or milk past its prime will ruin the batch.
This keeps beautifully—2 weeks in the freezer if stored in an airtight container. Press plastic wrap directly on the surface to prevent ice crystals. For best texture, let it sit at room temperature for 10-15 minutes before scooping. Homemade ice cream is always hardest straight from the freezer.
Why You’ll Love This Recipe
- No Churn Needed: I just mix the pudding, milk, cream, and sugar—no fancy equipment, no waiting hours for it to set.
- Creamy Vanilla Dream: The pudding mix gives it that ultra-smooth texture, and the real vanilla extract? Pure, rich flavor in every bite.
- Crowd Pleaser: I’ve served this at birthdays and random weeknights—kids and adults always come back for seconds.
- Budget Sweet Tooth: Heavy cream is the only splurge here, and it makes enough to stash leftovers in the freezer for spontaneous dessert cravings.
Step-by-Step Instructions for Homemade Ice Cream With Vanilla Pudding
Here’s my tested method for achieving that ultra-smooth texture with rich vanilla flavor.
Step 1: Infuse the Cream with Vanilla Flavor
In a medium saucepan, combine the 2 cups Whole Milk and 2 cups Heavy Whipping Cream over medium heat. If using the 1 whole Vanilla Bean, split it lengthwise, scrape the seeds into the pan, and add the pod as well for maximum flavor.
Heat the mixture until it just begins to steam and tiny bubbles form around the edges—do not let it boil. This gentle heating allows the vanilla to infuse fully without scorching. Once heated through, remove from heat and let the vanilla bean steep for 10-15 minutes to deepen the flavor.
Step 2: Temper the Egg Yolks and Create the Custard Base
In a separate bowl, whisk together the 0.75 cup Granulated Sugar, 4 whole Large Egg Yolks, 0.25 tsp Table Salt, and 1 package Instant Vanilla Pudding Mix until smooth and pale. This step ensures your base will be silky and lump-free.
Slowly pour about 1 cup of the warm cream mixture into the egg yolk mixture while whisking constantly. This tempering process prevents the eggs from scrambling. Once combined, pour the tempered mixture back into the saucepan with the remaining cream.
Step 3: Cook the Custard to Perfect Consistency
Return the saucepan to medium-low heat and cook, stirring constantly with a wooden spoon or silicone spatula, for 5-7 minutes. The mixture is ready when it thickens enough to coat the back of a spoon and leaves a clear path when you run your finger through it.
Strain the custard through a fine-mesh sieve into a clean bowl to remove any cooked bits of egg or vanilla pod pieces. Stir in the 2 tsp Pure Vanilla Extract and 1 can Sweetened Condensed Milk until fully incorporated. This adds richness and ensures an ultra-creamy texture.
Step 4: Chill the Mixture Thoroughly
Cover the bowl with plastic wrap, pressing it directly onto the surface of the custard to prevent a skin from forming. Refrigerate for at least 4 hours, or preferably overnight, until completely cold. Chilling is crucial for achieving that perfect creamy texture.
Real talk: rushing this step will result in icy ice cream. The mixture should be as cold as the 2 cups Rock Salt and 4 cups Ice Cubes you’ll use in your ice cream maker. If it’s not cold enough, it won’t churn properly.
Step 5: Churn and Freeze to Perfection
Pour the chilled custard into your ice cream maker and churn according to the manufacturer’s instructions, typically 20-25 minutes. The mixture should thicken to the consistency of soft-serve ice cream.
For the creamiest texture, transfer the ice cream to a lidded container and freeze for at least 4 hours or until firm. I like to press plastic wrap directly onto the surface before sealing the container to prevent ice crystals from forming. Serve and enjoy the smoothest, most flavorful homemade ice cream you’ve ever tasted.
Pro Tips For Making Homemade Ice Cream Recipe With Vanilla Pudding
- Chill the Base: I learned this the hard way—let your milk, cream, and sugar mixture get fully cold (at least 2 hours in the fridge) before adding the pudding mix. Warm liquids make the pudding clump and turn your ice cream grainy.
- Whisk the Pudding: Sounds obvious, but vigorously whisk the instant vanilla pudding mix into the cold base for a full 2 minutes. This breaks up any lumps and guarantees that smooth, creamy texture.
- Skip the Low-Fat: Resist the urge to swap whole milk or heavy cream for lighter versions. The fat content is non-negotiable for that rich, scoopable consistency—low-fat dairy turns icy fast.
- Add Extract Last: Stir in the pure vanilla extract right before churning, not with the dry pudding mix. Heat or prolonged sitting can mute its flavor, and you want that bold vanilla punch.
Common Mistakes When Making Perfect Results
Skipping the Chill
Rushing the chilling step is the most common mistake I see. The custard must be completely cold (ideally 40°F or below) before churning. If it’s warm, your ice cream maker will struggle, resulting in a slushy, icy mess instead of smooth scoops.
Overheating the Cream
Never let the milk and cream mixture boil when infusing the vanilla. Heat it just until steaming with tiny bubbles at the edges—about 180°F. Boiling can scorch the dairy and create off-flavors that ruin your entire batch. 🔥
Scrambling the Eggs
When tempering the egg yolks, pour the warm cream very slowly while whisking constantly. Adding it too quickly will cook the eggs, leaving you with sweet scrambled eggs in your custard. I use a thin stream and whisk vigorously to prevent this.
Under-Churning
Don’t pull the mixture from your ice cream maker too soon. It should reach the consistency of soft-serve, typically after 20-25 minutes. Stopping early means your ice cream will be runny and won’t hold its shape when scooped.
Ignoring the Freeze
After churning, freeze for at least 4 hours to firm up. Skipping this step gives you soft, melty ice cream. Press plastic wrap directly on the surface to prevent ice crystals from forming during storage.
Wrong Pudding Choice
Always use instant vanilla pudding mix—cook-and-serve requires additional steps. The 3.4 oz Jell-O box is my go-to for consistent results. Using the wrong type can lead to a grainy texture or improper thickening.
Nutrition Facts
Frequently Asked Questions
Do I need an ice cream maker for this?
An ice cream maker gives the best texture, but you can use the freeze-and-stir method. Pour into a shallow dish, freeze for 1 hour, then stir vigorously. Repeat every 30 minutes for 3-4 hours.
Can I use sugar-free pudding mix?
Yes, but the texture may be slightly less creamy. You might need to add 1-2 tablespoons of corn syrup to compensate for the missing sugar’s binding properties.
Why does my ice cream get icy?
Icy texture usually means the mixture wasn’t cold enough before churning or it wasn’t churned long enough. Always chill for at least 4 hours and churn to soft-serve consistency.

Trained in classic French technique but raised on slow-cooked ribs and spicy rubs, she blends culinary skill with smoke and soul.
- Recipe for Boneless Pork Chops in Cast Iron Skillet: Sear and Baste to Juicy Perfection - October 3, 2026
- Recipe for Boneless Cross Rib Roast: Slow-Roasted Beef with Herb Crust - October 3, 2026
- Hamburgers in Sauce Recipe Crock Pot: Slow-Cooked Savory Delight - October 3, 2026