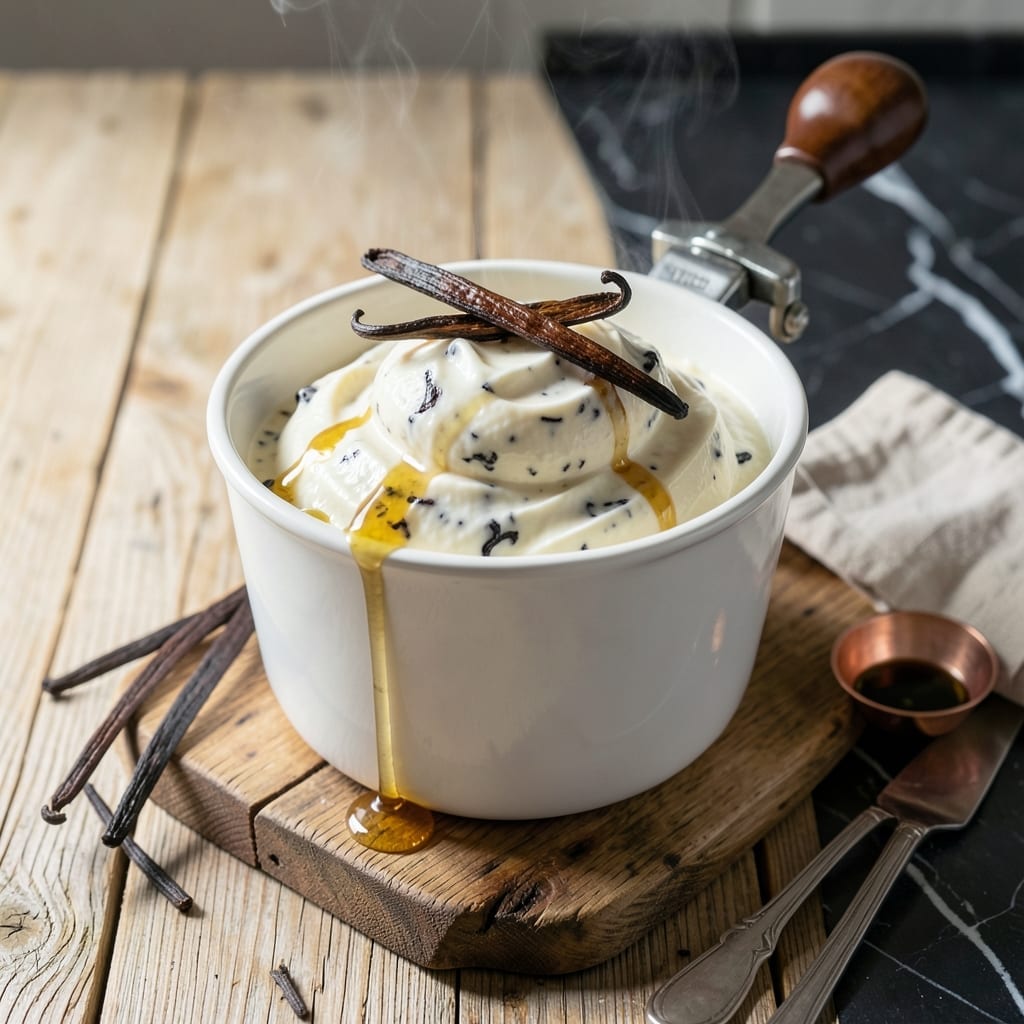
There’s something special about making vanilla ice cream the old-fashioned way—no electricity, just a hand crank and patience. This method delivers creamy, rich results that store-bought versions can’t match.
I’ve perfected this recipe through trial and error, learning that the key is in the slow churning process. The hand crank incorporates air gradually, creating that signature smooth texture without over-churning.
The base is simple: cream, milk, sugar, and real vanilla. But the magic happens during churning, where the mixture transforms into velvety ice cream right before your eyes.
Serve it fresh for soft-serve consistency or freeze for a firmer scoop. The flavor is pure, honest, and worth every turn of the crank.
Ingredients for Homemade Vanilla Ice Cream Recipe Hand Crank
Nine simple ingredients transform into rich, velvety homemade vanilla ice cream with a hand crank.
| Ingredient | Amount | Notes |
|---|---|---|
| Heavy Whipping Cream 🥛 | 2 cups | Full-fat for creamiest texture |
| Whole Milk 🥛 | 1 cup | Cold, straight from fridge |
| Granulated Sugar 🍚 | ¾ cup | Fine white granulated |
| Vanilla Bean 🌿 | 1 whole | Split and scraped |
| Pure Vanilla Extract 💧 | 1 tbsp | Madagascar bourbon preferred |
| Egg Yolks 🥚 | 4 pieces | Large eggs, room temperature |
| Pinch of Salt 🧂 | ¼ tsp | Fine sea salt works best |
| Ice ❄️ | 4 cups | Crushed for churning |
| Rock Salt 🧂 | 1 cup | For freezing ice cream base |
| Whole Eggs 🥚 | 2 whole | For custard base stability |
[recipe_ingredient_scaler]
The dairy is non-negotiable for that ultra-creamy texture. Organic Valley heavy cream and whole milk are my go-tos for the richest results. For vanilla, don’t skimp—Nielsen-Massey or Rodelle extracts deliver the purest flavor. If using a vanilla bean, Tahitian or Bourbon-Madagascar varieties offer the most complex aroma. Egg yolks add richness, but make sure they’re fresh (the deeper the color, the better).
No vanilla bean? Double the extract—just make sure it’s pure, not imitation. Short on cream? Half-and-half in a pinch, though the texture won’t be as luscious. For a lighter version, 2% milk works, but you’ll sacrifice some creaminess. Rock salt is essential for the ice bath—Morton’s canning salt is a reliable choice. If you’re out of eggs, this won’t work—there’s no good substitute for the custard base here.
The custard base keeps in the fridge for 2 days before churning. Once churned, ice cream is best fresh but holds for 1 week in an airtight container. Freeze it solid for firmer scoops, or enjoy soft-serve style right from the crank. Always use a clean, dry container for storage to prevent ice crystals.
Why You’ll Love This Recipe
- Hand Crank Simplicity: I love that I can churn this with just a hand crank—no fancy equipment, just me and the ingredients.
- Vanilla Bean Magic: That real vanilla bean and extract combo makes it taste like the ice cream shop’s best batch.
- Crowd Pleaser: Honestly, it’s a hit at every summer BBQ, birthday, or lazy Sunday afternoon.
- Stays Fresh: Leftovers? More like second helpings—it keeps perfectly in the freezer for a week.
Step-by-Step Instructions for Homemade Vanilla Ice Cream Hand Crank
Master the traditional method for creating rich, velvety ice cream with your hand crank freezer.
Step 1: Prepare the Custard Base
In a medium saucepan, combine the 2 cups Heavy Whipping Cream, 1 cup Whole Milk, 0.75 cup Granulated Sugar, and the seeds from the 1 whole Vanilla Bean (save the pod for later). Warm over medium heat until the mixture reaches 170°F and sugar fully dissolves.
In a separate bowl, whisk together the 2 whole Whole Eggs, 4 pieces Egg Yolks, 1 tbsp Pure Vanilla Extract, and 0.25 tsp Pinch of Salt until smooth. Slowly temper the eggs by whisking in about 1 cup of the hot cream mixture, then return everything to the saucepan.
Step 2: Cook the Custard to Perfect Thickness
Cook the custard over medium-low heat, stirring constantly with a wooden spoon, until it thickens enough to coat the back of the spoon. This should take 8-10 minutes. The mixture should reach 175-180°F—don’t let it boil or the eggs will curdle.
Strain the custard through a fine-mesh sieve into a clean bowl to remove any cooked egg bits. Stir in the vanilla bean pod for extra flavor. Cover and refrigerate for 4-6 hours or overnight until completely chilled. Cold custard churns better and prevents ice crystals.
Step 3: Set Up the Hand Crank Freezer
Fill the hand crank freezer’s outer bucket with alternating layers of 4 cups Ice and 1 cup Rock Salt, starting and ending with ice. The rock salt lowers the freezing point, creating the temperatures needed to freeze your ice cream.
Pour the chilled custard into the inner canister, leaving about 1 inch of space at the top for expansion during churning. Secure the lid tightly. The ice-to-salt ratio is critical—too much salt prevents proper freezing, while too little slows the process.
Step 4: Churn Until Thick and Creamy
Begin cranking the handle at a steady, even pace. The mixture will start thick and liquid but should begin to freeze within 10-15 minutes. Continue churning for 20-30 minutes total until the ice cream reaches a soft-serve consistency.
As it thickens, you’ll notice increased resistance on the crank. If it becomes too difficult to turn, add more ice and rock salt to the bucket. The ice cream is ready when it holds its shape and the dasher can no longer move through it easily.
Step 5: Freeze to Final Consistency
Transfer the soft ice cream to a lidded container and press plastic wrap directly onto the surface to prevent ice crystals. Freeze for at least 4 hours or until firm enough to scoop.
The final texture should be smooth and creamy, with no visible ice crystals. For best results, let the ice cream sit at room temperature for 5-10 minutes before serving to make scooping easier. This traditional method yields ice cream with a rich, dense texture that electric freezers can’t match.
Pro Tips For Making Homemade Vanilla Ice Cream Recipe Hand Crank
- Chill the Base: Always refrigerate your cream, milk, and sugar mixture for at least 4 hours—overnight is even better. I learned this the hard way after ending up with soupy ice cream that took forever to churn.
- Scrape the Bean: Split the vanilla bean lengthwise and scrape out every last bit of those tiny black seeds. Sounds tedious, but it actually changes the outcome with deeper flavor.
- Skip the Shortcuts: Resist the urge to substitute imitation vanilla or low-fat dairy—the real stuff is non-negotiable for that rich, creamy texture hand-cranking demands.
- Pre-Freeze the Crank: Pop your hand-crank ice cream maker’s cylinder in the freezer for 12-24 hours before churning. My grandmother swore by this, and she was right: it cuts churning time nearly in half.
Dietary Considerations for This Recipe
Dairy-Free Options
For a vegan version, swap the heavy cream and whole milk for full-fat coconut milk (about 3 cups total). The texture won’t be identical, but it’s surprisingly rich. I’ve had great results with Thai Kitchen coconut milk. 🌱
Egg-Free Approach
If eggs are a concern, use a cornstarch slurry (mix 2 tbsp cornstarch with 2 tbsp cold milk) to thicken the base instead. Cook it gently until it reaches pudding-like consistency. The flavor is still excellent, though slightly less creamy.
Lower Sugar Version
To reduce sugar, cut the granulated sugar by ¼ cup and add 1-2 tbsp honey or maple syrup for natural sweetness. The texture may be slightly icier, but the vanilla flavor will still shine through.
Lactose-Free Swap
Use lactose-free whole milk and heavy cream—brands like Lactaid work perfectly. The custard base remains just as rich, and the churning process stays the same. No one will notice the difference! 💪
Gluten-Free Note
This recipe is naturally gluten-free, as there are no wheat-based ingredients. Just double-check your vanilla extract and rock salt labels to ensure no hidden gluten. Most major brands are safe.
Allergen Awareness
If serving to guests with allergies, note that this contains dairy and eggs. For nut allergies, ensure your rock salt is processed in a nut-free facility. Always label clearly!
Nutrition Facts
Frequently Asked Questions
Why does my ice cream turn icy?
Icy texture usually means the custard wasn’t cold enough before churning or the freezer wasn’t cold enough. Ensure your base is fully chilled for 4-6 hours and use plenty of ice with rock salt in the bucket.
Can I make this without a vanilla bean?
Use 2 tbsp pure vanilla extract instead of the bean. The flavor will be slightly less complex but still delicious. Just skip straining the custard.
How long can I store homemade ice cream?
It stays fresh for up to 1 week in an airtight container with plastic wrap pressed on the surface. After that, ice crystals may form.
Why is my custard lumpy?
Lumps mean the eggs curdled, usually from cooking too fast or at too high a temperature. Keep the heat at medium-low and stir constantly. Straining removes any bits.

Trained in classic French technique but raised on slow-cooked ribs and spicy rubs, she blends culinary skill with smoke and soul.
- Recipe for Boneless Pork Chops in Cast Iron Skillet: Sear and Baste to Juicy Perfection - October 3, 2026
- Recipe for Boneless Cross Rib Roast: Slow-Roasted Beef with Herb Crust - October 3, 2026
- Hamburgers in Sauce Recipe Crock Pot: Slow-Cooked Savory Delight - October 3, 2026