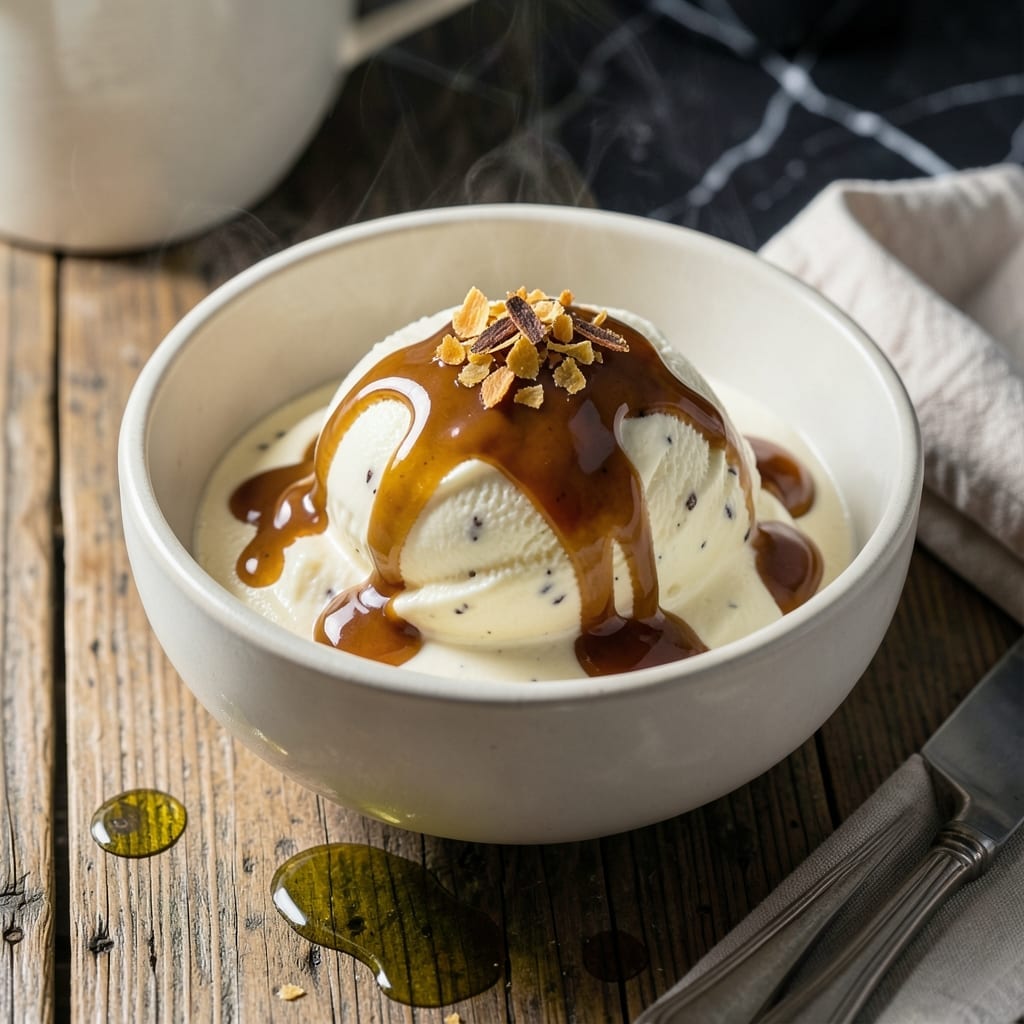
There’s nothing quite like homemade ice cream fresh from the machine—velvety, rich, and exactly how you love it.
This method delivers perfect results every time with a base of cream, sugar, and your favorite mix-ins. David and I have tested this on every ice cream maker imaginable to ensure foolproof success.
The churning process incorporates air, creating that signature smooth texture that store-bought versions can never match. The key is patience—don’t rush the freezing step.
You’ll end up with scoopable ice cream that melts just right on the tongue, ready to enjoy immediately or freeze for later. Here’s how to achieve that ideal consistency.
Ingredients for Ice Cream Recipe Using Ice Cream Maker
Creamy base plus your favorite add-ins for churned perfection every time.
| Ingredient | Amount | Notes |
|---|---|---|
| Heavy Cream 🥛 | 2 cups | Full-fat for creamiest texture |
| Whole Milk 🥛 | 1 cup | Cold, for balanced richness |
| Granulated Sugar 🍚 | ¾ cup | Fine white for smooth blend |
| Vanilla Extract 🌿 | 1 tbsp | Pure for best flavor |
| Table Salt 🧂 | ¼ tsp | Enhances all flavors |
| Large Egg Yolks 🥚 | 4 whole | Room temperature for volume |
| Vanilla Bean 🌱 | 1 whole | Split and scraped (optional) |
| Chocolate Chips 🍫 | 1 cup | Semi-sweet for classic taste |
| Crushed Cookies 🍪 | ½ cup | For mix-in texture |
| Chopped Nuts 🌰 | ½ cup | Toasted for crunch |
[recipe_ingredient_scaler]
The cream is non-negotiable here. Heavy cream with 36-40% fat gives that ultra-smooth texture you can’t get from half-and-half. I grab mine from Whole Foods or Trader Joe’s—both have reliable quality. The milk balances it out; don’t go lower than whole. Egg yolks add richness and stability (the science part David geeks out over). Vanilla is the flavor backbone—splurge on Nielsen-Massey if you can.
No ice cream maker? You’re out of luck for this one—it’s essential for that airy churn. Swap chocolate chips for chopped chocolate bars (better melt). Want fruit? Use frozen berries (thaw and drain first). The cookies can be any variety—Oreos are classic, but graham crackers work too. For a lighter version, half-and-half instead of cream but expect a less velvety result.
The base keeps in the fridge for 2 days before churning. Once churned, it’s best fresh but freezes solid for 2-3 weeks. Let it sit at room temp for 5-10 minutes before scooping (worth the wait).
Why You’ll Love This Recipe
- Set and Forget: The ice cream maker does all the work—just pour in the cream, milk, sugar, vanilla, and salt, then walk away.
- Pure Vanilla Bliss: That rich, creamy texture from the heavy cream and whole milk, with vanilla extract shining through, is exactly what homemade ice cream should taste like.
- Party or Pajamas: Honestly, it’s perfect for summer barbecues or just a lazy Sunday treat when you’re craving something sweet.
- Makes Extra Happy: I always double the batch because leftovers (if there are any) keep beautifully for up to a week.
Step-by-Step Instructions for Ice Cream Using Ice Cream Maker
Here’s the method I use to achieve that perfect creamy texture every single time.
Step 1: Heat and Temper the Custard Base
In a medium saucepan, combine the 2 cups Heavy Cream, 1 cup Whole Milk, and 0.75 cup Granulated Sugar over medium heat. Stir occasionally until the mixture just begins to simmer—you’ll see tiny bubbles forming around the edges of the pan.
In a separate bowl, whisk the 4 whole Large Egg Yolks until slightly thickened. Slowly pour about 1 cup of the hot cream mixture into the yolks while whisking constantly. This tempering prevents the eggs from scrambling. Return the tempered mixture to the saucepan and cook for 2-3 minutes until it thickens enough to coat the back of a spoon.
Step 2: Infuse Flavor and Chill the Base
Remove the custard from heat and stir in the 1 tbsp Vanilla Extract and 0.25 tsp Table Salt. If using the 1 whole Vanilla Bean, scrape the seeds into the custard and add the pod as well. Let it steep for 10 minutes to infuse maximum flavor.
Strain the custard through a fine-mesh sieve into a clean bowl to remove any cooked egg bits or vanilla pod pieces. Cover with plastic wrap pressed directly onto the surface to prevent a skin from forming. Refrigerate for at least 4 hours or overnight—chilling is crucial for that smooth, velvety texture.
Step 3: Churn in the Ice Cream Maker
Pour the chilled custard into your ice cream maker and churn according to the manufacturer’s instructions, typically 20-25 minutes. The mixture should thicken to the consistency of soft-serve ice cream and hold its shape when scooped.
During the last 5 minutes of churning, add the 1 cup Chocolate Chips, 0.5 cup Crushed Cookies, and 0.5 cup Chopped Nuts through the opening in the lid. This ensures even distribution throughout the ice cream without overmixing.
Step 4: Freeze to Perfection
Transfer the churned ice cream to a freezer-safe container, smoothing the top with a spatula. Press plastic wrap directly onto the surface to minimize ice crystals. Freeze for at least 4 hours or until firm.
For best texture, let the ice cream sit at room temperature for 5-10 minutes before scooping. The result should be smooth, creamy, and packed with those delicious mix-ins in every bite. This step ensures your creation holds its shape beautifully when served.
Pro Tips For Making Ice Cream Recipe Using Ice Cream Maker
- Chill the Base: Always refrigerate your cream-milk-sugar mixture for at least 4 hours before churning—I learned this the hard way when my first batch turned into soupy disappointment.
- Use Full-Fat Dairy: Skip the low-fat shortcuts; whole milk and heavy cream with at least 36% fat make a real difference in texture, giving you that rich, scoopable consistency.
- Pre-Freeze the Bowl: Make sure your ice cream maker bowl is completely frozen (24 hours is ideal) or the mixture won’t set properly—yes, even if you’re impatient like me.
- Add Vanilla Last: Stir in the vanilla extract just before churning to preserve its bold flavor; adding it too early can mute the aroma, and nobody wants bland vanilla ice cream.
Pro Cooking Tips for This Recipe
Pre-Chill Your Bowl
This is non-negotiable. Your ice cream maker’s bowl needs to freeze solid for at least 12 hours before churning. I keep mine in the freezer full-time at 0°F so it’s always ready. David learned this the hard way when his first batch turned into soup. 💡
Temper Those Eggs
Slowly add 1 cup of hot cream to your yolks while whisking constantly. This prevents scrambled eggs in your custard. I use a pyrex measuring cup for easy pouring. The mixture should look smooth, not curdled.
Chill Thoroughly
Don’t rush the chilling step. Your custard must be 40°F or below before churning. I spread mine in a shallow dish and stir occasionally to speed cooling. Overnight chilling develops the best flavor.
Timing the Add-Ins
Add your Chocolate Chips, Crushed Cookies, and Chopped Nuts during the last 5 minutes of churning. This prevents them from sinking to the bottom. I tested adding them earlier—big mistake.
Watch the Consistency
Your ice cream should look like soft-serve when done churning. If it’s still liquidy, keep going. The Cuisinart ICE-21 I use typically takes 22 minutes for perfect texture. Trust the machine, not the clock. 🌡️
Freeze Properly
Press plastic wrap directly on the surface before freezing. This prevents ice crystals from forming. I use quart-sized containers for easy storage. Let it freeze for at least 4 hours before serving.
Nutrition Facts
Frequently Asked Questions
Why does my ice cream turn icy?
This usually happens if the custard wasn’t cold enough before churning. Ensure it’s 40°F or below and use the ice cream maker with a fully frozen bowl.
Can I skip the egg yolks?
You can, but the texture won’t be as rich and creamy. Egg yolks add fat and stability, creating that velvety mouthfeel. For a lighter version, try 2 whole eggs instead of 4 yolks.
How long can I store homemade ice cream?
It keeps well for 2-3 weeks in an airtight container with plastic wrap pressed on the surface. For best texture, enjoy within the first week.
Can I add fresh fruit?
Yes, but use frozen fruit that’s thawed and drained to prevent ice crystals. Add during the last 5 minutes of churning for even distribution.

Trained in classic French technique but raised on slow-cooked ribs and spicy rubs, she blends culinary skill with smoke and soul.
- Recipe for Boneless Pork Chops in Cast Iron Skillet: Sear and Baste to Juicy Perfection - October 3, 2026
- Recipe for Boneless Cross Rib Roast: Slow-Roasted Beef with Herb Crust - October 3, 2026
- Hamburgers in Sauce Recipe Crock Pot: Slow-Cooked Savory Delight - October 3, 2026