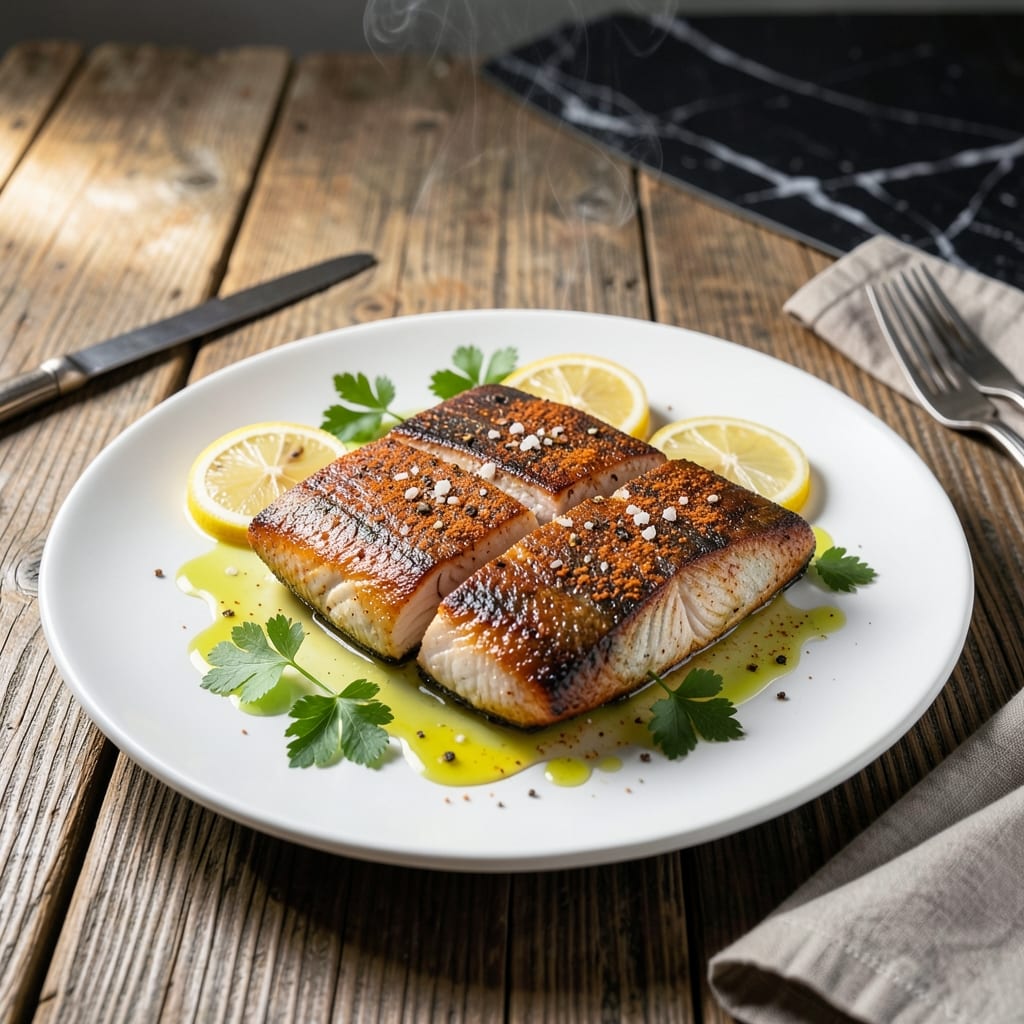
I’ve tested this pan-frying method for king mackerel in my small Boston kitchen until I got it just right. The result is a golden crust that gives way to perfectly flaky interior every time.
This technique relies on high heat and precise timing to cook the fish through without drying it out. A well-seasoned fillet and hot oil are all you need for professional results.
You’ll achieve a crisp exterior that locks in moisture, while the inside stays tender and delicate. The contrast between the crust and flaky fish is what makes this dish special.
The process takes less than 15 minutes from start to finish, making it ideal for a quick yet impressive dinner. Serve with lemon wedges to balance the richness.
Ingredients for King Mackerel Recipe Pan Fried
A handful of pantry staples transforms fresh king mackerel into a restaurant-worthy dish.
| Ingredient | Amount | Notes |
|---|---|---|
| King Mackerel Fillets 🐟 | 4 whole | Skin-on, about 6 oz each |
| All-Purpose Flour 🌾 | ½ cup | For light dredging |
| Kosher Salt 🧂 | 1 ½ tsp | Diamond Crystal preferred |
| Freshly Ground Black Pepper 🌶️ | 1 tsp | Coarse grind for texture |
| Paprika 🌶️ | 1 tsp | Smoked or sweet variety |
| Garlic Powder 🧄 | ½ tsp | Not garlic salt |
| Vegetable Oil 🫒 | ½ cup | High smoke point for frying |
| Unsalted Butter 🧈 | 2 tbsp | For basting during cooking |
| Fresh Lemon 🍋 | 1 whole | Cut into wedges for serving |
| Fresh Parsley 🌿 | 2 tbsp | Chopped, for garnish |
| Cayenne Pepper 🔥 | ¼ tsp | Optional for heat |
[recipe_ingredient_scaler]
The fish is the star here. King mackerel fillets with skin on give you that perfect contrast between crisp crust and flaky interior. Hit Whole Foods or a trusted fishmonger—they’ll often skin and portion them for you. Look for fillets about 1 inch thick; thinner ones cook too fast and dry out. If buying whole, ask them to clean and fillet it (saves you the hassle).
No all-purpose flour? Cornstarch or rice flour work for dredging, though the crust won’t brown as deeply. Want more kick? Swap paprika for Cajun seasoning. The butter is optional but adds richness—olive oil works too if you’re avoiding dairy. Skip the cayenne if serving kids or heat-sensitive folks. Fresh herbs? Dill or chives pair beautifully with the lemon.
Cook immediately after seasoning—the salt starts drawing out moisture. Leftovers? Rare, but they’ll keep in the fridge for 1-2 days. Reheat gently in a skillet to preserve the crust (microwave turns it soggy). The lemon wedges and parsley garnish stay fresh for 3 days if stored separately in the fridge.
Why You’ll Love This Recipe
- 20-Minute Dinner: I can get this from fillet to fork in the time it takes to set the table—just flour, spices, and a hot pan.
- Crispy, Smoky Bite: That paprika-kissed crust with the flaky fish inside? Honestly, it’s the reason I keep making it.
- Weeknight Hero: It’s my go-to for busy evenings, and leftovers (if there are any) taste just as good cold the next day.
- Budget-Friendly Feast: King mackerel fillets give me that restaurant-quality meal without the restaurant price tag.
Step-by-Step Instructions for Pan Fried King Mackerel
Here’s how to achieve that perfect golden crust while keeping the interior tender and flaky.
Step 1: Season and Dredge the King Mackerel Fillets
Pat the king mackerel fillets completely dry with paper towels—this is crucial for achieving a crispy crust. In a shallow dish, combine the all-purpose flour with kosher salt, freshly ground black pepper, paprika, garlic powder, and cayenne pepper.
Dredge each fillet lightly in the seasoned flour mixture, shaking off any excess. The flour creates a delicate crust that browns beautifully, while the spices infuse every bite with flavor. I like to let the dredged fillets rest for 5 minutes to help the coating adhere better during cooking.
Step 2: Heat the Oil and Pan-Fry the Fillets
In a large skillet, heat the vegetable oil over medium-high heat until it shimmers—this indicates it’s hot enough for frying. The oil should be about ¼-inch deep in the pan, which is perfect for achieving an even golden crust without deep-frying.
Carefully place the fillets skin-side down into the hot oil. Press down gently with a spatula for the first 10 seconds to ensure even contact with the pan. Cook undisturbed for 3-4 minutes until the edges turn golden brown and crispy.
Step 3: Flip and Baste with Butter for Extra Flavor
Using a thin spatula, carefully flip each fillet to the other side. Add the unsalted butter to the pan and let it melt. As it foams, spoon the butter continuously over the fillets for 1 minute—this basting step adds richness and promotes even browning.
Cook for an additional 2-3 minutes until the second side is also golden brown and the fish flakes easily when tested with a fork. The internal temperature should reach 145°F for perfect doneness.
Step 4: Rest and Serve with Fresh Garnishes
Transfer the fillets to a paper towel-lined plate to drain any excess oil. Let them rest for 2 minutes—this allows the juices to redistribute, ensuring the flaky interior stays moist and tender.
Arrange the king mackerel on a serving platter. Garnish with chopped fresh parsley and serve with fresh lemon wedges on the side. A squeeze of lemon just before eating brightens up the rich, savory flavors beautifully.
Pro Tips For Making King Mackerel Recipe Pan Fried
- Pat Fillets Dry: I learned this the hard way—wet fillets steam instead of fry, so blot them with paper towels before dredging. That’s how you get that crispy crust without the sog.
- Season the Flour: Mix 1 teaspoon kosher salt, ½ teaspoon black pepper, and ½ teaspoon paprika directly into the flour before coating. Sounds simple, but it makes the seasoning stick where it matters.
- Hot Oil, No Crowding: Heat the oil until it shimmers, then add only 2 fillets at a time—any more and the temperature drops, turning your mackerel greasy instead of golden.
- Rest Before Serving: Give the fried fillets 3-4 minutes on a wire rack after cooking. My grandmother swore by this, and she was right: it keeps the crust crisp while the inside stays juicy.
Essential Equipment for This Dish
Skillet Selection
I always reach for my 12-inch cast iron skillet—it retains heat perfectly and gives an even crust. A stainless steel skillet works too, but avoid nonstick as it won’t get hot enough for that golden sear. 🔥
Oil Choices
Use an oil with a high smoke point like vegetable or peanut oil. I’ve tested with avocado oil too, which adds a nice buttery note. Whatever you choose, ensure it’s fresh—old oil burns easily.
Temperature Control
A reliable instant-read thermometer is non-negotiable for checking the 145°F internal temp. I use a ThermoWorks model because it’s fast and accurate. The fish cooks quickly, so precision matters.
Tongs or Spatula
Use thin, metal tongs or a fish spatula to flip the fillets without breaking them. I prefer tongs for better control, especially in my cramped Boston kitchen where space is tight.
Basting Tool
A large spoon works best for basting with butter. I keep one dedicated to frying to avoid cross-contamination. The butter should be cold when added to the pan for even melting.
Draining Setup
Have a paper towel-lined plate ready before you start cooking. This catches excess oil while letting the crust stay crisp. I learned this the hard way after ruining a perfectly fried fillet on a bare plate.
Nutrition Facts
Frequently Asked Questions
What’s the best oil for pan-frying?
Use a high smoke point oil like vegetable, peanut, or avocado oil. These handle the medium-high heat without burning. Avoid olive oil—it smokes at lower temps.
How do I know when it’s done?
The fish is ready when it flakes easily and reaches 145°F internally. Look for golden brown edges and opaque flesh. Overcooking dries it out—pull it off just as it hits temp.
Can I skip the flour coating?
You can, but the flour creates that crispy crust. Without it, you’ll miss the texture contrast. For a gluten-free option, try cornstarch or almond flour instead.
Why does my fish stick to the pan?
Sticking happens if the pan isn’t hot enough or the fish isn’t dry before cooking. Use medium-high heat and pat fillets thoroughly with paper towels first. A well-seasoned cast iron skillet helps too.

Trained in classic French technique but raised on slow-cooked ribs and spicy rubs, she blends culinary skill with smoke and soul.
- Recipe for Boneless Pork Chops in Cast Iron Skillet: Sear and Baste to Juicy Perfection - October 3, 2026
- Recipe for Boneless Cross Rib Roast: Slow-Roasted Beef with Herb Crust - October 3, 2026
- Hamburgers in Sauce Recipe Crock Pot: Slow-Cooked Savory Delight - October 3, 2026