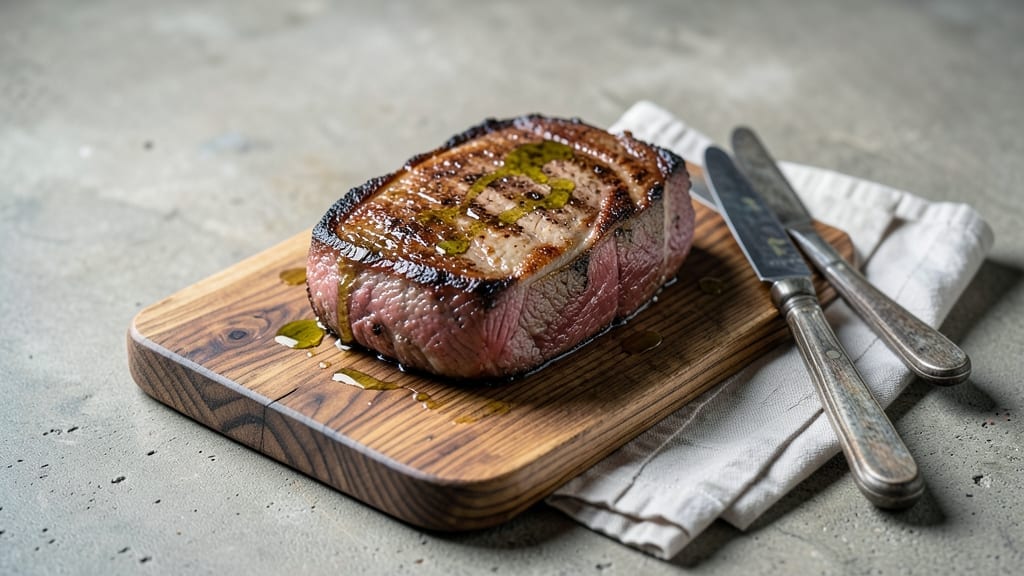
Slow-cooking brisket in the oven delivers the same tender, juicy results as a smoker—without the fuss. I perfected this method after years of experimenting with my dad’s old oven, where we’d leave brisket cooking all day while I flipped pancakes (and ate more chocolate chips than I cooked).
The key lies in precise temperature control and patience, two things that turn tough meat into melt-in-your-mouth perfection.
This recipe transforms a tough cut into restaurant-quality brisket using only an oven and a reliable thermometer. Unlike smoker methods, it requires no special equipment—just a heavy Dutch oven or roasting pan, a few hours of hands-off time, and the occasional check to ensure the meat stays moist.
The seasoning blend is simple but powerful: coarse salt, black pepper, and a touch of garlic powder to build deep flavor without overpowering the natural richness of the beef.
By the time you pull it from the oven, you’ll have brisket so tender it falls apart at the touch, with a crust that’s perfectly caramelized. The internal temperature should reach 203°F, where collagen breaks down into gelatin, creating that signature velvety texture.
Slice against the grain for clean, bite-sized pieces that stay juicy and flavorful. This is the kind of brisket that makes weeknight dinners feel like a celebration.
Serve with classic sides like roasted potatoes, collard greens, or a simple cornbread salad to soak up every last drop of that rich, smoky-sweet sauce. The leftovers?
Even better the next day, if you can resist eating the whole pan straight from the oven. Let’s get cooking—your taste buds will thank you.
Ingredients for oven slow cooked brisket
Just a few simple ingredients transform tough brisket into melt-in-your-mouth perfection.
| Ingredient | Amount | Notes |
|---|---|---|
| Packer Brisket 🥩 | 4 lb | Whole packer cut with fat cap |
| Kosher Salt 🧂 | 2 tbsp | Coarse grain preferred |
| Freshly Ground Black Pepper 🌶️ | 1 ½ tbsp | Freshly cracked preferred |
| Garlic Powder 🧄 | 1 tbsp | Finely ground for even seasoning |
| Yellow Onion 🧅 | 1 whole | Peeled, quartered, no need to chop |
| Fresh Rosemary 🌿 | 1 sprig | 3-4 inch sprig, woody stems removed |
| Fresh Thyme 🌿 | 1 sprig | 3-4 stems, leaves only |
| Beef Broth 💧 | 2 cups | Low-sodium preferred |
| Apple Cider Vinegar 🍎 | 2 tbsp | For acidity balance |
| Brown Sugar 🍯 | 1 tbsp | Light or dark works |
| Unsalted Butter 🧈 | 2 tbsp | Cold, cubed for basting |
| Heavy Cream 🥛 | ½ cup | For finishing sauce |
[recipe_ingredient_scaler]
The brisket is the star here—Packer cut with that thick fat cap is ideal, but flat cut works too. Most butchers will trim it for you if you ask, but leave that fat—it’s what keeps the meat moist. I always grab mine from Costco or my local Whole Foods butcher counter where they handle it carefully. Look for bright red meat with good marbling—no gray or slimy spots. If you’re buying a whole packer, ask for it to be scored lightly on the fat cap (about 1/4-inch deep cuts) to help the seasoning penetrate. That little extra effort makes all the difference when you pull it out of the oven.
No fresh rosemary or thyme? Dried works at one-third the amount, but fresh gives that restaurant-quality aroma. Short on beef broth? Water plus 1 tbsp soy sauce gets you close, though you’ll lose some depth. The apple cider vinegar might seem odd, but it’s what helps tenderize the meat during the long cook. Balsamic vinegar works too if that’s what you have. For the brown sugar, don’t skip it—it helps caramelize the crust while keeping the meat from drying out. And that butter at the end? Full-fat is non-negotiable here—it makes the sauce silky. If you’re watching calories, use half butter and half heavy cream instead.
This brisket tastes even better the next day, so plan ahead. Wrap it tightly in foil and refrigerate for up to 4 days, or freeze for 3 months in portions. The sauce thickens as it cools, so add a splash of warm water when reheating. For serving, slice against the grain—that’s how you get those clean, tender bites. I always make extra because the leftovers make the best sandwiches (just add some of that rich sauce on top). Store the sauce separately if you’re not using it right away—it keeps for 5 days in the fridge.
Why You’ll Love This Recipe
- No-Cleanup Nightmare: Honestly, this recipe is my secret weapon for lazy-but-still-impressive dinners. You’re only dealing with one heavy skillet, and the brisket practically cooks itself at 275°F for hours—no constant babysitting required. The onions and herbs caramelize in the same pan, so you’re not scrubbing a dozen dishes afterward. Just sear, slow, and serve.
- Creamy, Caramelized Magic: That finishing sauce with the heavy cream and brown sugar? It’s the difference between “meh” and “I’ll eat this every Tuesday.” The apple cider vinegar cuts through the richness, while the rosemary and thyme give it an herbal depth that makes every bite feel special. The brisket’s fat cap renders into the pan, turning the sauce into liquid gold.
- Leftovers That Outlast the Meal: I make this for Sunday dinner, and by Thursday, I’m still eating it. The brisket keeps its tenderness for up to four days wrapped in foil, and the sauce? Five days in the fridge if you store it separately. Toss it into tacos, sandwiches, or even a fried rice bowl—it’s that versatile. My kids even ask for “mystery meat” leftovers, and they’ll never complain.
- Budget-Friendly Beast: A 4 lb packer brisket is one of the most affordable cuts out there, and this recipe stretches it into multiple meals. The ingredients? Most of them are pantry staples or cheap fresh herbs. You’re not paying for fancy cuts or exotic spices—just good, honest flavor that’ll have everyone reaching for seconds. And if you freeze portions, you’ve got a freezer full of instant comfort.
Step-by-step instructions for oven slow cooked brisket
Here’s my foolproof method for transforming a tough cut into melt-in-your-mouth perfection.
Season and Sear the Brisket
Begin by laying the 4 lb packer brisket fat-side up on a cutting board. Generously rub all sides with the 2 tablespoons kosher salt, pressing firmly so it adheres. Sprinkle evenly with the 1½ tablespoons freshly ground black pepper and 1 tablespoon garlic powder, working the seasoning into the meat.
Heat your oven to 425°F and place a heavy oven-safe skillet or Dutch oven on the stovetop over medium-high heat. Add the brisket and sear for 8-10 minutes per side until deeply browned and the fat begins to render. This initial sear locks in juices and builds deep flavor. Transfer the brisket to a plate and let it rest while you prep the aromatics.
Build the Flavor Base
In the same skillet (no need to clean it), add the quartered 1 yellow onion, 1 sprig fresh rosemary, and 1 sprig fresh thyme. Cook for 5 minutes until the onions soften and begin to caramelize. Stir in the 2 tablespoons apple cider vinegar and 1 tablespoon brown sugar, scraping up any browned bits from the bottom of the pan.
Pour in the 2 cups beef broth and bring to a gentle simmer. Let it reduce by half—about 10 minutes—until it thickens slightly and coats the back of a spoon. This concentrated base will infuse the brisket with rich flavor as it cooks.
Slow Cook to Tender Perfection
Return the brisket to the skillet, fat-side up, and pour the reduced broth mixture over it. Cover tightly with foil and transfer to the preheated 275°F oven. Cook for 4-5 hours, checking periodically to ensure the liquid doesn’t evaporate completely. If needed, add a splash of water or broth to maintain moisture.
Here’s the key: The brisket is done when it reaches an internal temperature of 203°F at its thickest point and a fork slides in like butter. This low-and-slow method breaks down the connective tissue, resulting in that signature tender, juicy texture you’re after.
Finish with Rich Cream Sauce
Once the brisket reaches the target temperature, remove it from the oven and transfer to a cutting board. Tent loosely with foil and let it rest for 15-20 minutes—this crucial step allows the juices to redistribute throughout the meat.
Return the skillet to the stovetop over medium heat and whisk in the 2 tablespoons unsalted butter and ½ cup heavy cream. Simmer for 3-4 minutes until the sauce thickens slightly and becomes glossy. This finishing touch adds a velvety richness that complements the deep, savory flavors of the brisket.
Slice and Serve
Slice the brisket against the grain into ¼-inch thick slices. The grain runs horizontally across the flat and diagonally across the point—adjust your angle accordingly. Spoon the creamy sauce over the top and serve immediately with the pan juices spooned alongside.
Each bite should deliver that perfect balance of tender, juicy meat with a rich, aromatic sauce. The brisket should pull apart easily with a fork, and the sauce should coat every slice beautifully. This method delivers restaurant-quality results without needing a smoker!
Pro Tips For Making Oven Slow Cooked Brisket
- Don’t Rush the Sear: I learned this the hard way—skipping the full 8-10 minutes per side means you’ll miss that deep, caramelized crust that holds moisture. High heat. Seriously, crank it up until the fat sizzles like crazy and the meat turns a rich mahogany color. That’s your flavor insurance policy.
- Quarter Those Onions: Yes, even if you’re impatient like me, resist the urge to chop the onion into tiny pieces. Those thick quartered slices caramelize beautifully in 5 minutes and add texture without disappearing into the sauce. (Bonus: Less mess to scrape up.)
- Check the Temp, Not the Time: After burning three batches, I finally figured out the oven’s hot spots aren’t the real enemy—guessing is. Use an instant-read thermometer at the thickest part of the brisket. Hit 203°F, and you’re golden. No more dry, overcooked brisket or mushy, underdone disappointment.
- Cold Butter Wins: Sounds weird, but it works: Toss those 2 tablespoons of butter into the sauce cold and cubed. As it melts, it coats the brisket in a glossy, buttery sheen without breaking. (Your future self will thank you when the sauce isn’t a greasy puddle.)
Essential equipment for this dish
Your Trusty Dutch Oven
I’ve been using my Le Creuset Dutch oven for years—it’s the backbone of my kitchen for slow-cooked meats. The thick, heavy enamel retains heat perfectly, which is critical for maintaining that 275°F oven temperature without fluctuations.
If you don’t have one, a heavy stainless steel Dutch oven or even a cast-iron Dutch oven will work, but avoid thin, lightweight pans—they’ll cause hot spots and uneven cooking.
I picked mine up at Williams Sonoma for about $150, and it’s been worth every penny for brisket and beyond. 🔥
Instant-Read Thermometer
This is non-negotiable for brisket success. I use a Thermoworks Smoke thermometer with dual probes, but even a basic Meater Plus will do the trick. The key is tracking the internal temperature of the brisket—it should hit 203°F at its thickest point.
I’ve learned the hard way that guessing won’t cut it; my first attempt at brisket ended with a dry, rubbery mess because I relied on my oven’s faulty temperature gauge. Now I double-check with my thermometer every 60 minutes. 🌡️
Heavy Foil or Aluminum Foil
Tightly wrapping your brisket in heavy-duty aluminum foil (or even two layers of regular foil) traps steam and keeps the meat moist during the long cook. I always use Reynolds Wrap because it’s thicker and less likely to tear.
If you’re short on foil, a foil-lined roasting pan works too—just make sure it’s snug so no steam escapes. This step is what separates a juicy brisket from a dry one, and it’s one of the easiest ways to improve your results. 💫
Cutting Board and Sharp Knife
You’ll need a sturdy cutting board (I use a maple board from Sur La Table) for slicing against the grain, and a sharp 12-inch chef’s knife—dull knives crush the meat instead of slicing cleanly.
I keep my knife honed with a Wüsthof Sharpening Steel to maintain that perfect edge. Slicing against the grain is the secret to tender bites, so don’t skip this step! A serrated knife works too, but a sharp chef’s knife gives you more control. 🔪
Meat Mallet (Optional but Helpful)
If your brisket has a thick fat cap, a meat mallet helps tenderize it before cooking. I use a Lodge cast-iron mallet to gently pound the fat down to about ¼-inch thickness, which ensures even cooking and a better crust.
Skip this if your brisket is already thinly trimmed, but it’s a game-changer for thicker cuts. This step also helps the seasoning penetrate deeper into the meat. 💪
Nutrition facts
Frequently asked questions
Why does my oven slow cooked brisket need such a long cook time?
The 4-5 hours at 275°F is essential because this low-and-slow method breaks down tough connective tissue into gelatin, creating that signature tender texture. Brisket is a lean cut with collagen that needs time to melt—rushing it results in dry, chewy meat instead of fork-tender perfection. The slow heat allows flavors to meld while keeping the meat juicy.
What if my brisket isn’t reaching 203°F after 5 hours?
If your brisket hasn’t hit 203°F after 5 hours, lower the oven to 250°F and continue cooking, checking every 30 minutes. Undercooked brisket will feel firm and springy when pressed—it needs that collagen breakdown to become tender. A meat thermometer is your best friend here; oven temperatures can vary.
Can I skip the searing step if my brisket is already browned?
Searing is crucial for flavor development, even if your brisket looks browned. The 8-10 minutes at 425°F creates a Maillard reaction that locks in juices and adds depth. If you skip it, your brisket will lack that rich, caramelized crust. Pro tip: Use the rendered fat for extra flavor in your sauce!
How do I know if I’ve sliced the brisket correctly against the grain?
Look for the visible grain lines on the meat’s surface—they run horizontally across the flat and diagonally across the point. Slice at a 45-degree angle perpendicular to these lines for the most tender bites. If you slice with the grain, each bite will be chewy. Practice makes perfect—your first few slices might be uneven, but you’ll get the hang of it!

Trained in classic French technique but raised on slow-cooked ribs and spicy rubs, she blends culinary skill with smoke and soul.
- Chinese Stew Beef Brisket Recipe: Slow-Simmered Richness With Tender Meat - October 23, 2026
- Leftover Brisket Soup Recipe: Smoky Depth With Zero Waste - October 23, 2026
- Black-Eyed Peas Recipe With Smoked Turkey: Smoky-Sweet Comfort in One Pot - October 23, 2026