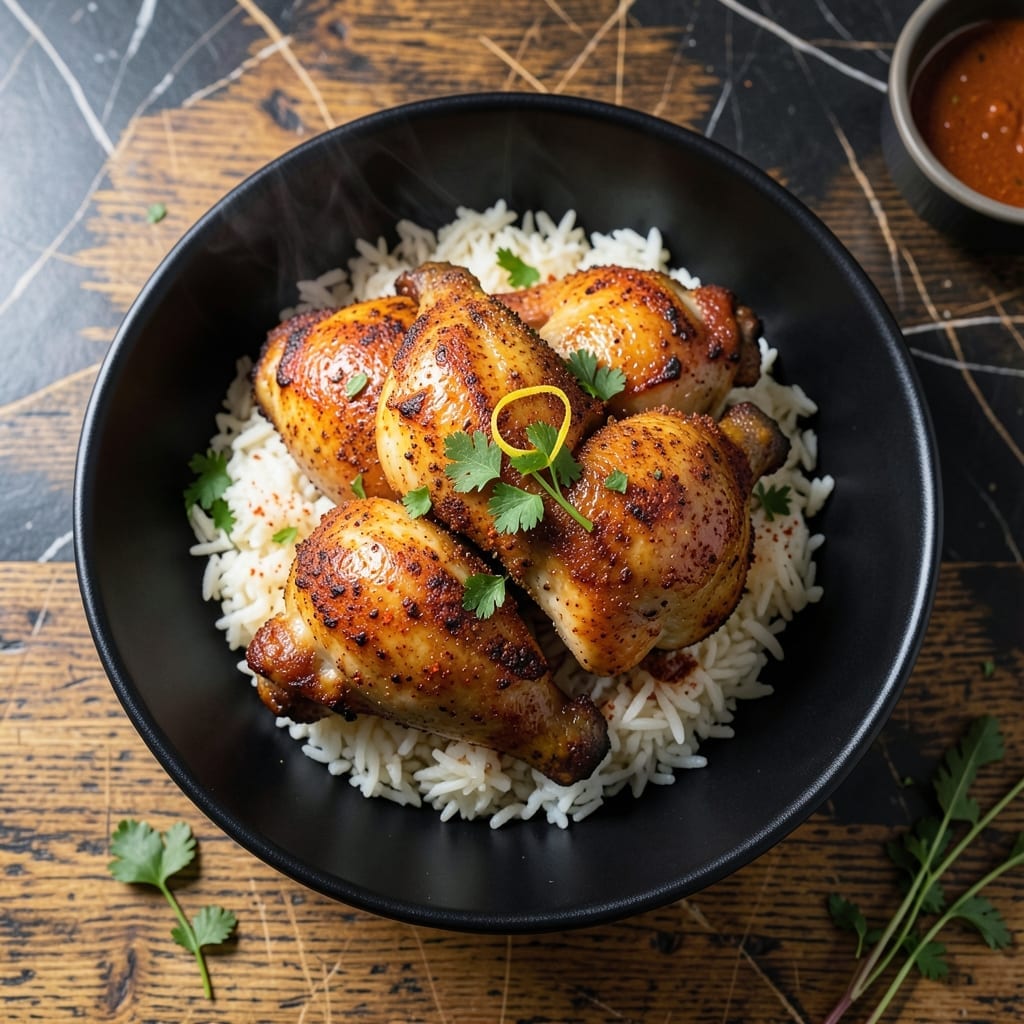
Achieving crispy oven chicken at home requires one simple but crucial technique: the right balance of heat and time. This method transforms basic ingredients into golden, shatteringly crispy perfection without frying.
I developed this recipe after years of testing oven temperatures and cooking times. The key is high heat to create that coveted crispy exterior while keeping the meat juicy. Pantry staples form the coating that delivers on texture.
What emerges from the oven is chicken with a golden crust that crackles with every bite, while the meat inside stays tender and flavorful. The aroma alone will have everyone gathering around the table before it’s even plated.
Serve with roasted vegetables or a simple salad to complete the meal. The crispy results will make this your go-to oven chicken recipe.
Ingredients for Recipe Crispy Oven Chicken
Pantry staples plus a few spices create that shatteringly crispy golden crust at home.
| Ingredient | Amount | Notes |
|---|---|---|
| Chicken Thighs 🍗 | 2 lb | Boneless, skin-on preferred |
| All-Purpose Flour 🌾 | 1 cup | For crispy coating |
| Cornstarch 🌾 | ¼ cup | Boosts crispiness |
| Baking Powder 🧂 | 1 tsp | Helps coating puff |
| Paprika 🌶️ | 1 tbsp | Sweet or smoked variety |
| Garlic Powder 🧄 | 1 tsp | Enhances flavor depth |
| Onion Powder 🧅 | 1 tsp | Balances seasoning |
| Salt 🧂 | 1 ½ tsp | Kosher or sea salt preferred |
| Black Pepper 🌶️ | 1 tsp | Freshly ground |
| Olive Oil 🫒 | 2 tbsp | For drizzling before baking |
| Butter 🧈 | 2 tbsp | Melted, for extra richness |
| Dijon Mustard 🟡 | 1 tbsp | Optional, for tangy twist |
[recipe_ingredient_scaler]
The chicken is everything here. Skin-on, boneless thighs give the best texture—crispy skin, juicy inside. Look for air-chilled if available (it crisps better than water-chilled). I get mine from Whole Foods or the butcher counter at Kroger. For the coating, cornstarch and baking powder are the secret weapons—don’t skip them (worth the extra minute).
No cornstarch? Instant potato flakes (crushed) can work in a pinch. Swap smoked paprika for regular if you prefer milder flavor. Butter can be omitted for a lighter version, but it adds depth. Fresh herbs like thyme or rosemary are great additions (just chop and mix into the flour). For gluten-free, almond flour or crushed cornflakes replace all-purpose flour.
Coating keeps in a sealed container for 1 month (no butter or wet ingredients). Baked chicken stays crispy for 2 days in the fridge—reheat in the oven at 375°F. Freeze uncooked breaded chicken for up to 3 months (thaw before baking).
Why You’ll Love This Recipe
- One Pan Magic: I toss the thighs with flour, cornstarch, and paprika, then let the oven do the work—no splatter, no fuss.
- Crispy Perfection: The baking powder trick gives that golden, crackly crust while keeping the meat juicy inside.
- Weeknight Hero: I’ve served this for lazy Sundays and rushed Wednesdays—always disappears fast.
- Budget Stretch: Chicken thighs stay cheap, and this recipe turns them into something special. Leftovers? Still great cold.
Step-by-Step Instructions for Crispy Oven Chicken
Here’s the method that guarantees a golden crust and juicy interior with minimal effort.
Step 1: Prepare the Seasoned Coating Mixture
In a large bowl, whisk together the 1 cup All-Purpose Flour, 0.25 cup Cornstarch, 1 tsp Baking Powder, 1 tbsp Paprika, 1 tsp Garlic Powder, 1 tsp Onion Powder, 1.5 tsp Salt, and 1 tsp Black Pepper. The cornstarch and baking powder are the secret to that extra crispiness.
This dry mixture should look evenly colored and free of lumps. The paprika adds a subtle warmth and that signature golden hue to the finished coating. Don’t skip the baking powder—it helps the coating puff slightly, creating more surface area for maximum crunch.
Step 2: Coat and Rest the Chicken Thighs
Pat the 2 lb Chicken Thighs completely dry with paper towels. This step is crucial—any moisture will prevent the coating from adhering properly. Season the thighs lightly with a pinch of salt if desired, though the coating is already well-seasoned.
Dredge each thigh in the flour mixture, pressing firmly to ensure an even, thick coating. Place the coated thighs on a wire rack set over a baking sheet. Let them rest for 10 minutes—this allows the coating to hydrate slightly and adhere better during baking.
Step 3: Drizzle with Fat and Bake at High Heat
Preheat your oven to 425°F. While it heats, drizzle the 2 tbsp Olive Oil and melted 2 tbsp Butter evenly over the coated chicken thighs. The combination of oil and butter creates a rich, golden finish that pure oil alone can’t achieve.
Bake on the middle rack for 20 minutes, then flip each piece and bake for another 15-20 minutes. You’ll know it’s ready when the coating is deep golden brown and the internal temperature reaches 165°F.
Step 4: Optional Finishing Touch and Rest
If using, brush the hot chicken with 1 tbsp Dijon Mustard immediately after removing from the oven. The mustard adds a subtle tang that cuts through the richness while adding an extra layer of flavor to the crust.
Let the chicken rest for 5-10 minutes before serving. This allows the juices to redistribute for maximum tenderness. The coating will stay crispy if you keep it on the wire rack rather than a solid surface, which would trap steam and make it soggy.
Pro Tips For Making Recipe Crispy Oven Chicken
- Preheat the Pan: Crank your oven to 425°F and let it sit for 15 minutes after it beeps—I learned this the hard way after too many batches of sad, soggy skin.
- Pat Thighs Dry: Use paper towels to remove every bit of moisture from the chicken thighs; even a little dampness ruins the crisp (yes, even if you’re in a hurry).
- Double Dredge: Toss the thighs in flour first, then dip in a cornstarch-baking powder mix for extra crunch; skip this and you’ll get coating that slides right off.
- Use a Rack: Place a wire rack over a baking sheet so air circulates under the chicken—my grandmother swore by this, and she was right.
Pro Cooking Tips for This Dish
Oven Preheating
Always preheat your oven to 425°F for at least 20 minutes before baking. I use an oven thermometer to verify the temperature—many home ovens run 10-25°F cooler than their dial indicates. This high heat is non-negotiable for achieving that shatteringly crispy crust.
Wire Rack Essential
Place your chicken on a wire rack set over a baking sheet, never directly on the pan. This allows hot air to circulate underneath, preventing the bottom from becoming soggy. I use a Nordic Ware rack that fits perfectly in my half-sheet pan. The elevation makes all the difference.
Don’t Overcrowd
Leave at least 1 inch of space between each piece of chicken. Overcrowding traps steam, which will turn your crispy coating into a sad, soggy mess. If needed, bake in batches—it’s worth the extra 10 minutes for perfect results. 💪
Fat Distribution
Drizzle the olive oil and melted butter evenly over all pieces, including the undersides. I use a pastry brush to ensure complete coverage. The fat not only promotes browning but also helps the coating crisp up uniformly.
The Flip Test
After the first 20 minutes, flip each piece carefully. If the coating resists, let it cook another 2-3 minutes before trying again. The flip should reveal a deep golden brown crust—this is your visual cue that it’s working. 🔥
Resting Matters
Let the chicken rest on the wire rack for 5-10 minutes after baking. This allows the juices to settle while keeping the coating crisp. I learned the hard way that cutting too soon results in dry meat and a less impressive presentation.
Nutrition Facts
Frequently Asked Questions
Why use both flour and cornstarch?
Cornstarch creates an ultra-crispy texture, while flour provides structure and flavor. The combo gives you the best of both worlds: shattery crust and sturdy coating.
Can I use chicken breasts instead of thighs?
Yes, but reduce baking time to 15-18 minutes per side. Breasts dry out faster and may not be as juicy as thighs. For best results, brine them first.
How do I keep the coating from falling off?
Pat chicken completely dry before coating and let it rest 10 minutes after dredging. Press firmly when applying the mixture.
What if my oven runs cool?
Increase temperature to 450°F or extend baking by 5-10 minutes. Use an oven thermometer to check your actual temperature.

Trained in classic French technique but raised on slow-cooked ribs and spicy rubs, she blends culinary skill with smoke and soul.
- Beef Brisket Rolls Recipe: Flaky Layers and Smoky Sweet Filling - October 15, 2026
- Masterbuilt Smoker Beef Brisket Recipe: Bark-To-Meat Ratio Hack for Unmatched Flavor - October 15, 2026
- Costco Beef Brisket Recipe: Low-and-Slow Masterpiece With Molasses-Kissed Crust - October 15, 2026