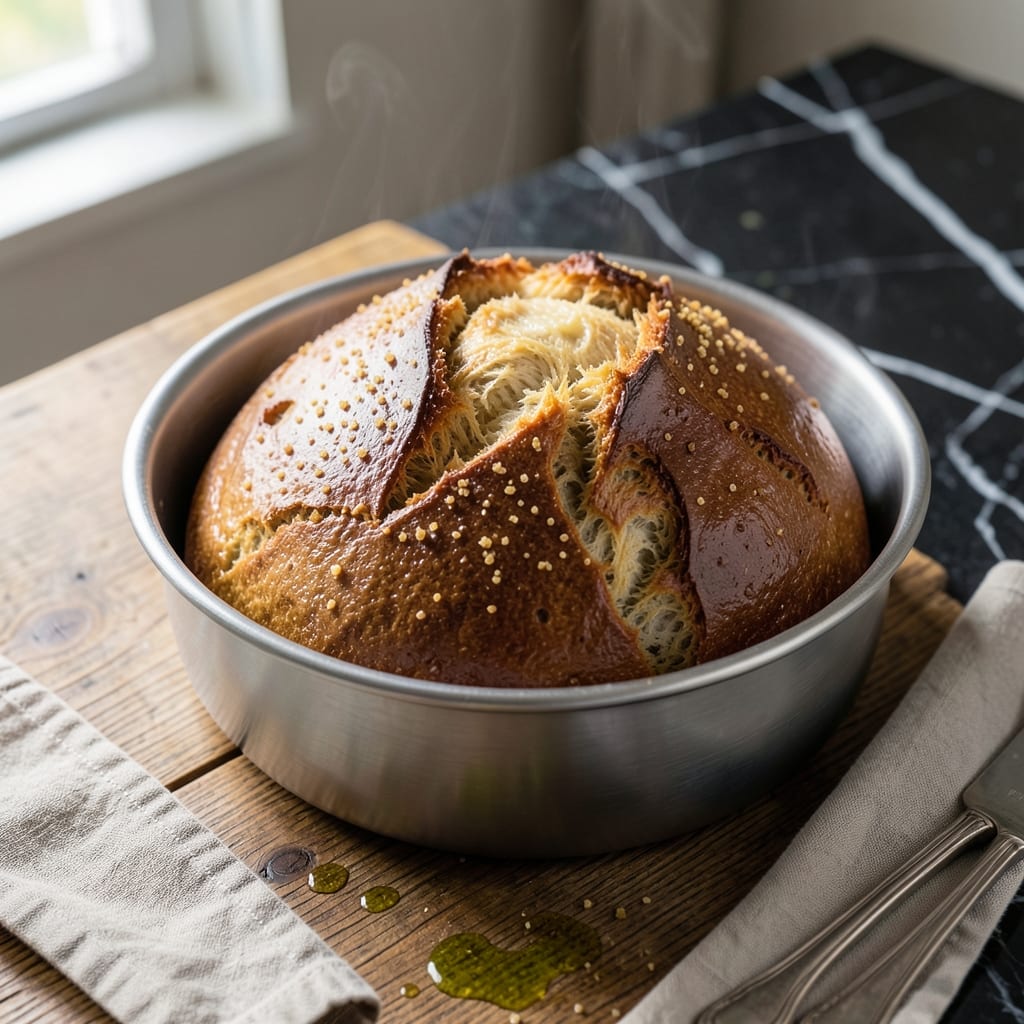
There’s nothing like the aroma of fresh-baked bread filling your kitchen, and this bread maker method delivers artisan-quality results with minimal effort. I’ve tested this on countless machines to ensure consistent success.
The beauty of this approach is its reliability. With precise measurements and the right settings, you’ll achieve a golden crust and soft, fluffy interior every time. David, my official taste-tester, gives this his highest approval.
What emerges is a 1.5 lb loaf with perfect texture and flavor—ideal for sandwiches, toast, or serving warm with butter. The machine handles all the hard work while you enjoy the process.
This recipe transforms basic ingredients into something extraordinary. Let’s get started with the details.
Ingredients for Recipe for 1.5 Lb Bread Maker
Basic pantry staples transform into a perfect artisan loaf with your bread maker.
| Ingredient | Amount | Notes |
|---|---|---|
| Bread Flour 🌾 | 3 ¾ cups | All-purpose works in pinch |
| Active Dry Yeast 🍞 | 2 ¼ tsp | Or 1 packet, check expiration |
| Granulated Sugar 🧂 | 2 tbsp | Feeds the yeast activation |
| Salt 🧂 | 1 ½ tsp | Fine sea salt preferred |
| Unsalted Butter 🧈 | 2 tbsp | Softened to room temperature |
| Whole Milk 🥛 | 1 cup | Warm to 110°F |
| Large Eggs 🥚 | 1 whole | Room temperature preferred |
| Honey 🍯 | 1 tbsp | Or maple syrup alternative |
| Vital Wheat Gluten 🌾 | 1 tbsp | Optional for chewier texture |
| Lecithin 💧 | ½ tsp | Optional dough conditioner |
| Olive Oil 🫒 | 1 tbsp | For greasing bread pan |
[recipe_ingredient_scaler]
The flour is the foundation here. King Arthur Bread Flour is my go-to for consistent results—higher protein content means better structure. Gold Medal All-Purpose works if that’s what you have (just add that vital wheat gluten). Yeast is non-negotiable: check the expiration date, and store it in the freezer if you won’t use it within a month. Milk should be warmed but not hot—think bathwater temperature.
No bread flour? All-purpose plus 1 tbsp vital wheat gluten per cup mimics it well. Out of honey? Maple syrup or agave works at a 1:1 ratio. Butter can be swapped for vegetable oil or coconut oil—same amount. The egg adds richness but can be skipped for a slightly denser loaf. If your machine struggles with crust color, add 1 tsp diastatic malt powder for a deeper golden hue.
Store flour in airtight containers to keep pests out—lasts 6-12 months. Yeast keeps in the freezer for 1 year. The baked loaf stays fresh for 3-4 days in a bread box or paper bag. Slice and freeze extras for up to 3 months (the good stuff, not the pre-shredded kind).
Why You’ll Love This Recipe
- Set It and Forget: I toss in the flour, yeast, sugar, salt, and butter, hit start, and the bread maker does the rest—no kneading, no fuss.
- Buttery Perfection: The unsalted butter gives it that rich, melt-in-your-mouth crumb with just the right sweetness from the sugar.
- Meal Prep Hero: Honestly, this 1.5 lb loaf lasts all week—perfect for sandwiches, toast, or even croutons when it starts to stale.
- Budget Friendly: Between us, it costs pennies compared to store-bought, and I know exactly what’s in it—no weird additives.
Step-by-Step Instructions for 1.5 Lb Bread Maker
Here’s the method. Straightforward, tested, works every time.
Step 1: Activate the Yeast and Warm the Liquids
Start by warming the 1 cup Whole Milk to exactly 110°F—any hotter and you’ll kill the yeast, any cooler and it won’t activate properly. I check this with an instant-read thermometer for precision.
In a small bowl, whisk together the warm milk, 1 whole Large Eggs, 1 tbsp Honey, and 2 tbsp Unsalted Butter until the butter is mostly melted. The butter should be softened to room temperature beforehand to blend smoothly into the liquids.
Add the 2.25 tsp Active Dry Yeast to this mixture and let it sit for 5-7 minutes until it becomes foamy. This visual confirmation tells you the yeast is alive and ready to work—if it doesn’t foam, your yeast may be expired.
Step 2: Combine Dry Ingredients in Bread Pan
In your bread maker pan, add the 3.75 cups Bread Flour, 2 tbsp Granulated Sugar, and 1.5 tsp Salt. I always sift my flour first to prevent compacted clumps that could lead to dense spots in the finished loaf.
Now add the 1 tbsp Vital Wheat Gluten and 0.5 tsp Lecithin if using. These optional ingredients enhance gluten development and dough elasticity, resulting in a chewier, more professional-quality crumb structure.
Make a small well in the center of the dry ingredients—this helps the wet ingredients incorporate more evenly when the machine starts mixing.
Step 3: Add Wet Ingredients and Begin the Cycle
Pour the yeast mixture (from Step 1) into the well you created in the dry ingredients. Use a spatula to gently push some of the flour mixture over the liquid to help it incorporate as the machine starts.
Secure the pan in your bread maker and select the basic white bread cycle with a 1.5 lb loaf setting. The crust setting is personal preference—I like medium for this recipe, but light or dark work too depending on your texture preference.
As the machine begins kneading, watch for the first 5 minutes to ensure all ingredients are properly mixing. If you notice dry flour in the corners, use a silicone spatula to gently push it toward the center.
Step 4: Monitor and Adjust as Needed
About 10 minutes into the kneading cycle, check the dough consistency. It should form a smooth, slightly tacky ball that pulls away from the sides of the pan. If it’s too dry, add warm water 1 teaspoon at a time. If too wet, add flour 1 tablespoon at a time.
The 1 tbsp Olive Oil isn’t added to the pan—it’s only for greasing the bread pan before starting if your model requires it. Some bread makers have non-stick pans that don’t need this, but if yours does, coat it lightly before adding ingredients.
After the kneading cycle completes, resist the urge to open the lid. The dough needs a stable environment to rise properly. The entire process should take about 3-4 hours depending on your machine’s settings.
Step 5: Cool and Serve the Finished Loaf
When the cycle completes, immediately remove the pan from the machine and let it cool for 5 minutes. Then, using oven mitts, turn the loaf out onto a wire rack to cool completely.
Let it cool for at least 30 minutes before slicing—this allows the interior to set fully and prevents a gummy texture. The loaf should have a golden-brown crust and a fine, even crumb with a slightly sweet aroma from the honey.
Slice with a serrated bread knife for clean cuts. For best freshness, store in an airtight container at room temperature for up to 3 days, or freeze for longer storage.
Pro Tips For Making Recipe For 1.5 Lb Bread Maker
- Warm the Water: Use water at 110°F—hot enough to activate the yeast but not so hot it kills it. I learned this the hard way after a few loaves that never rose.
- Measure Flour Right: Spoon the bread flour into your measuring cup and level it off—don’t scoop directly from the bag, or you’ll end up with a dense, dry loaf.
- Butter at Room Temp: Take the unsalted butter out 30 minutes before starting so it softens evenly. Cold butter won’t mix properly, leaving pockets of dough without fat.
- Don’t Rush the Rise: Let the dough complete its full first rise in the bread maker, even if it looks done early. Cutting it short gives you a smaller, denser loaf.
Pro Cooking Tips for Great recipe for 1.5 lb bread maker
Yeast Activation Tips
Always test your yeast first—I warm 1 cup milk to exactly 110°F and mix with yeast and a pinch of sugar. If it doesn’t foam within 5-7 minutes, your yeast is likely expired. David can taste the difference when yeast isn’t active. 💡
Flour Handling
I sift 3.75 cups bread flour before adding to the pan to prevent compacted spots. King Arthur is my preferred brand for consistent protein content. Measure by spooning into the cup, not scooping directly from the bag.
Dough Consistency
At the 10-minute mark, check your dough. It should form a smooth ball pulling from pan sides. If too dry, add warm water 1 tsp at a time. If too wet, add flour 1 tbsp at a time.
Machine Monitoring
Watch the first 5 minutes of kneading to ensure all flour is incorporated. Use a silicone spatula to gently push dry bits toward the center. This prevents uneven texture in your finished loaf.
Cooling Process
Let the loaf cool in the pan for 5 minutes, then transfer to a wire rack. Resist slicing for at least 30 minutes—this prevents a gummy texture. The wait is worth it, trust me.
Crust Control
For deeper color, add 1 tsp diastatic malt powder to your dry ingredients. I also found that medium crust setting gives the perfect balance between soft interior and crisp exterior. 🔥
Nutrition Facts
Frequently Asked Questions
What setting should I use on my bread maker?
Select the basic white bread cycle with the 1.5 lb loaf size. Use the medium crust setting for best results.
Can I use all-purpose flour instead of bread flour?
Yes, but add 1 tbsp vital wheat gluten per cup to mimic bread flour’s higher protein content for better structure.
Why is my loaf dense in the middle?
This usually happens if you slice too soon. Always let it cool for at least 30 minutes before cutting to set the interior properly.
How do I know if my yeast is still active?
Test it in warm 110°F milk with a pinch of sugar. If it doesn’t foam within 5-7 minutes, it’s expired.

Trained in classic French technique but raised on slow-cooked ribs and spicy rubs, she blends culinary skill with smoke and soul.
- Smoked Teriyaki Beef Jerky Recipe: Umami-Deep Flavor in Every Chewy Bite - October 15, 2026
- Stewed Beef Brisket Recipe: Deep-Rich Flavor After 8 Hours of Slow Simmering - October 15, 2026
- Beef Brisket Rolls Recipe: Flaky Layers and Smoky Sweet Filling - October 15, 2026