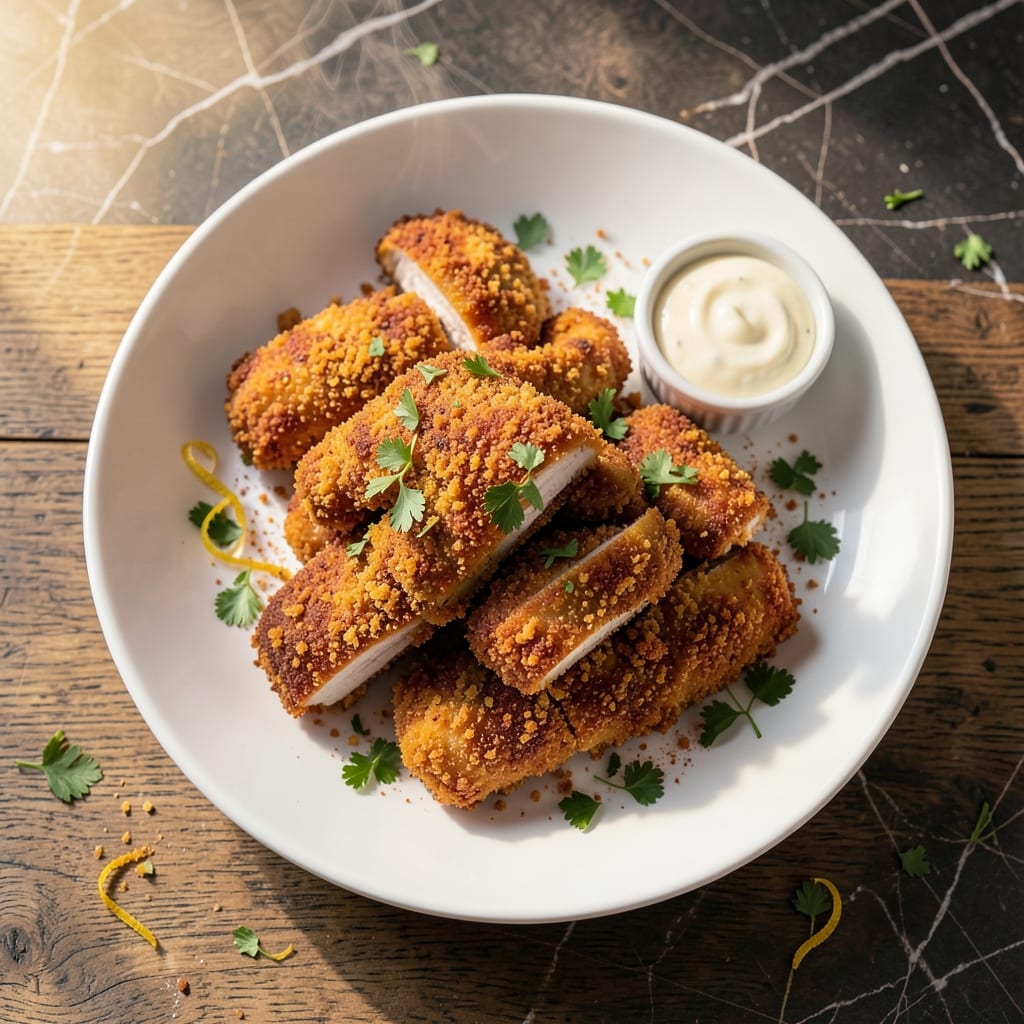
I’ve spent years perfecting this breaded chicken tenderloin recipe to achieve the ideal balance of textures. The coating stays crunchy while the meat remains tender and moist.
The secret lies in a double-dredging technique and precise cooking temperature. This method ensures every piece develops a golden exterior without drying out the interior.
What sets this version apart is the careful timing that transforms simple ingredients into restaurant-quality results. The breading adheres perfectly, creating that satisfying crunch with each bite.
These tenderloins work equally well for family dinners or casual gatherings. The technique guarantees consistent success every time you make them.
Ingredients for Recipe for Breaded Chicken Tenderloins
These carefully selected ingredients create restaurant-quality breaded chicken with perfect texture balance.
| Ingredient | Amount | Notes |
|---|---|---|
| Chicken Tenderloins 🍗 | 1 ½ lb | Boneless, skinless, pounded to even thickness |
| All-Purpose Flour 🌾 | 1 ½ cups | Divided for double-dredging |
| Large Eggs 🥚 | 2 whole | Beaten for egg wash |
| Buttermilk 🥛 | 1 cup | Full-fat for optimal adhesion |
| Panko Breadcrumbs 🍞 | 2 cups | Japanese-style for extra crunch |
| Cornstarch 🌾 | ¼ cup | For crispier coating |
| Garlic Powder 🧄 | 1 tsp | Freshly ground preferred |
| Onion Powder 🧅 | 1 tsp | Fine grind for even distribution |
| Paprika 🌶️ | 1 tsp | Sweet or smoked variety |
| Salt 🧂 | 1 ½ tsp | Diamond Crystal kosher salt preferred |
| Black Pepper 🌶️ | ½ tsp | Freshly ground for best flavor |
| Vegetable Oil 🫒 | 2 cups | For deep frying, high smoke point |
| Cayenne Pepper 🔥 | ¼ tsp | Optional for subtle heat |
[recipe_ingredient_scaler]
The chicken tenderloins are the foundation—opt for air-chilled, hormone-free from Whole Foods or a trusted butcher. Pounding to even thickness is non-negotiable for consistent cooking. Panko breadcrumbs (from the Asian aisle at Kroger or Walmart) provide superior crunch compared to standard breadcrumbs. Buttermilk should be full-fat; Organic Valley offers excellent quality. Cornstarch, often overlooked, is the secret to that extra crisp exterior.
No buttermilk? Whole milk with 1 tbsp lemon juice works in a pinch. Panko can be replaced with crushed cornflakes at a 1:1 ratio for a different texture. For gluten-free, swap all-purpose flour for rice flour and use gluten-free panko. The spices can be adjusted—smoked paprika adds depth, while a pinch of mustard powder enhances the coating’s savoriness. Always use fresh spices for optimal flavor.
Store raw chicken in the coldest part of your fridge for up to 2 days before cooking. Cooked tenderloins keep for 3-4 days refrigerated or freeze for up to 3 months. Reheat in a 375°F oven for 10-12 minutes to restore crispiness. Avoid microwaving, as it will soften the breading significantly.
Why You’ll Love This Recipe
- 20-Minute Meal: I can get these from prep to plate faster than takeout arrives. Honestly, the buttermilk dip and panko crunch do half the work for me.
- Crispy Outside, Juicy Inside: That panko crust stays shatteringly crisp while the buttermilk keeps the chicken absurdly tender.
- Kid-Approved Crowd Pleaser: I serve these for picky eaters and dinner parties alike. Between us, even the adults fight over the last piece.
- Budget Stretcher: Chicken tenderloins are cheaper than breasts, and one batch makes enough for leftovers my family actually wants to eat.
Step-by-Step Instructions for Breaded Chicken Tenderloins
Achieve restaurant-quality results with this precise method for crispy, golden tenderloins with a juicy interior.
Step 1: Prepare the Breading Station and Season Chicken
Set up three shallow bowls in a row. In the first, combine 1.5 cups all-purpose flour with 1 tsp garlic powder, 1 tsp onion powder, 1 tsp paprika, 1.5 tsp salt, 0.5 tsp black pepper, and 0.25 tsp cayenne pepper. This seasoned flour ensures every bite is flavorful.
In the second bowl, whisk 2 whole large eggs with 1 cup buttermilk until smooth. The buttermilk’s acidity tenderizes the chicken while helping the coating adhere. In the third bowl, mix 2 cups panko breadcrumbs with 0.25 cup cornstarch—this combination guarantees maximum crunch.
Step 2: Coat the Chicken Tenderloins
Pat the 1.5 lb chicken tenderloins dry with paper towels—moisture is the enemy of crispiness. Dredge each piece in the seasoned flour, shaking off excess. Then dip into the egg-buttermilk mixture, letting any excess drip back into the bowl.
Finally, press each tenderloin firmly into the panko-cornstarch mixture, ensuring complete coverage. I like to press down gently to help the crumbs adhere. Place the coated tenderloins on a wire rack set over a baking sheet. Let them rest for 10 minutes—this helps the coating set and prevents it from falling off during frying.
Step 3: Fry to Golden Perfection
Heat 2 cups vegetable oil in a deep, heavy-bottomed skillet over medium-high heat until it reaches 350°F. Use a deep-fry or candy thermometer for accuracy. The oil is ready when a pinch of panko sizzles immediately upon contact.
Carefully place 3-4 tenderloins in the hot oil, avoiding overcrowding—this lowers the oil temperature and leads to greasy results. Fry for 4-5 minutes per side until the coating is deep golden brown and the internal temperature reaches 165°F. Drain on a wire rack or paper towels to maintain crispiness.
Step 4: Rest and Serve Immediately
Transfer the fried tenderloins to a clean wire rack and let them rest for 2-3 minutes. This brief rest allows the juices to redistribute, ensuring a moist interior. Serve immediately while hot and crispy.
For best results, keep the first batch warm in a 200°F oven while frying subsequent batches. This maintains the perfect texture without overcooking. The contrast of the shattering crust and tender meat delivers the promised crunch with every bite.
Pro Tips For Making Recipe For Breaded Chicken Tenderloins
- Double Dredge: Dip the tenders in flour, then buttermilk-egg wash, then back in flour before the final panko coat. I learned this the hard way—single dredging leads to patchy breading that falls off in the pan.
- Press the Panko: After coating, press the panko firmly into the chicken with your palms. Sounds weird, but it works: this guarantees a thick, crispy crust that doesn’t flake off when cooking.
- Rest Before Frying: Let the breaded tenders rest on a wire rack for 10 minutes before frying. My grandmother swore by this, and she was right: it sets the coating so it doesn’t slide off in the oil.
- Skip Cold Chicken: Take the tenderloins out of the fridge 15-20 minutes before breading. After burning three batches, I finally figured out that cold chicken lowers the oil temp, making the breading greasy instead of crispy.
Storing and Reheating This recipe for breaded chicken tenderloins
Refrigerator Storage
Let your tenderloins cool completely before storing—I wait about 30 minutes. Place them in a single layer on a paper towel-lined plate, then transfer to an airtight container with parchment between layers. They’ll keep for 3-4 days at 40°F or below. 💡
Freezer Storage
For longer storage, freeze cooked tenderloins in a single layer on a baking sheet first. Once frozen solid, transfer to a gallon freezer bag with parchment between each piece. They’ll maintain quality for up to 3 months. Squeeze out excess air to prevent freezer burn.
Oven Reheating
Preheat your oven to 375°F and place tenderloins on a wire rack over a baking sheet. Heat for 10-12 minutes until the internal temperature reaches 165°F. This method restores crispiness better than any other. 🔥
Air Fryer Method
Arrange tenderloins in a single layer in your air fryer basket. Reheat at 375°F for 4-5 minutes, flipping halfway. Check that the coating is crispy and the interior is heated through. I use my Ninja Foodi for this.
Avoid Microwaving
While it’s the quickest option, microwaving will make the breading soggy. If you must, use 50% power in 30-second intervals and place a paper towel under and over the tenderloins. Even then, expect softened texture.
Nutrition Facts
Frequently Asked Questions
Can I bake these instead of frying?
Yes! Bake at 400°F for 15-20 minutes, flipping halfway. Use a wire rack on a baking sheet for even crisping. The texture won’t be as crunchy as frying, but still delicious.
Why does my breading fall off?
The most common cause is not letting the coating rest before cooking. Always let breaded pieces sit for 10 minutes to help the coating adhere. Also, pat the chicken completely dry first.
What’s the best oil for frying?
Use oils with a high smoke point like vegetable, canola, or peanut oil. Peanut oil adds a subtle flavor. Maintain 350°F for perfect crispiness without burning.
Can I make these gluten-free?
Swap all-purpose flour for rice flour and use gluten-free panko. The cornstarch can stay as is. The texture will be very similar to the original.

Trained in classic French technique but raised on slow-cooked ribs and spicy rubs, she blends culinary skill with smoke and soul.
- Best Smoked Oxtail Recipe: Deep-Rich Flavor After Low-and-Slow Cooking - October 14, 2026
- Pit Boss Smoked Prime Rib Roast Recipe: Bark-to-Bone Crispness in 4 Hours - October 14, 2026
- Smoked Tuna Steak Recipe: Seared Crust Meets Silky Centers - October 14, 2026