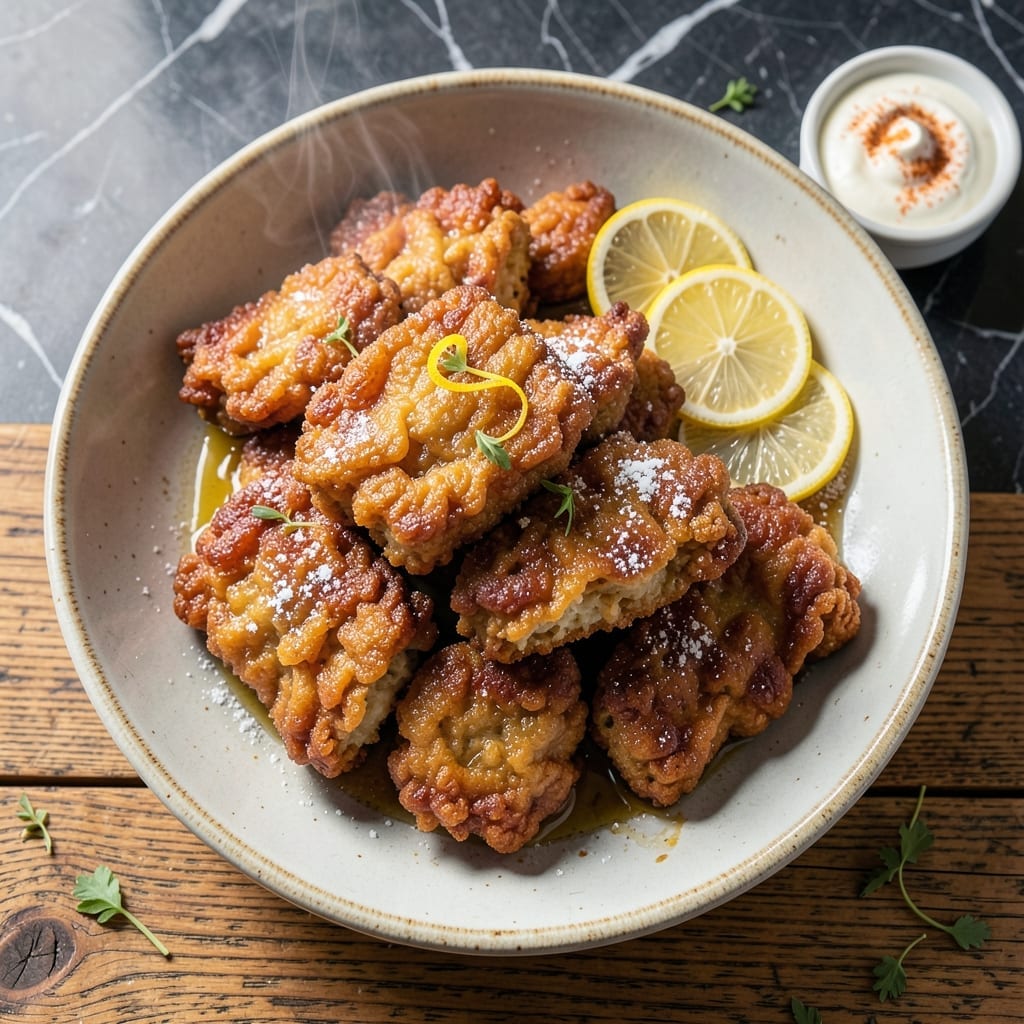
Deep frying transforms ordinary ingredients into golden, crispy masterpieces with a technique that’s simpler than many realize. This method delivers unmatched texture and flavor when done correctly.
I learned the importance of precise oil temperature and proper drainage from years of trial and error. The key is maintaining consistent heat and using the right oil for optimal results without greasiness.
Whether you’re frying chicken, vegetables, or fish, the process creates a shatteringly crisp exterior that gives way to tender, flavorful centers. The contrast between the crunchy coating and moist interior is what makes this technique so satisfying.
With a few safety precautions and the right approach, you’ll achieve professional-quality results at home. The secret lies in patience and attention to detail throughout the process.
Ingredients for Recipe for Deep Fried
Quality ingredients create that perfect golden, crispy texture everyone loves with deep frying.
| Ingredient | Amount | Notes |
|---|---|---|
| Vegetable Oil 🫒 | 4 cups | High smoke point, peanut or canola work too |
| All-Purpose Flour 🌾 | 2 cups | For dredging and batter base |
| Cornstarch 🌾 | ½ cup | Creates extra crispiness in coating |
| Baking Powder 🧂 | 1 tsp | For lighter, airier batter |
| Eggs 🥚 | 2 whole | Large, beaten for batter binding |
| Buttermilk 🥛 | 1 cup | Adds tang and tenderness to batter |
| Chicken Thighs 🍗 | 1 ½ lb | Boneless, skinless, cut into strips |
| Salt 🧂 | 1 tbsp | Kosher or sea salt for seasoning |
| Black Pepper 🌶️ | 1 tsp | Freshly ground preferred |
| Garlic Powder 🧄 | 1 tsp | For seasoning the coating |
| Paprika 🌶️ | 1 tsp | Smoked or sweet variety |
| Cayenne Pepper 🔥 | ¼ tsp | Optional for heat adjustment |
[recipe_ingredient_scaler]
The oil choice is non-negotiable for optimal results. Peanut oil offers the highest smoke point and best flavor for deep frying, though vegetable or canola oil work well too. For professional-quality outcomes, avoid oils with low smoke points like extra-virgin olive oil. Always use a deep, heavy pot and never fill it more than halfway. Costco sells peanut oil in bulk at reasonable prices for frequent frying.
Buttermilk can be replaced with whole milk plus 1 tbsp vinegar or lemon juice (let sit 5 minutes). For a gluten-free option, swap all-purpose flour for rice flour or a gluten-free blend. The chicken thighs can be substituted with chicken breasts (pound to even thickness) or tofu for a vegetarian version. Cornstarch is essential for that shatteringly crisp texture—don’t skip it.
Store unused oil in a cool, dark place for up to 3 months. The battered chicken keeps in the fridge for 2 days but is best eaten immediately. Leftovers reheat well in a 400°F oven for 10-15 minutes to restore crispiness. Never reuse oil that’s darkened or has a burnt smell.
Why You’ll Love This Recipe
- Minimal Effort: I just mix flour, cornstarch, and baking powder with eggs—no fancy steps, just dip and fry.
- Crispy Perfection: That cornstarch in the batter makes it shatteringly crisp while staying light as air.
- Weeknight Hero: Honestly, it’s my go-to for quick dinners, picnics, or when the kids demand snacks.
- Budget Friendly: A handful of pantry staples and vegetable oil—feeds a crowd without breaking the bank.
Step-by-Step Instructions for Deep Frying
Achieve perfect golden crunch with this professional technique for consistently crispy results.
Step 1: Prepare the Seasoned Coating
In a large bowl, whisk together the 2 cups All-Purpose Flour, 0.5 cup Cornstarch, 1 tsp Baking Powder, 1 tbsp Salt, 1 tsp Black Pepper, 1 tsp Garlic Powder, 1 tsp Paprika, and 0.25 tsp Cayenne Pepper until fully combined. The cornstarch is essential for that extra-crisp texture you’re after.
This dry mix creates a well-seasoned base that will adhere to the chicken and form a sturdy crust. I always sift the flour first to eliminate lumps, ensuring a smooth, even coating on every piece.
Step 2: Create the Buttermilk Batter
In a separate bowl, beat the 2 whole Eggs lightly, then whisk in the 1 cup Buttermilk until smooth. The buttermilk’s acidity tenderizes the chicken while adding a subtle tang to balance the richness of the dish.
This wet mixture should be thin enough to drip off a spoon but thick enough to cling to the chicken. If it seems too runny, let it sit for a minute or two—the flour will absorb some liquid as it rests.
Step 3: Coat and Rest the Chicken
Pat the 1.5 lb Chicken Thighs dry with paper towels to remove excess moisture—this ensures the coating adheres properly. Cut the thighs into uniform strips for even cooking.
Dip each piece into the buttermilk mixture, letting any excess drip off, then dredge it thoroughly in the seasoned flour. Press gently to ensure full coverage. Place the coated chicken on a wire rack and let it rest for 10 minutes—this allows the coating to hydrate and set, preventing it from flaking off during frying.
Step 4: Heat the Oil and Fry to Perfection
Pour the 4 cups Vegetable Oil into a deep, heavy-bottomed pot or Dutch oven, leaving at least 2 inches of space at the top for safety. Heat the oil over medium-high heat until it reaches 350-375°F on a deep-fry thermometer.
Fry the chicken in batches to avoid overcrowding, which can lower the oil temperature and lead to soggy results. Carefully lower each piece into the oil and cook for 6-8 minutes, turning occasionally, until the coating is deep golden brown and the internal temperature reaches 165°F. Drain on a wire rack or paper towels to maintain crispness.
Step 5: Rest and Serve Immediately
Let the fried chicken rest for 2-3 minutes after frying. This brief pause allows the juices to redistribute, ensuring the meat stays moist and tender inside its crisp shell.
Serve while hot for the best texture—the contrast between the crunchy exterior and juicy interior is at its peak right out of the fryer. Any leftovers should be reheated in an oven or air fryer to revive the crispness.
Pro Tips For Making Recipe For Deep Fried
- Heat the Oil First: I learned this the hard way—always preheat the vegetable oil to 350-375°F before adding batter. Cold oil makes greasy, soggy results every time.
- Chill the Batter: After mixing the flour, cornstarch, baking powder, and eggs, let the batter rest in the fridge for 15-20 minutes. It fries up crispier and holds together better.
- Skip Overcrowding: Resist the urge to fry too many pieces at once—it drops the oil temp and leads to uneven cooking. Two or three pieces at a time max in a standard pot.
- Drain on Wire Rack: Skip the paper towels and use a wire rack over a baking sheet. The air circulation keeps the bottom from getting soggy while the excess oil drips off.
Troubleshooting This Dish
Oil Temperature Issues
If your coating absorbs too much oil, your oil temperature is likely too low. Use a deep-fry thermometer to maintain 350-375°F consistently. I keep my ThermoWorks thermometer clipped to the pot for constant monitoring. 🌡️
Soggy Coating Fix
Overcrowding the pot drops oil temperature, causing soggy results. Fry in batches with at least 2 inches between pieces. I use a Dutch oven for better heat retention with large batches.
Also, drain on a wire rack, not paper towels, to prevent steam from softening the crust.
Uneven Cooking
Uneven thickness means uneven cooking. Pound chicken to ½-inch thickness before coating. Cut pieces into similar sizes for consistent results.
Rotate pieces during frying to ensure all sides get equal heat exposure.
Batter Falling Off
If your coating slides off, the chicken might be too wet. Pat pieces very dry before dipping. I use paper towels and press firmly to remove all moisture.
Let coated chicken rest for 10 minutes before frying to help the batter adhere properly.
Oil Smoking Excessively
Smoking oil means it’s overheating. Immediately reduce heat and let it cool to 350°F. I turn off the burner completely if it starts smoking heavily. ⚡
Consider switching to peanut oil which has a higher smoke point than vegetable oil.
Nutrition Facts
Frequently Asked Questions
What’s the ideal oil temperature for frying?
Maintain oil between 350-375°F for perfect crispiness. Use a deep-fry thermometer for accuracy. Oil that’s too cool creates greasy food, while too hot burns the outside before cooking through.
Can I use an air fryer instead of deep frying?
Yes, but results will differ. Air fry at 400°F for 12-15 minutes, flipping halfway. The texture won’t be identical to deep-frying, but it’s a healthier alternative with less oil.
How do I know when the food is done?
Look for a deep golden brown color and internal temperature of 165°F for chicken. Use a meat thermometer for precision. Smaller items like vegetables cook faster, often in 3-5 minutes.
What’s the best way to dispose of used oil?
Let oil cool completely, then pour into a sealed container. Never pour down the drain. Many communities have recycling programs for cooking oil. Store used oil in a cool, dark place if reusing.

Trained in classic French technique but raised on slow-cooked ribs and spicy rubs, she blends culinary skill with smoke and soul.
- Best Smoked Oxtail Recipe: Deep-Rich Flavor After Low-and-Slow Cooking - October 14, 2026
- Pit Boss Smoked Prime Rib Roast Recipe: Bark-to-Bone Crispness in 4 Hours - October 14, 2026
- Smoked Tuna Steak Recipe: Seared Crust Meets Silky Centers - October 14, 2026