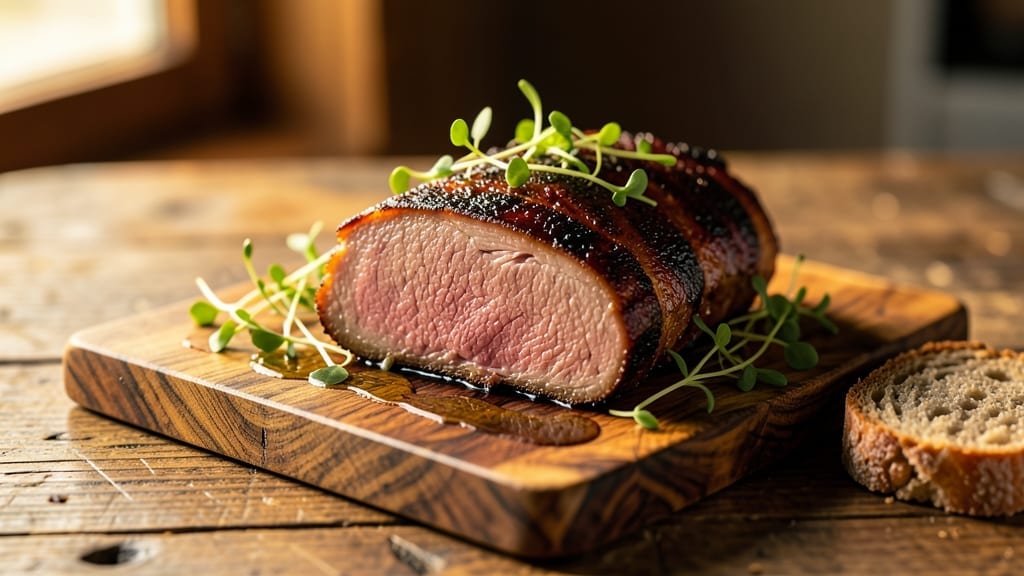
Mastering a smoked pork picnic roast transforms backyard gatherings into legendary feasts—juicy, tender, and packed with that signature smoky aroma that lingers long after the last bite. 🔥 Growing up in small-town Georgia, I learned that pork shoulder, when smoked low and slow, becomes so tender it practically melts in your mouth.
The key lies in patience: hours of careful smoking, precise temperature control, and knowing exactly when to pull it from the heat.
This recipe delivers restaurant-quality results with minimal fuss, using a simple yet effective dry rub and a blend of applewood and hickory for that classic Southern smoky depth.
The magic happens at 225°F, where the pork shoulder breaks down into melt-in-your-mouth perfection while forming a crispy bark that seals in all those juices. I’ve perfected this method over years of smoking competitions, and it never fails to impress—even skeptical guests.
By the time you’re done, you’ll have a pull-apart masterpiece that’s juicy, flavorful, and ready to serve with classic sides like tangy coleslaw or pickled vegetables. The secret to serving it right? Resting it under foil for 15 minutes—this ensures every slice stays moist and tender.
Whether you’re hosting a backyard BBQ or feeding a hungry crowd, this recipe delivers the kind of pork that becomes the star of any meal.
Pair it with a drizzle of homemade BBQ sauce or a sprinkle of fresh herbs for extra flair. Here’s how to make it—step by step, just like I’ve done for years in my kitchen and on competition pits across the Southeast.
Ingredients for smoked pork picnic roast
Big batch of tender pork. Smoky, juicy, and perfect for crowds—just like grandma’s old recipes.
| Ingredient | Amount | Notes |
|---|---|---|
| Pork Shoulder (Picnic Cut) 🐷 | 8 lb | Bone-in preferred for flavor |
| Brown Sugar 🍚 | ½ cup | Light or dark variety |
| Smoked Paprika 🌶️ | 3 tbsp | Sweet or hot preferred |
| Garlic Powder 🧄 | 2 tbsp | Not garlic salt |
| Onion Powder 🧅 | 2 tbsp | Fresh ground preferred |
| Coarse Kosher Salt 🧂 | 2 tbsp | For dry rub |
| Black Pepper 🌶️ | 1 tbsp | Freshly ground preferred |
| Applewood/Hickory Wood Chips 🪵 | 2 cups | Soaked in water 2+ hours |
| Apple Cider Vinegar 🍎 | ¼ cup | For cleaning grill surface |
| Peppermint Tea Bags ☕ | 2 whole | For cooling water |
| Butter 🧈 | ½ cup | Full-fat for richness |
| Fresh Parsley 🌿 | ¼ cup | Chopped for garnish |
[recipe_ingredient_scaler]
The pork shoulder is everything here. Bone-in picnic cut gives you that extra layer of flavor—trust me, it’s worth the extra weight. I always buy mine from Costco when I’m feeding a crowd, but your local butcher will work too. Look for good marbling—that’s where the juiciness comes from. If you’re short on time, pre-cut slabs at the grocery store save you from cubing yourself, but the whole cut is more authentic. For the wood chips, Traeger or Weber brands are reliable, but any quality applewood/hickory blend works. Soak them in cool water with a peppermint tea bag—the tea keeps the water fresh and adds a subtle aroma.
No applewood? Hickory alone works just fine—it’s the classic Southern choice. Short on brown sugar? Maple syrup at half the amount adds sweetness without changing texture. Want extra smokiness? Add 1 tbsp liquid smoke to your dry rub. Fresh parsley is ideal but dried parsley at one-third the amount gets you close. The apple cider vinegar isn’t just for cleaning—it’s a natural degreaser that helps your grill surface last longer. And if you’re worried about the vinegar smell, just rinse it off after cleaning.
This roast keeps beautifully for 4 days in the fridge, but honestly, it’s even better the next day. For long-term storage, slice and freeze portions in airtight containers—it reheats like a dream in the oven at 300°F for 20 minutes. I always wrap leftovers in foil with a pat of butter on top to keep them moist. The dry rub? Store it in a glass jar for up to 3 months. I make extra just so I’ve got it ready for next time. And if you’re serving it at room temperature, pull it out 1 hour ahead—that’s how you get those perfect slices.
Why You’ll Love This Recipe
- No-Fuss Flavor Bomb: That dry rub—half a cup of brown sugar, smoked paprika, and those powders—does all the work while you nap. I mix it once, slap it on the pork, and forget about it until it’s done. The magic happens in the smoke, not the stirring.
- Crowd-Pleasing Magic: Between us, this isn’t just for summer BBQs. I serve it at Thanksgiving leftovers, game day, or even a lazy Sunday. The pork’s so good, no one cares if it’s not a holiday. Plus, the peppermint tea bags inside the butcher paper? That little trick makes it feel special without extra effort.
- Leftovers That Rule: Honestly, I make this for a crowd, but the best part is the next-day sandwiches. Slice the pork, layer it on toasted bread with coleslaw, and drizzle that parsley butter over it. It’s like eating a gourmet meal without the fuss. And if you freeze portions? Reheating takes 20 minutes flat.
- Budget-Friendly Feast: An 8-pound pork shoulder with a handful of pantry staples feeds everyone and leaves little change. The wood chips and tea bags are small investments, but they make the flavor pop. I’ve spent more on takeout for half this amount—so why not feed your family right?
Step-by-step instructions for smoked pork picnic roast
Here’s the foolproof method that delivers melt-in-your-mouth pork every time.
🔥 Step 1: Prepare the Wood Chips and Clean the Smoker
Soak the 2 cups applewood/hickory wood chips in water for at least 2 hours before smoking. This prevents them from burning too quickly and gives you that clean, consistent smoke flavor. While they soak, clean your smoker thoroughly using the ¼ cup apple cider vinegar—it cuts through grease and removes old flavors. I like to wipe down the interior with a vinegar-soaked cloth, then rinse with hot water and dry completely.
Here’s the thing—clean smoke flavor starts with a clean smoker. If you skip this step, you might end up with a mix of pork and whatever was smoked last time. Trust me, it makes a difference. Once your smoker is clean and dry, you’re ready to build that perfect smoke environment.
👨🍳 Step 2: Mix and Apply the Dry Rub
In a large bowl, combine the ½ cup brown sugar, 3 tbsp smoked paprika, 2 tbsp garlic powder, 2 tbsp onion powder, 2 tbsp coarse kosher salt, and 1 tbsp black pepper. Mix thoroughly until every ingredient is evenly distributed—you should see no streaks of any single component. This is your flavor foundation, so don’t rush it.
Pat the 8 lb pork shoulder dry with paper towels (yes, even if it looks dry—you want it bone dry for that perfect bark). Then generously coat the entire surface with the dry rub mixture, pressing it into the meat so it adheres well. Don’t be shy—this is where all the flavor lives. Let the rubbed pork sit at room temperature for 1 hour before smoking. This resting period ensures even cooking and helps the rub penetrate.
🔥 Step 3: Smoke at Low and Slow
Preheat your smoker to 225°F using the soaked applewood/hickory wood chips. Place the rubbed pork shoulder fat-side up on the smoker grate—this allows the rendered fat to baste the meat as it cooks. Close the lid and resist the urge to peek. Every time you open it, you lose heat and moisture, adding unnecessary time to your cook.
Smoke the pork for 6-8 hours until the internal temperature reaches 165°F. You’ll notice it hits “the stall” around 160°F—this is when the temperature stops rising as moisture evaporates. Don’t panic; this is completely normal. The key is patience. The pork will continue cooking through even after the stall.
🥘 Step 4: Wrap and Finish Cooking
Once the internal temperature hits 165°F, it’s time to wrap the pork. I use butcher paper (not foil) because it breathes better and helps maintain that beautiful bark. Place the 2 peppermint tea bags inside the paper before wrapping—this adds a subtle minty freshness that pairs perfectly with the smoky pork. Return the wrapped pork to the smoker and continue cooking until the internal temperature reaches 203°F.
This final stage, often called the “Texas crutch,” helps the pork push through the stall and reach that perfect pull-apart tenderness. The total cook time should be around 8-10 hours, but don’t rush it. The internal temperature is your guide, not the clock.
⏰ Step 5: Rest and Serve with Butter Baste
Remove the pork from the smoker and let it rest for at least 1 hour (I prefer 2 hours) wrapped in the butcher paper. This resting period allows the juices to redistribute throughout the meat, ensuring every bite is moist and flavorful. While it rests, melt the ½ cup butter in a small saucepan over low heat. Once melted, remove from heat and stir in the ¼ cup chopped fresh parsley. This butter basting adds richness and freshness that takes your pork to the next level.
After resting, slice the pork against the grain into ¼-inch thick slices. Spoon the melted butter mixture over each slice before serving. The result should be juicy, tender pork with a perfect bark and a hint of minty freshness from the tea bags. Serve with your favorite sides—cornbread, coleslaw, or crusty bread to soak up those delicious juices.
Pro Tips For Making Smoked Pork Picnic Roast
- Prep the Rub Properly: Mix the ½ cup brown sugar, 3 tbsp smoked paprika, and spices until no streaks remain—this ensures every bite has consistent flavor. I learned the hard way that skipping this step means some areas taste like straight salt while others are overwhelmingly sweet.
- Don’t Rush the Rest: Let the rubbed pork sit at room temperature for the full 1 hour before smoking. I know, it feels like forever, but cold meat cooks unevenly and steams instead of developing that perfect bark.
- Watch the Stall: When the internal temp hits 160°F, it’ll stall—don’t panic and crank the heat. The 225°F is non-negotiable; rushing it here means dry, tough meat. The pork will push through on its own.
- Butter Up While Warm: Melt the ½ cup butter with ¼ cup parsley while the pork rests—not before. Cold butter won’t coat the slices, and skipping the parsley leaves the dish flat. Trust me, the effort is worth it.
Essential equipment for smoked pork picnic roast
Your Smoker is Your Canvas
Your smoker is the heart of this recipe, and investing in the right one makes all the difference. I’ve been using a Traeger Timberline 34 for years, but even a Weber Smokey Mountain will work beautifully.
If you’re on a budget, a Char-Griller Akorn is a fantastic entry-level option that delivers consistent results. The key is temperature control—look for a model with a digital probe thermometer like the Meater+ for accuracy. 🔥
Must-Have Accessories
A Lodge cast iron skillet is essential for wrapping your pork in the Texas crutch stage—I use mine to hold the butcher paper while it cooks. Don’t overlook a high-quality meat probe thermometer like the Thermoworks Smoke to monitor internal temps without opening the smoker.
I also keep a spray bottle with apple cider vinegar on hand to clean the grate between cooks. These tools elevate your results from good to legendary.
Wood Chips and Fuel
Applewood and hickory are your best friends for this recipe, but Traeger brand wood chips are my go-to because they’re pre-soaked and consistent. If you’re using Traeger pellets, they’re even more convenient—they smoke and ignite automatically.
For a Southern twist, try pecan wood chips for a subtle sweetness. Just remember to soak them for at least 2 hours before using to prevent flare-ups. My farm-grown heritage pigs deserve the best fuel!
Resting and Serving Tools
After smoking, you’ll need a large cutting board and a sharp boning knife like the Dexter-Russell 12-inch for slicing against the grain. I also keep a foil-wrapped cooler nearby to rest the pork—this keeps it warm while you prep sides.
For serving, a wooden serving board adds rustic charm, and a small sauce boat for the parsley butter is a game-changer. Presentation matters!
Budget-Friendly Swaps
If you don’t own a smoker yet, a charcoal grill with a temperature probe works in a pinch—just add a water pan to maintain humidity. For the dry rub, Penzeys spices are my favorite for their consistency, but any smoked paprika and garlic powder combo will work.
Even a $20 digital thermometer from Amazon improves accuracy dramatically. You don’t need a fancy setup—just the right tools for the job. 💡
Nutrition facts
Frequently asked questions
Why does my smoked pork picnic roast need to rest after cooking?
Resting is absolutely critical for juiciness! After smoking, the pork’s internal juices redistribute when you let it rest for 1 hour (or 2 hours for best results). Skipping this step means dry, tough slices instead of tender, melt-in-your-mouth perfection. The butcher paper wrap keeps it warm and moist during rest, so don’t rush it!
Can I use foil instead of butcher paper for wrapping?
Butcher paper is ideal because it breathes while maintaining moisture, preserving that beautiful bark. Foil traps steam and can make the surface soggy. If you must use foil, wrap it loosely and check for doneness sooner. The Texas crutch works best with paper for that perfect balance of tenderness and texture.
What if my smoker temperature fluctuates during cooking?
Fluctuations are normal, but keep an eye on it! Use a reliable probe thermometer to monitor both smoker temp and pork’s internal temp. If temps drop below 225°F, add more wood chips or adjust airflow. The key is patience—your pork will keep cooking even if the smoker cools slightly. Just focus on reaching 203°F internally.
How do I know when the pork is done if I don’t have a meat thermometer?
Check for tenderness by pressing gently with your finger—it should feel like the pad of your thumb. Also look for a dark, rich bark and a juicy sheen when sliced. If unsure, pierce with a skewer: if juices run clear (not pink), it’s done. The 203°F internal temp is your best guide when possible.

Trained in classic French technique but raised on slow-cooked ribs and spicy rubs, she blends culinary skill with smoke and soul.
- Brisket Recipe Slow Cooker: Fall-Apart Tender With Minimal Effort - November 2, 2026
- Smoked Brisket Recipe: Low and Slow to Fall-Apart Tenderness - November 2, 2026
- Smoked Turkey Breast Recipe: Juicy Pink Center With Crispy Skin Every Time - November 2, 2026