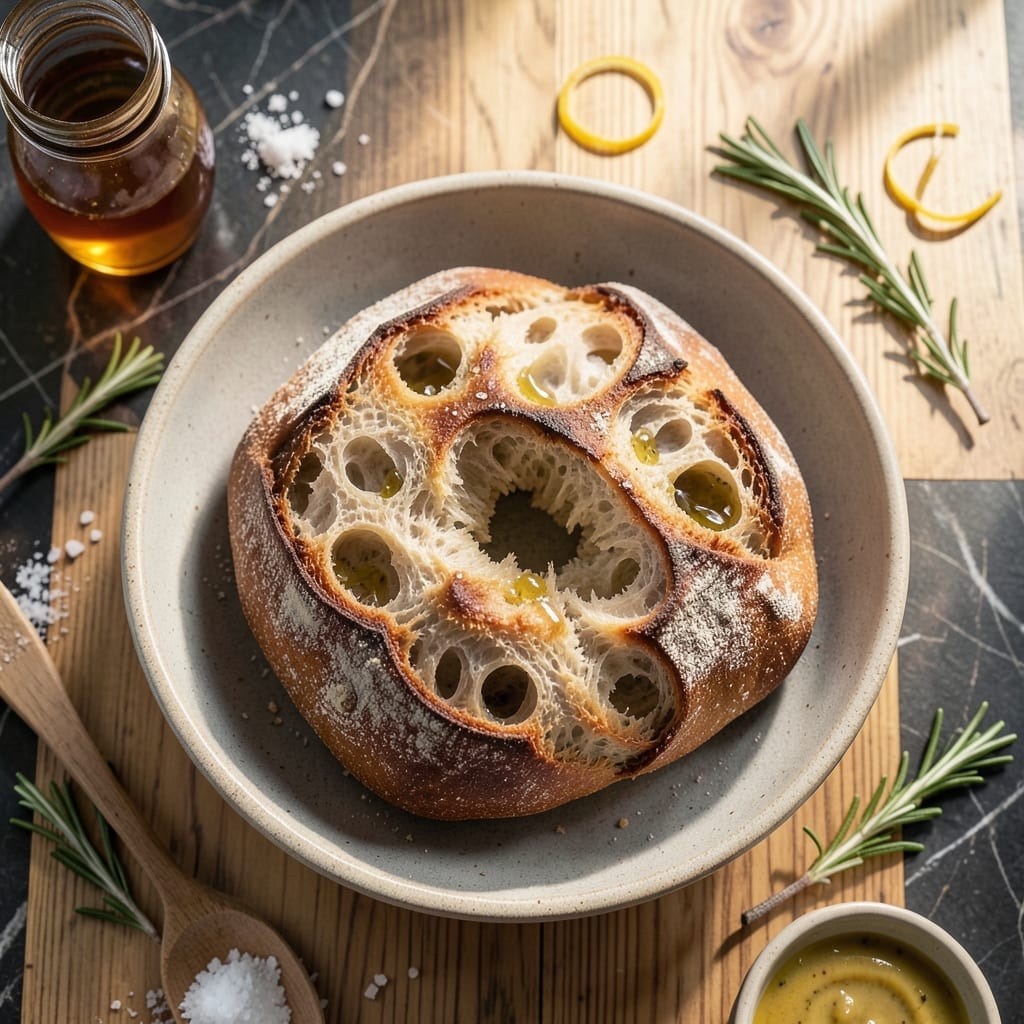
Creating the perfect whole wheat ciabatta requires patience and precision, but the results are worth every minute. This recipe delivers a bread with a rustic crust and an open, airy crumb that rivals any bakery loaf.
The key lies in a high-hydration dough and a long, slow fermentation process. I’ve refined this method to ensure the whole wheat flour doesn’t weigh down the texture, maintaining the lightness ciabatta is known for.
With just a handful of ingredients and careful attention to timing, you’ll achieve a loaf with a chewy interior and a crackling exterior. The process is straightforward, but the details make all the difference.
This bread is versatile, ideal for sandwiches or served alongside a hearty meal. Let’s begin.
Ingredients for Whole Wheat Ciabatta
Minimal ingredients create maximum texture in this bakery-style whole wheat bread.
| Ingredient | Amount | Notes |
|---|---|---|
| Whole Wheat Flour 🌾 | 3 cups | Finely milled preferred |
| Bread Flour 🌾 | 1 cup | For structural support |
| Active Dry Yeast 🍞 | ¼ tsp | Or instant yeast equivalent |
| Sea Salt 🧂 | 2 tsp | Fine grain for even distribution |
| Lukewarm Water 💧 | 2 ¼ cups | 105-110°F for yeast activation |
| Extra-Virgin Olive Oil 🫒 | 2 tbsp | For dough enrichment |
| Honey 🍯 | 1 tsp | Optional for yeast feeding |
| Cornmeal 🌽 | ¼ cup | For dusting baking surface |
[recipe_ingredient_scaler]
The flour blend is critical here. King Arthur offers excellent whole wheat and bread flours—look for fine grind to avoid dense crumb. Yeast freshness matters: if it doesn’t bubble within 5 minutes in warm water, replace it. I source my yeast from bulk bins at natural food stores for optimal viability. The salt should be non-iodized for clean flavor.
No honey? Sugar or agave works equally well for yeast activation. Bread flour can be replaced with all-purpose in a pinch, but expect slightly less chew. For a more pronounced wheat flavor, increase whole wheat flour by 0.5 cup and add 1 extra tbsp water. The olive oil can be omitted, but it contributes to the open crumb structure.
Store flours in airtight containers to prevent oxidation. The dough can rest overnight in the fridge for enhanced flavor development. Baked loaves keep 2-3 days at room temperature, or freeze for 1 month. Always bring ingredients to room temperature before mixing.
Why You’ll Love This Recipe
- No-Fuss Mixing: I just stir the whole wheat flour, bread flour, yeast, and water together—no fancy steps, just a bowl and a spoon.
- Nutty Depth: The whole wheat flour gives it this warm, toasty flavor that’s way more interesting than plain white bread.
- Sandwich Hero: Honestly, it’s my go-to for paninis, dipping in soup, or even as a base for bruschetta—so versatile.
- Budget Baker: A bag of whole wheat flour and bread flour makes multiple loaves, and it’s still cheaper than store-bought.
Step-by-Step Instructions for Whole Wheat Ciabatta
Master this technique for a loaf with an open crumb structure and chewy texture.
Step 1: Activate the Yeast and Hydrate the Flours
In a large mixing bowl, dissolve the 0.25 tsp Active Dry Yeast and 1 tsp Honey in the 2.25 cups Lukewarm Water at 105-110°F. Let it sit for 5-7 minutes until the surface becomes frothy and slightly domed—this confirms the yeast is active and ready to work.
Add the 3 cups Whole Wheat Flour and 1 cup Bread Flour to the yeast mixture. The bread flour provides the gluten structure needed to support the whole wheat’s density. Stir with a wooden spoon until no dry pockets remain; the dough will be shaggy and sticky. This high-hydration dough is intentionally loose—resist the urge to add more flour.
Step 2: Incorporate Salt and Olive Oil
Sprinkle the 2 tsp Sea Salt evenly over the dough. Fine grain salt distributes more uniformly, ensuring every bite is properly seasoned. Drizzle in the 2 tbsp Extra-Virgin Olive Oil, which enriches the dough and adds a subtle fruity depth.
Use a dough whisk or wet hands to mix until the salt and oil are fully integrated. The dough will feel elastic and slightly tacky. Cover the bowl with a damp kitchen towel and let it rest at room temperature for 20 minutes to allow the flours to fully hydrate before the first fold.
Step 3: Perform Stretch-and-Fold Sessions
Over the next 2 hours, perform a series of stretch-and-fold actions every 30 minutes, for a total of four sessions. Wet your hands to prevent sticking, then reach under one side of the dough, stretch it upward, and fold it over the top. Rotate the bowl 90 degrees and repeat on all four sides.
This technique strengthens the gluten network without kneading, which is critical for high-hydration doughs like this one. You’ll notice the dough becoming smoother and more cohesive with each fold, while still maintaining its sticky character. The volume should increase by about 50% during this period.
Step 4: Final Proof and Shape
After the last fold, let the dough rest uncovered for 1 hour to complete the bulk fermentation. The surface should look bubbly and jiggle slightly when shaken. Lightly dust a work surface with the 0.25 cup Cornmeal to prevent sticking during shaping.
Turn the dough out onto the cornmeal-dusted surface. Shape it into a rectangle approximately 12×8 inches by gently dimpling the surface with your fingertips to release air bubbles. The dough will be soft and slightly resistant—this is normal. Transfer it to a parchment-lined baking sheet dusted with more cornmeal.
Step 5: Bake to Golden Perfection
Preheat your oven to 450°F with a baking stone or inverted baking sheet on the middle rack. Let the dough proof at room temperature for 30-45 minutes until it has risen slightly and the surface develops a few small bubbles.
Just before baking, dimple the dough’s surface deeply with your fingertips to create the characteristic ciabatta holes. Bake for 25-30 minutes until the crust is deep golden brown and the internal temperature reaches 210°F. The loaf should sound hollow when tapped on the bottom. Cool completely on a wire rack before slicing to preserve the open crumb structure.
Pro Tips For Making Whole Wheat Ciabatta
- Hydrate the yeast: Use lukewarm water around 105°F—any hotter and you’ll kill the yeast, any colder and it’ll take forever to activate. I learned this the hard way after a few sad, flat loaves.
- Mix the flours: Combine whole wheat and bread flour in a 1:2 ratio for structure without density. Sounds weird, but it works: the bread flour’s gluten compensates for the whole wheat’s heaviness.
- Skip the over-kneading: Ciabatta dough should be sticky and slack—resist the urge to add extra flour or knead it smooth. After burning three batches, I finally figured out that less handling means better holes.
- Use a scale: Weigh your ingredients, especially the flours—whole wheat compacts differently than bread flour, and volume measurements can throw off your hydration. My grandmother swore by this, and she was right.
Troubleshooting whole wheat ciabatta
Dense Dough Problems
If your ciabatta turns out dense, the issue is usually underproofed dough or insufficient gluten development. Whole wheat flour absorbs more liquid, so ensure your hydration is at least 75%. I often add an extra 1-2 tbsp water if the dough feels too stiff. 💡
Flat Loaf Fixes
Flat loaves typically mean overproofing or weak gluten structure. Reduce final proof time to 30 minutes max at room temperature. Also, perform your stretch-and-folds more gently—overworking can break down the gluten network you’ve built during the 2-hour bulk fermentation.
Gummy Interior
A gummy crumb often indicates the loaf wasn’t baked long enough. Even if it looks done, use an instant-read thermometer to confirm the internal temperature reaches 210°F. I always bake for the full 30 minutes at 450°F for that perfect dry crumb.
Crust Too Thick
For a thinner, crispier crust, dimple the dough more aggressively just before baking. Press your fingertips deep into the surface to create those signature ciabatta holes. Also, ensure your oven is fully preheated with a baking stone for even heat distribution.
Yeast Not Activating
If your yeast isn’t bubbling after 5-7 minutes, check your water temperature—it should be 105-110°F. Too hot kills the yeast, too cold slows activation. I use a digital thermometer for precision. Also, verify your yeast isn’t expired. 🌡️
Sticky Dough Handling
High-hydration doughs are sticky by nature. Wet your hands with cold water before handling to prevent tearing. Use a dough scraper to lift and fold during stretch-and-folds. Resist adding flour—this can make your final loaf dense.
Nutrition Facts
Frequently Asked Questions
Can I use all whole wheat flour?
Not recommended. The bread flour provides essential gluten structure. Using 100% whole wheat will result in a dense loaf. Stick to the 3:1 ratio for best texture.
How do I know when the dough is ready?
It should double in size, look bubbly, and jiggle when shaken. This takes about 3-4 hours at room temperature. Don’t rush it—patience is key!
Why does my bread have a dense crumb?
Likely underproofed or not enough gluten development. Ensure proper hydration and complete all stretch-and-fold sessions during bulk fermentation.
Can I bake this in a Dutch oven?
Yes! Preheat your Dutch oven at 450°F for 30 minutes. Bake covered for 20 minutes, then uncovered for 10-15 minutes for a crisp crust.

Trained in classic French technique but raised on slow-cooked ribs and spicy rubs, she blends culinary skill with smoke and soul.
- Recipe for Boneless Pork Chops in Cast Iron Skillet: Sear and Baste to Juicy Perfection - October 3, 2026
- Recipe for Boneless Cross Rib Roast: Slow-Roasted Beef with Herb Crust - October 3, 2026
- Hamburgers in Sauce Recipe Crock Pot: Slow-Cooked Savory Delight - October 3, 2026