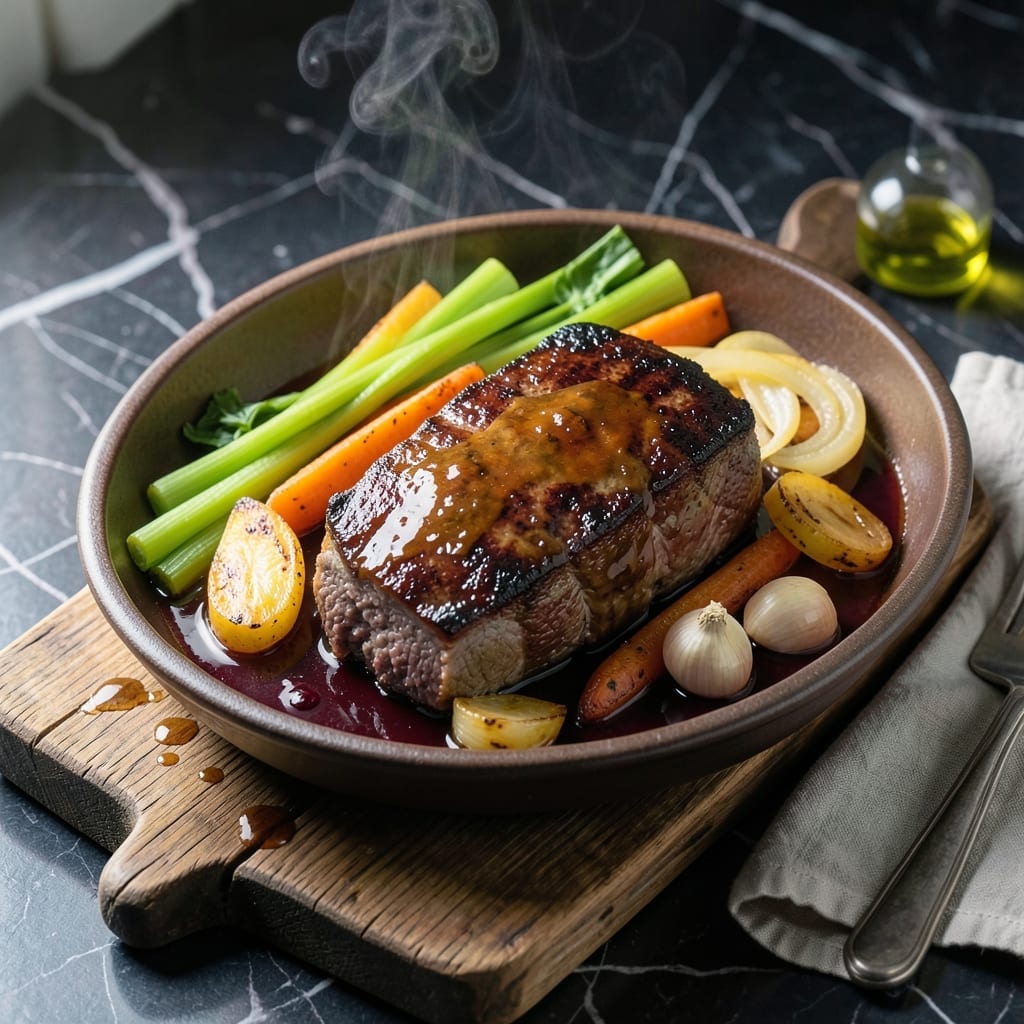
This slow-braised pot roast transforms tough cuts into fall-apart tender meat with rich, aromatic depth. The celery adds subtle earthy notes that elevate every bite without overpowering the dish.
I developed this method after years of testing different braising liquids and vegetable combinations. The low and slow approach ensures the meat stays juicy while the vegetables break down into a flavorful sauce.
The result is a hearty, comforting meal with deeply flavored meat and a sauce that’s perfect for soaking up with crusty bread. Each component contributes to the dish’s complex, satisfying character.
Serve it with mashed potatoes or buttered noodles for a complete, restaurant-quality Sunday supper at home.
Ingredients for Pot Roast Recipe Celery
Transform tough cuts into restaurant-quality comfort with these carefully selected ingredients for deep, aromatic flavor.
| Ingredient | Amount | Notes |
|---|---|---|
| Beef Chuck Roast 🥩 | 3 lb | Well-marbled, trimmed of excess fat |
| Celery Stalks 🌿 | 4 whole | Cut into 2-inch pieces |
| Carrots 🥕 | 3 whole | Peeled, cut into chunks |
| Yellow Onion 🧅 | 1 whole | Large, quartered |
| Garlic Cloves 🧄 | 6 cloves | Smashed, peeled |
| Red Wine 🍷 | 2 cups | Dry, full-bodied variety |
| Beef Stock 🥣 | 2 cups | Low-sodium preferred |
| Tomato Paste 🍅 | 2 tbsp | For depth of flavor |
| Fresh Thyme Sprigs 🌿 | 4 whole | Tied with kitchen twine |
| Fresh Rosemary Sprig 🌿 | 1 whole | Optional, for garnish |
| Bay Leaf 🍃 | 1 whole | Dried, for aromatics |
| Olive Oil 🫒 | 2 tbsp | For searing beef |
| Kosher Salt 🧂 | 1 ½ tsp | Divided for seasoning |
| Black Pepper 🌶️ | 1 tsp | Freshly cracked preferred |
| All-Purpose Flour 🌾 | ¼ cup | For thickening sauce |
[recipe_ingredient_scaler]
The beef chuck roast is non-negotiable for this dish—look for well-marbled cuts with visible fat streaks at Whole Foods or your trusted butcher. The marbling breaks down during the long braise, creating that signature fall-apart texture. Celery, often overlooked, adds subtle earthy depth (don’t skip it). I source my vegetables from farmers markets when possible—they hold up better to long cooking times.
No red wine? Substitute with 1 cup beef broth plus 1 cup water with 1 tbsp balsamic vinegar. Short on time? Use pre-cut mirepoix from Trader Joe’s (the good stuff, not the frozen kind). Fresh herbs are ideal, but dried thyme at one-third the amount works in a pinch. The tomato paste can be swapped for tomato sauce, but reduce the beef stock by half to compensate for the extra liquid.
This dish tastes even better the next day—store in an airtight container for up to 5 days in the fridge or freeze for 3 months. The sauce thickens as it cools, so reheat gently with a splash of water or stock. Always let the meat rest 15 minutes before slicing (worth the extra minute).
Why You’ll Love This Recipe
- Dump and Go: I toss the chuck roast, celery, carrots, and onions in the pot—no fancy prep, just rough chopping and a quick sear.
- Feeds the Week: I make this on Sunday and we eat it for days—tacos, sandwiches, or straight from the pot.
- Pantry Hero: A cheap cut of beef and humble veggies turn into something extraordinary. Honestly, it’s my secret weapon for stretching a grocery budget.
Step-by-Step Instructions for Pot Roast with Celery
Master the art of slow-braised pot roast with these precise, professional techniques.
Step 1: Sear the Beef Chuck Roast
Pat the beef chuck roast dry with paper towels and season generously with 1 tsp kosher salt and 1 tsp black pepper. This ensures a proper sear and prevents the meat from steaming in the pan.
Heat the 2 tbsp olive oil in a Dutch oven over medium-high heat until shimmering. Sear the beef chuck roast on all sides for 4-5 minutes per side until deeply browned. The fond created here will form the base of your rich braising liquid.
Transfer the seared beef to a plate and reduce heat to medium. The roast should develop a deep mahogany crust—this is your visual cue that the Maillard reaction has worked its magic.
Step 2: Build the Aromatic Base
In the same pot, add the yellow onion, celery stalks, and carrots. Sauté for 5-6 minutes until the vegetables begin to soften and develop color at the edges. This step extracts maximum flavor from your mirepoix.
Stir in the 2 tbsp tomato paste and cook for 1-2 minutes until it darkens slightly. Add the 6 cloves garlic cloves, 4 whole fresh thyme sprigs, 1 whole fresh rosemary sprig, and 1 whole bay leaf, toasting them for 30 seconds to release their essential oils.
The tomato paste should turn from bright red to a deeper, brick-like color—this indicates the raw flavor has cooked out and the sugars have begun to caramelize.
Step 3: Deglaze and Thicken the Braising Liquid
Pour in the 2 cups red wine and scrape up all browned bits from the bottom of the pot with a wooden spoon. Bring to a simmer and cook for 3-4 minutes until the liquid has reduced by about half. The alcohol smell should dissipate completely during this process.
Sprinkle the 0.25 cup all-purpose flour over the vegetables and stir to combine. Pour in the 2 cups beef stock and bring to a gentle simmer. The flour will create a velvety texture in your finished sauce while preventing lumps.
Return the beef chuck roast to the pot along with any accumulated juices. The liquid should come about halfway up the sides of the meat—this ensures even cooking and prevents the top from drying out.
Step 4: Slow-Braise to Perfection
Cover the pot and transfer to a preheated 325°F oven. Braise for 2.5-3 hours, turning the beef chuck roast once halfway through, until the meat is fork-tender and easily pulls apart with gentle pressure.
Check the pot at the 2-hour mark—if the liquid is reducing too quickly, add a splash of water. The celery and carrots should be soft enough to pierce easily with a fork, and the sauce should have thickened to coat the back of a spoon.
The beef is done when it reaches an internal temperature of 195-200°F and a fork inserted into the thickest part twists out with no resistance. The connective tissue will have melted into gelatin, creating that signature melt-in-your-mouth texture.
Step 5: Rest and Serve
Carefully remove the beef chuck roast from the pot and transfer to a cutting board. Skim any excess fat from the surface of the sauce if desired, though I find the marbling from the beef chuck roast adds richness to the final dish.
Let the beef rest for 15-20 minutes before slicing or pulling apart. This allows the juices to redistribute throughout the meat. Meanwhile, taste the sauce and adjust seasoning with the remaining 0.5 tsp kosher salt if needed.
Serve the pot roast with the braised celery, carrots, and a generous ladle of the aromatic sauce. The vegetables should be tender but still hold their shape, having absorbed the deep, wine-infused flavors of the braising liquid.
Pro Tips For Making Pot Roast Recipe Celery
- Sear the Chuck: I learned this the hard way—browning the beef chuck roast in batches over high heat until deeply colored locks in flavor and guarantees tender meat, even after hours of braising.
- Cut Celery Large: Skip the tiny dice; chunky 2-inch celery pieces hold their shape and texture better during the long cook, so you actually get celery in every bite instead of mush.
- Don’t Crowd the Pot: After burning three batches, I finally figured out that overfilling the pot with veggies steams the beef instead of searing it—work in stages if needed.
- Use Stale Bread: Sounds weird, but it works: tossing a slice of stale bread on top while cooking absorbs excess grease and adds a subtle richness to the broth.
Essential Equipment for This Recipe
Dutch Oven Essentials
I swear by my Le Creuset 7.25-quart Dutch oven for pot roast—its heavy enameled cast iron distributes heat evenly and retains it perfectly for the 3-hour braise. The tight-fitting lid traps steam, keeping the meat impossibly tender. 💪
Thermometer Matters
Don’t guess on doneness—use a ThermoWorks Dot or similar instant-read thermometer. I check the thickest part of the roast for that magic 195-200°F range where collagen melts into gelatin. It’s the only way to ensure perfect results every time.
Wooden Spoon Workhorse
A sturdy wooden spoon is non-negotiable for deglazing—it scrapes up all those flavorful browned bits without damaging your Dutch oven. I keep mine by the stove at all times. The flat edge gets into corners better than silicone or metal.
Sharp Knife
For trimming the 3 lb beef chuck roast and slicing veggies, my Wüsthof 8-inch chef’s knife is my go-to. A sharp blade makes quick work of the celery and carrots, and it’s safe—I learned that from Dad when I was six, helping with pancakes.
Cutting Board
Use a large, stable cutting board—my John Boos maple board gives plenty of space for prepping all the vegetables. The juice groove is perfect for catching any spills when you’re resting the meat. It’s seen me through countless Sunday suppers.
Kitchen Twine
Tie your thyme and rosemary sprigs together with cotton kitchen twine for easy removal after braising. I buy unbleached twine in bulk from New Seasons Market—it’s food-safe and compostable. One less thing to fish out of your sauce later.
Nutrition Facts
Frequently Asked Questions
Can I use celery leaves in the braising liquid?
Celery leaves add extra flavor and shouldn’t be wasted. Toss them in with the other aromatics during Step 2. They’ll infuse the sauce with a subtle herbal note.
Why does my sauce turn out thin?
If your sauce isn’t thickening, it may need more reduction time. Uncover the pot during the last 30 minutes of braising. For quicker results, simmer the sauce on the stovetop after removing the meat.
Can I make this in a slow cooker?
Yes! After searing the meat and sautéing the veggies, transfer everything to a slow cooker. Cook on low for 8-10 hours or high for 5-6 hours. The celery will soften beautifully.

Trained in classic French technique but raised on slow-cooked ribs and spicy rubs, she blends culinary skill with smoke and soul.
- Recipe for Boneless Pork Chops in Cast Iron Skillet: Sear and Baste to Juicy Perfection - October 3, 2026
- Recipe for Boneless Cross Rib Roast: Slow-Roasted Beef with Herb Crust - October 3, 2026
- Hamburgers in Sauce Recipe Crock Pot: Slow-Cooked Savory Delight - October 3, 2026