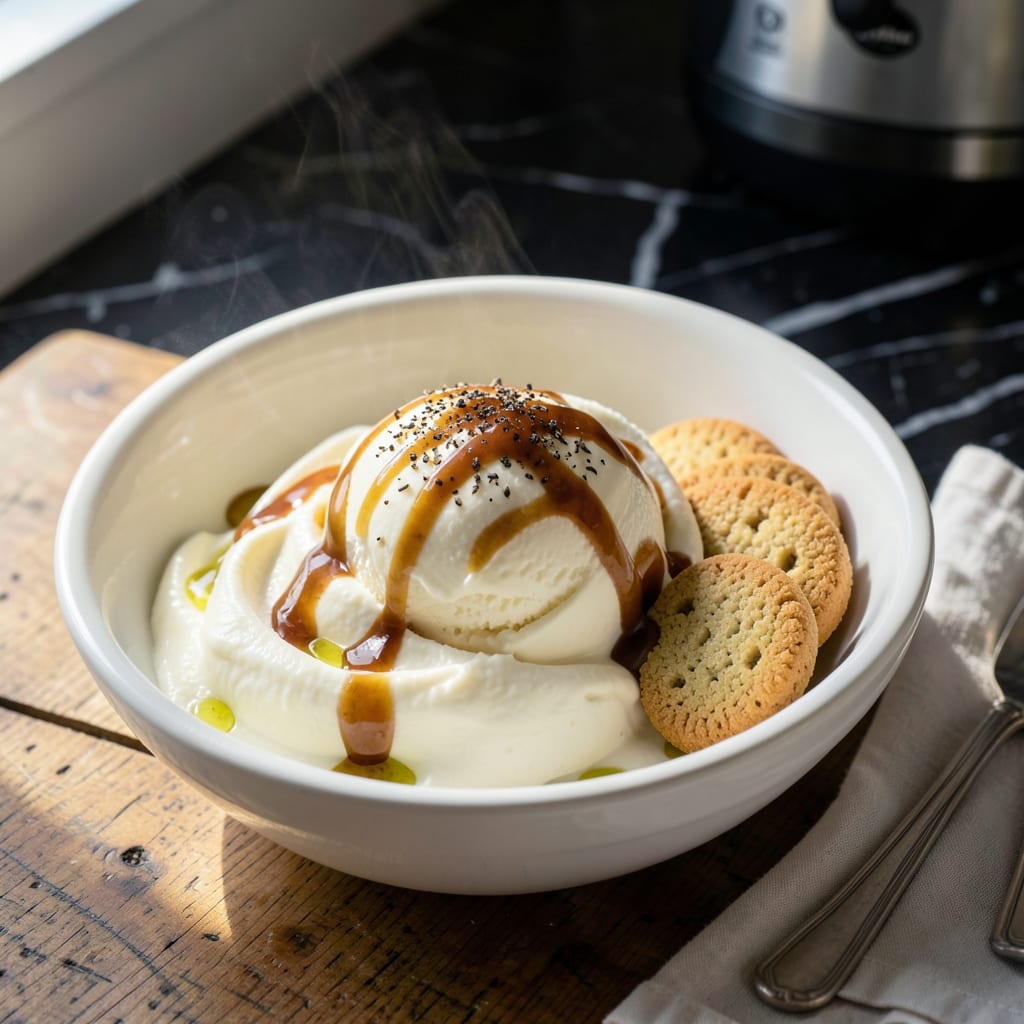
Making homemade ice cream in a 6 qt maker opens up endless possibilities for creamy, customized treats. This method transforms simple ingredients into rich, velvety desserts with professional results.
What sets this approach apart is the precise ratio of dairy to sugar and flavorings, ensuring every batch churns to the perfect consistency. The 6 qt capacity allows for generous portions while maintaining consistent texture.
The process is straightforward yet yields results that rival any artisanal shop. You control the sweetness, mix-ins, and richness, creating exactly the flavor profile you want.
From classic vanilla to inventive combinations, this method delivers creamy results every time.
Ingredients for Recipe for 6 Qt Ice Cream Maker
Ten ingredients transform into velvety 6-quart batches of homemade luxury. Nothing artificial, just pure creaminess.
| Ingredient | Amount | Notes |
|---|---|---|
| Heavy Whipping Cream 🥛 | 4 cups | Cold, at least 36% fat |
| Whole Milk 🥛 | 2 cups | Cold, full-fat preferred |
| Granulated Sugar 🍚 | 1 ½ cups | Fine white for smooth texture |
| Pure Vanilla Extract 🌿 | 2 tbsp | Real extract, not imitation |
| Large Egg Yolks 🥚 | 6 whole | Fresh, pasteurized optional |
| Salt 🧂 | ½ tsp | Fine sea salt preferred |
| Vanilla Bean 🌱 | 1 whole | Split and scraped (optional boost) |
| Sour Cream 🥛 | ½ cup | Full-fat for tang (optional) |
| Light Corn Syrup 🧈 | ¼ cup | Prevents iciness (optional) |
| Pure Almond Extract 🌰 | ½ tsp | For depth (optional) |
[recipe_ingredient_scaler]
The dairy base is non-negotiable for professional results. Heavy cream at 36% fat or higher from Organic Valley or Darigold delivers the richest texture. For milk, whole milk is mandatory—2% or skim will churn icy. Egg yolks add custard-like depth; pasteurized yolks work if raw is a concern. Always check the cream’s expiration—older dairy whips poorly and can separate.
Need to skip eggs? Cornstarch at 2 tbsp per 4 cups liquid replaces yolks for stability. For sugar, superfine baker’s sugar dissolves fastest, but regular granulated works with extra whisking. The vanilla bean is optional but worth the splurge for speckled vanilla ice cream. If using extracts, Rodelle or Nielsen-Massey offer superior quality. Light corn syrup prevents rock-hard freezing—Karo is the standard.
The base keeps in the fridge 24-48 hours before churning (flavors deepen). Churned ice cream holds 1 week in an airtight container with parchment pressed on the surface. For longer storage, freeze in pint containers for 2-3 months. Always temper slightly before scooping.
Why You’ll Love This Recipe
- One-Bowl Wonder: I love that I can mix the cream, milk, and sugar in a single bowl—no fancy equipment, just simple whisking before the ice cream maker does the rest.
- Velvety Vanilla Dream: The combo of heavy cream and egg yolks gives it that ultra-rich texture, and the real vanilla extract makes the flavor pop like store-bought never could.
- Feeds the Whole Crew: Honestly, 6 quarts means I can make enough for a summer BBQ or freeze half for later—no last-minute dessert stress.
- Pantry Staples Only: Between us, I always have these ingredients on hand, so I can decide on a whim to make it without a special grocery trip.
Step-by-Step Instructions for 6 Qt Ice Cream Maker
Master the custard base and churning process for consistently smooth, rich homemade ice cream.
Step 1: Temper the Egg Yolks with Warm Cream Mixture
In a medium saucepan, combine the 4 cups Heavy Whipping Cream, 2 cups Whole Milk, and 1.5 cups Granulated Sugar. Heat over medium heat until small bubbles form at the edges and the sugar fully dissolves, stirring occasionally.
In a separate bowl, whisk the 6 whole Large Egg Yolks until pale and slightly thickened. Slowly pour about 1 cup of the hot cream mixture into the yolks while whisking constantly—this prevents curdling. Return the tempered yolk mixture to the saucepan and cook over low heat for 5-7 minutes, stirring constantly, until the custard thickens enough to coat the back of a spoon.
Step 2: Infuse Flavor and Chill the Base
Remove the custard from heat and stir in the 2 tbsp Pure Vanilla Extract, 0.5 tsp Salt, and 0.5 tsp Pure Almond Extract. If using, split the 1 whole Vanilla Bean, scrape the seeds into the custard, and add the pod for additional infusion.
Strain the custard through a fine-mesh sieve into a clean bowl to remove any cooked egg bits or vanilla pod. Press plastic wrap directly onto the surface to prevent a skin from forming. Refrigerate for at least 4 hours or overnight until completely chilled—this is crucial for smooth texture.
Step 3: Finalize the Base and Prepare the Ice Cream Maker
Once chilled, stir in the 0.5 cup Sour Cream and 0.25 cup Light Corn Syrup until fully combined. The corn syrup helps prevent iciness, while the sour cream adds a subtle tang. Pour the mixture into your 6 qt ice cream maker canister.
Ensure the canister has been pre-frozen for at least 12 hours so it reaches 0°F or lower. If using a model that requires rock salt and ice, layer crushed ice and rock salt around the canister according to manufacturer instructions. The ratio is typically 1 part rock salt to 6 parts ice.
Step 4: Churn Until Thick and Creamy
Turn on the ice cream maker and let it churn for 20-25 minutes. The mixture will start as a liquid and gradually thicken to the consistency of soft-serve ice cream. Watch for the custard to pull away from the sides and hold its shape when a spoon is inserted.
If the mixture isn’t thickening after 25 minutes, check that the canister was properly frozen and that there’s enough ice and salt. Avoid overfilling the canister—leave at least 1 inch of space at the top for expansion as it freezes.
Step 5: Freeze to Firm Perfection
Transfer the churned ice cream to a lidded container, smoothing the top with a spatula. Press plastic wrap directly onto the surface to minimize ice crystals. Freeze for at least 4 hours or until firm enough to scoop.
For the creamiest texture, serve within 1-2 weeks. Let it sit at room temperature for 5-10 minutes before scooping to make serving easier. The final product should be velvety smooth with a rich, balanced sweetness from the custard base.
Pro Tips For Making Recipe For 6 Qt Ice Cream Maker
- Temper the yolks: Slowly whisk the hot milk mixture into the egg yolks, a little at a time—I learned this the hard way after scrambling my first two batches.
- Chill thoroughly: Give the custard base at least 4 hours in the fridge, or overnight if you can. My grandmother swore by this, and she was right: it prevents icy texture.
- Use full-fat dairy: Skip the low-fat milk or half-and-half substitutions—the heavy cream and whole milk are non-negotiable for that rich, creamy finish.
- Pre-freeze the bowl: Make sure your 6 qt ice cream maker bowl is completely frozen for 12+ hours. Sounds obvious, but I was skeptical until I tried it and got perfect consistency every time.
Serving Suggestions for This recipe for 6 qt ice cream maker
Classic Presentation
Scoop into chilled bowls for a timeless look. Use an ice cream scoop dipped in warm water for perfectly round portions. Garnish with fresh berries or a drizzle of chocolate syrup for a pop of color. 💛
Sundae Bar Fun
Set out toppings in small bowls for a DIY experience. I love offering crushed Oreos, caramel sauce, and whipped cream. Let guests build their own creations—it’s always a hit at gatherings.
Waffle Cone Pairing
Serve in crisp waffle cones for that classic ice cream shop feel. Warm the cones slightly in a 350°F oven for 2-3 minutes to enhance their aroma. The contrast of warm cone and cold ice cream is irresistible.
Frozen Dessert Platter
Create a stunning spread with multiple flavors. Use waffle bowls, sugar cones, and brownies as vessels. Add fresh mint leaves for a restaurant-worthy touch. 🌟
Adult-Twist Serving
For grown-up gatherings, pair with espresso shots or bourbon for an affogato or boozy float. A sprinkle of sea salt on caramel toppings elevates the flavors beautifully.
Make-Ahead Prep
Pre-scoop into parchment-lined containers and freeze. When ready to serve, let sit at room temperature for 5-10 minutes. This works perfectly for party planning without last-minute stress.
Nutrition Facts
Frequently Asked Questions
Can I use half-and-half instead of heavy cream?
It’s not recommended. The 36% fat in heavy cream is essential for that ultra-creamy texture. Half-and-half may result in icy or less rich ice cream.
How do I prevent ice crystals from forming?
Press plastic wrap directly onto the surface before freezing and use an airtight container. Adding 0.25 cup corn syrup to the base also helps prevent iciness.
Why isn’t my mixture thickening during churning?
Check that your canister was pre-frozen for 12 hours and don’t overfill it. If using a salt-and-ice model, ensure you’ve used enough ice and rock salt.
Can I make this without eggs?
Yes! Replace the yolks with 2 tbsp cornstarch mixed with 2 tbsp cold milk before adding to the warm cream mixture.

Trained in classic French technique but raised on slow-cooked ribs and spicy rubs, she blends culinary skill with smoke and soul.
- Best Smoked Oxtail Recipe: Deep-Rich Flavor After Low-and-Slow Cooking - October 14, 2026
- Pit Boss Smoked Prime Rib Roast Recipe: Bark-to-Bone Crispness in 4 Hours - October 14, 2026
- Smoked Tuna Steak Recipe: Seared Crust Meets Silky Centers - October 14, 2026