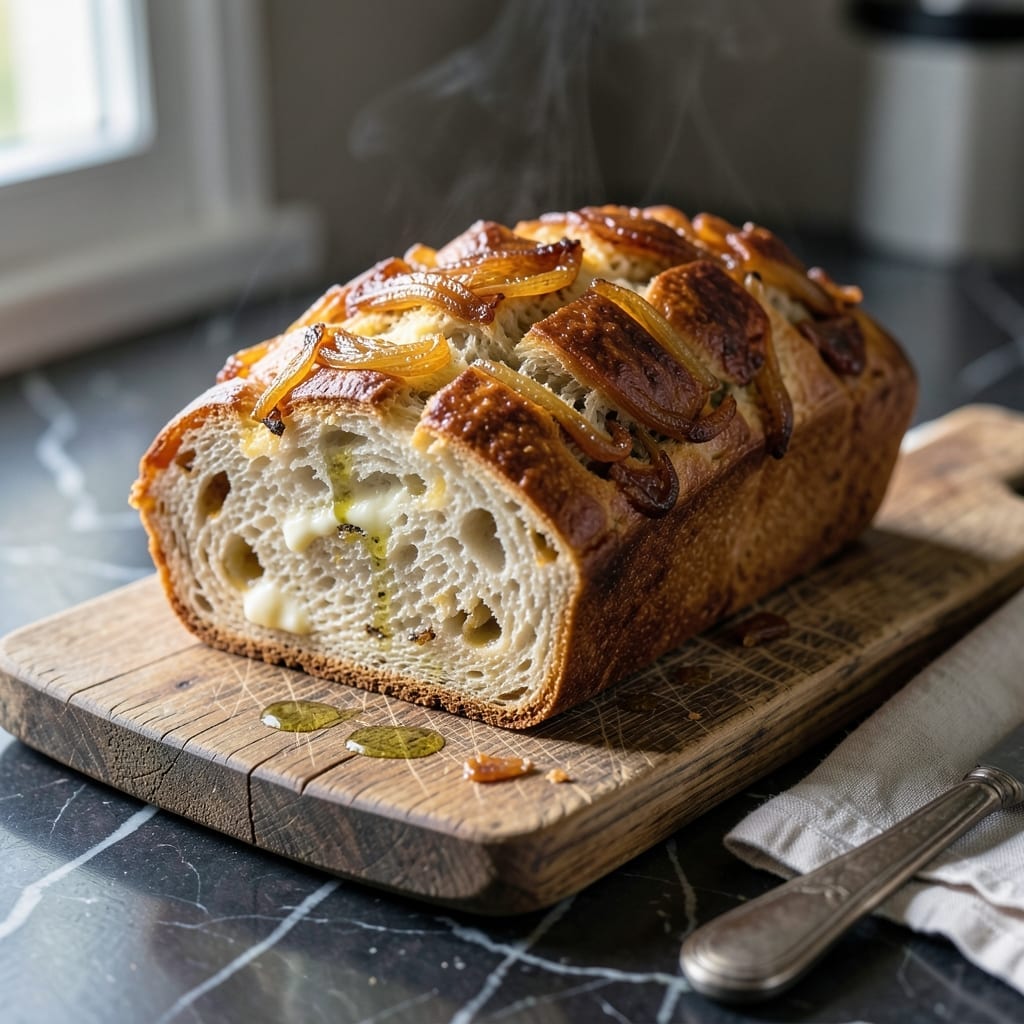
This bread machine recipe delivers artisan-quality onion bread with minimal effort. The machine handles the kneading and rising while you focus on creating those signature caramelized layers.
Sweet onions slowly cook down to a rich, golden jam that gets swirled through the dough before baking. The result is a tender loaf with pockets of sweet, savory flavor in every bite.
The bread machine does most of the work, but the real magic happens when you add the caramelized onions. This technique ensures even distribution and maximum flavor in every slice.
You will get a golden brown loaf with a soft crumb and irresistible onion aroma. It is perfect for sandwiches or serving warm with butter.
Ingredients for Onion Bread Recipe Bread Machine
Simple pantry items plus sweet onions make this hands-off artisan loaf.
| Ingredient | Amount | Notes |
|---|---|---|
| Bread Flour 🌾 | 3 cups | All-purpose works in pinch |
| Water 💧 | 1 cup | Warm, about 110°F |
| Unsalted Butter 🧈 | 2 tbsp | Softened, or vegetable oil |
| Granulated Sugar 🍚 | 2 tbsp | For dough and onions |
| Salt 🧂 | 1 ½ tsp | Kosher or sea salt |
| Active Dry Yeast 🍞 | 2 ¼ tsp | 1 packet, check expiration |
| Sweet Onions 🧅 | 2 whole | Large, thinly sliced |
| Olive Oil 🫒 | 2 tbsp | For caramelizing onions |
| Brown Sugar 🟤 | 1 tbsp | For onion caramelization |
| Dried Thyme 🌿 | ½ tsp | Optional, for depth |
| Milk 🥛 | ¼ cup | Warm, for softer dough |
[recipe_ingredient_scaler]
The onions are everything here. Sweet onions like Vidalias caramelize fastest and deepest—yellow onions work too but take a bit longer. I grab mine from Whole Foods or the local farmers market when they’re in season. Bread flour gives that chewy, bakery-style texture, but all-purpose in a pinch won’t ruin anything. Just don’t skip the warm liquids—yeast needs that gentle nudge to wake up.
No bread flour? All-purpose plus 1 tbsp vital wheat gluten gets you close. Fresh out of thyme? Rosemary or sage at half the amount adds a nice twist. Brown sugar can be swapped for white in the caramelizing step (just add a splash of molasses). The milk makes the crumb softer—dairy-free milk works fine if that’s your thing.
Dough rises best at room temp, so let it sit for 10-15 minutes if your kitchen’s chilly. Caramelized onions keep in the fridge for 5 days—make extra for burgers or dips. The loaf freezes beautifully for up to 3 months (slice first for easy toasting).
Why You’ll Love This Recipe
- Set and Forget: I just dump everything in the bread machine, press a button, and let it do the work while I enjoy my coffee.
- Buttery Onion Layers: The caramelized onions and butter create a rich, savory depth that makes every slice irresistible.
- Weeknight Hero: It’s my go-to for sandwiches, soup dippers, or even as a quick garlic bread base.
- Stays Fresh: Honestly, it tastes just as good toasted the next day—no waste, just easy leftovers.
Step-by-Step Instructions for Onion Bread
Here’s how to make this bread machine loaf with caramelized onions, hands-free and foolproof.
Step 1: Caramelize the Sweet Onions
Heat the 2 tbsp Olive Oil in a skillet over medium-low heat. Add the 2 whole Sweet Onions, thinly sliced, and cook slowly for 20-25 minutes, stirring occasionally, until they turn deep golden brown and smell sweet and jammy.
About halfway through, sprinkle in the 1 tbsp Brown Sugar and the 0.5 tsp Dried Thyme to deepen the flavor. Keep the heat steady—too high and they’ll burn. Once caramelized, remove from heat and let cool slightly; you’ll fold these into the dough later.
Step 2: Load the Bread Machine with Wet Ingredients
Pour the 1 cup Water and 0.25 cup Milk into the bread machine pan first. Both should be warm (about 110°F)—this activates the yeast properly. Warm liquid is critical; too hot kills the yeast, too cold slows the rise.
Add the 2 tbsp Unsalted Butter, softened, and the 2 tbsp Granulated Sugar. I drop the butter in last so it doesn’t clump. The sugar feeds the yeast and adds subtle sweetness to balance the savory onions.
Step 3: Add Dry Ingredients and Start the Machine
Measure the 3 cups Bread Flour into the pan, spreading it evenly over the wet ingredients. Make a small well in the center and add the 2.25 tsp Active Dry Yeast—keep it separate from the liquids until the machine starts mixing.
Finally, sprinkle the 1.5 tsp Salt over the flour. Salt toughens yeast if they touch directly, so this order matters. Select the “Basic” or “White Bread” setting on your machine (usually a 3-4 hour cycle) and press start. Most machines beep when it’s time to add mix-ins—that’s your cue for the onions.
Step 4: Add Caramelized Onions and Finish the Cycle
When your machine signals (usually after the first knead, around 10-15 minutes in), add the cooled caramelized onions. Distribute them evenly around the pan so they’re incorporated as the dough kneads again.
Close the lid and let the machine finish its cycle. Resist the urge to open it—you’ll lose heat and disrupt the rise. The loaf is done when the machine signals completion and the bread is golden brown on top with a hollow sound when tapped.
Step 5: Cool and Slice the Loaf
Once the cycle ends, carefully remove the pan using oven mitts—it’s hot! Turn the loaf out onto a wire rack and let it cool for at least 20 minutes. This prevents a gummy texture by allowing the interior to set fully.
Slice with a serrated knife once cooled. The layers of sweet, jammy onions should be visible throughout, and each slice should have a tender crumb with a slightly crisp crust. Serve warm for the best aroma and flavor.
Pro Tips For Making Onion Bread Recipe Bread Machine
- Pre-cook the onions: Sauté the onions in a little butter until deeply caramelized before adding to the bread machine—raw onions will leave the bread soggy and underdeveloped.
- Check the dough early: After 5-10 minutes of kneading, peek in and adjust the consistency; if it looks dry, add water a teaspoon at a time, or a bit more flour if it’s sticking.
- Use room temperature butter: I learned this the hard way—cold butter won’t incorporate properly, leaving streaks in the dough instead of a smooth, elastic texture.
- Let it cool completely: Slicing too soon traps steam and makes the loaf gummy; give it at least 30 minutes on a wire rack, even if the smell is torturing you.
Common Mistakes When Making Great onion bread recipe bread machine
Overworking the Onions
Caramelizing onions is all about patience. If you rush and crank the heat to high, they’ll burn instead of turning that perfect deep golden brown. Keep it at medium-low heat and give them 20-25 minutes to slowly break down. I learned this the hard way in Nonna’s kitchen—she’d scold me for trying to speed things up. 🔥
Skipping the Cool Down
Never add hot caramelized onions directly to the bread machine. The heat can kill your yeast, leaving you with a dense, flat loaf. Always let them cool slightly for about 10 minutes before adding. This small step ensures your bread rises properly and develops that perfect texture.
Wrong Ingredient Order
Your bread machine needs ingredients in a specific order to work its magic. Always add liquids first, then fats and sugars, followed by flour, and finally yeast. If yeast touches liquid before mixing starts, it can activate too early. I use Zojirushi machines—they’re forgiving, but even they need the right sequence.
Ignoring the Beep
Most machines beep when it’s time to add mix-ins. If you miss this window, the onions won’t distribute evenly. Set a timer for 10-15 minutes into the cycle as a backup. Distribute the onions around the pan, not in one clump, so every slice gets that sweet, savory flavor.
Slicing Too Soon
I know it’s tempting, but resist cutting into that warm loaf immediately. Letting it cool for at least 20 minutes allows the crumb to set. Slicing too early can make the bread gummy. Trust me, the wait is worth it for that perfect, tender texture. 💡
Using Cold Liquids
Yeast needs warmth to activate, so ensure your water and milk are about 110°F. Too cold, and your dough won’t rise properly. Too hot, and you risk killing the yeast. A quick test: it should feel warm, not hot, on your wrist.
Nutrition Facts
Frequently Asked Questions
Can I use regular onions instead of sweet ones?
Yes, but expect a stronger flavor. Yellow onions work well but take longer to caramelize. Red onions add color but can turn mushy. For best results, stick with Vidalias or other sweet varieties.
What setting should I use on my bread machine?
Select the “Basic” or “White Bread” setting for a 3-4 hour cycle. If your machine has a “Dough” setting, use that and bake separately in an oven at 375°F for 25-30 minutes.
Why is my loaf dense in the middle?
This usually means the yeast didn’t activate properly. Check your liquid temperature—it should be 110°F. Also, ensure yeast isn’t expired and isn’t touching salt or liquid before mixing starts.
Can I make this without a bread machine?
Mix and knead by hand, let rise 1-2 hours, then shape, add onions, and bake at 375°F for 30-35 minutes. The texture will differ slightly but still be delicious.

Trained in classic French technique but raised on slow-cooked ribs and spicy rubs, she blends culinary skill with smoke and soul.
- Best Smoked Oxtail Recipe: Deep-Rich Flavor After Low-and-Slow Cooking - October 14, 2026
- Pit Boss Smoked Prime Rib Roast Recipe: Bark-to-Bone Crispness in 4 Hours - October 14, 2026
- Smoked Tuna Steak Recipe: Seared Crust Meets Silky Centers - October 14, 2026