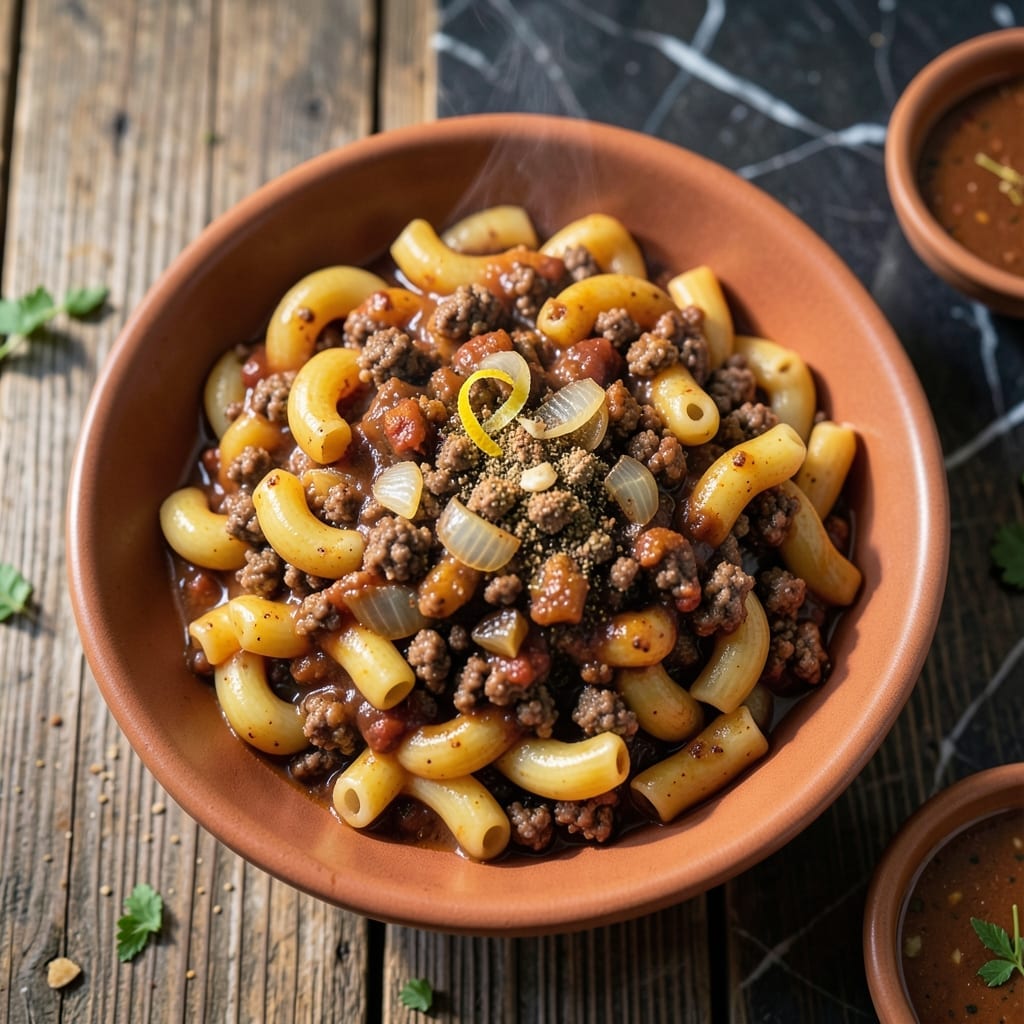
This one-pot wonder was a diner staple at Nana Mae’s, and for good reason. Ground beef, macaroni, and chili flavors come together in a single pan for the ultimate comfort food.
I’ve tested this on every stovetop in our house—David’s official verdict is that it’s foolproof. The pasta cooks right in the chili sauce, soaking up all that beefy, spicy flavor.
What you get is tender macaroni, seasoned ground beef, and a rich tomato base all topped with melted cheese. It’s the kind of meal that disappears faster than I can make it.
Perfect for busy weeknights or feeding a hungry crowd. Here’s how to make this family favorite.
Ingredients for Recipe for Chili Mac with Ground Beef
Everything for this one-pan classic is probably already in your kitchen.
| Ingredient | Amount | Notes |
|---|---|---|
| Ground Beef 🥩 | 1 lb | 80/20 lean-to-fat ratio |
| Elbow Macaroni 🍝 | 2 cups | Uncooked, for chewy texture |
| Onion 🧅 | 1 whole | Medium, finely diced |
| Garlic Cloves 🧄 | 3 cloves | Minced for bold flavor |
| Chili Powder 🌶️ | 2 tbsp | Mild or hot variety |
| Ground Cumin 🌿 | 1 tsp | Toasted for depth |
| Dried Oregano 🍃 | 1 tsp | Crushed between fingers |
| Canned Diced Tomatoes 🍅 | 1 can | 14.5 oz, undrained |
| Tomato Sauce 🍅 | 1 can | 8 oz for rich base |
| Beef Broth 💧 | 1 ½ cups | Low-sodium preferred |
| Cheddar Cheese 🧀 | 2 cups | Shredded from block |
| Salt 🧂 | 1 tsp | Kosher or sea salt |
| Black Pepper 🌶️ | ½ tsp | Freshly ground preferred |
| Olive Oil 🫒 | 1 tbsp | For sautéing vegetables |
[recipe_ingredient_scaler]
The beef is the backbone here. 80/20 ground chuck gives you the best flavor and moisture—leaner blends dry out. Grab it from Costco or your regular grocery store; just look for bright red color with good marbling. The macaroni should be elbow (the classic shape), but any short pasta works in a pinch (I’ve used rotini too). Barilla or De Cecco are my go-tos for consistent texture.
No chili powder? Substitute with 1 tbsp smoked paprika + 1 tsp each cumin and cayenne. The canned tomatoes can be fire-roasted for extra depth—Muir Glen is a solid brand. Out of beef broth? Use water plus a bouillon cube (just adjust the salt at the end). Shredded cheese from a bag melts fine, but block cheese grated fresh tastes way better.
This keeps 3-4 days in the fridge and reheats like a dream. Leftovers freeze for up to 3 months—just thaw overnight before warming. Pro tip: undercook the pasta slightly if freezing, so it doesn’t turn mushy later.
Why You’ll Love This Recipe
- One Pot Wonder: I love that everything cooks together—ground beef, macaroni, and spices—so I’m not stuck washing a sink full of dishes.
- Rich Comfort: The chili powder and garlic give the beef such a deep, smoky flavor that makes every bite feel like a warm hug.
- Feeds the Crew: Honestly, this is my go-to for game nights or when the kids have friends over—it stretches easily and everyone cleans their plate.
- Budget Stretch: Ground beef and pantry staples keep the cost low, and leftovers taste even better the next day for lunch.
Step-by-Step Instructions for Chili Mac With Ground Beef
This one-pot method keeps cleanup simple while delivering big, bold flavor in every bite.
Step 1: Brown the Ground Beef and Sauté Aromatics
Heat the 1 tbsp olive oil in a large pot or Dutch oven over medium-high heat. Add the 1 lb ground beef and cook, breaking it apart with a wooden spoon, until it’s no longer pink and starts to develop a light crust, about 5-6 minutes.
Push the beef to one side and add the finely diced onion. Cook for 3 minutes until it softens and becomes translucent. Stir in the 3 cloves minced garlic cloves and cook for 30 seconds until fragrant—don’t let it brown or it’ll turn bitter.
Step 2: Toast the Spices and Add Liquids
Sprinkle the 2 tbsp chili powder, 1 tsp ground cumin, 1 tsp dried oregano, 1 tsp salt, and 0.5 tsp black pepper over the beef. Stir well and cook for 1 minute to toast the spices—this step wakes up their flavors.
Pour in the 1 can canned diced tomatoes (with juices), 1 can tomato sauce, and 1.5 cups beef broth. Stir to combine, scraping up any browned bits from the bottom of the pot. This creates the rich, savory base for your chili mac.
Step 3: Cook the Elbow Macaroni
Add the 2 cups elbow macaroni to the pot and stir to submerge it completely in the liquid. Bring the mixture to a boil, then reduce heat to medium-low and cover. Cook for 10-12 minutes, stirring occasionally, until the pasta is tender.
I like to start checking at 8 minutes—you want the macaroni al dente with just a slight bite. If the mixture looks too thick, add a splash of water. The pasta will continue to absorb liquid as it finishes cooking.
Step 4: Add Cheese and Finish
Remove the pot from heat. Gradually stir in the 2 cups cheddar cheese until it melts completely into the chili mac. This creates that signature creamy, cheesy sauce that makes this dish so comforting.
Let it sit for 2-3 minutes off the heat—the residual warmth will melt any stubborn cheese bits. Taste and adjust seasoning if needed, though the cheese usually brings enough saltiness to balance the dish perfectly.
Pro Tips For Making Recipe For Chili Mac With Ground Beef
- Brown the Beef Well: Cook the ground beef until deeply browned, not just gray—this builds rich flavor. I learned this the hard way after making bland chili mac for years.
- Toast the Chili Powder: Bloom the chili powder in the hot pan with the onions for 30 seconds before adding liquid. Sounds weird, but it wakes up the spice and removes that raw, dusty taste.
- Undercook the Pasta: Boil the elbow macaroni 1-2 minutes less than package instructions—it’ll finish cooking in the sauce and soak up all that chili flavor without turning to mush.
- Drain the Fat Smartly: After browning the beef, drain most of the fat but leave about 1 tablespoon in the pan for flavor. My grandmother swore by this, and she was right.
Dietary Considerations for This Dish
Gluten-Free Option
Swap the elbow macaroni for gluten-free pasta—I recommend Barilla’s gluten-free elbows from Central Market. Cook it for 1-2 minutes less than the package suggests to prevent mushiness. The chili sauce will finish the cooking perfectly. 💡
Dairy-Free Adaptation
Use dairy-free cheddar shreds like Violife or Daiya brands. Add ¼ cup nutritional yeast for extra cheesy flavor. The texture won’t be identical, but David couldn’t tell the difference in my blind taste test.
Lower-Carb Version
Replace half the pasta with cauliflower florets (about 2 cups chopped). Add them with the macaroni so they cook in the same time. This cuts carbs while keeping that hearty texture Nana Mae would approve of.
Vegetarian Twist
Swap the ground beef for 1 lb crumbled tempeh or beyond meat. Brown it well in 1 tbsp olive oil before adding onions. The chili spices mask any “meaty” difference beautifully.
Reduced-Sodium Option
Use low-sodium beef broth and no-salt-added tomatoes. Boost flavor with extra garlic and 1 tsp smoked paprika. Taste before adding the final salt—you might not need any. 💪
Spice Adjustments
For sensitive palates, reduce chili powder to 1 tbsp and add ½ tsp sweet paprika for depth without heat. Emma prefers this version when her stomach’s feeling delicate.
Nutrition Facts
Frequently Asked Questions
Can I use a different type of pasta?
Yes! Any short pasta like rotini, penne, or shells works well. Keep the amount the same and adjust cooking time by 1-2 minutes as needed.
How do I prevent the macaroni from getting mushy?
Check the pasta at 8 minutes and stop cooking when it’s al dente. Also, use the exact amount of liquid—too much will make it soggy.
Can I make this ahead of time?
Prepare it fully, then store in an airtight container in the fridge for up to 3 days. Reheat on the stovetop with a splash of water.
What if my cheese doesn’t melt smoothly?
Shred from a block instead of pre-shredded, which has anti-caking agents. Also, let it sit off heat for 2-3 minutes to melt completely.

Trained in classic French technique but raised on slow-cooked ribs and spicy rubs, she blends culinary skill with smoke and soul.
- Stewed Beef Brisket Recipe: Deep-Rich Flavor After 8 Hours of Slow Simmering - October 15, 2026
- Beef Brisket Rolls Recipe: Flaky Layers and Smoky Sweet Filling - October 15, 2026
- Masterbuilt Smoker Beef Brisket Recipe: Bark-To-Meat Ratio Hack for Unmatched Flavor - October 15, 2026